skip to main |
skip to sidebar
© 2010 Simon Hucko
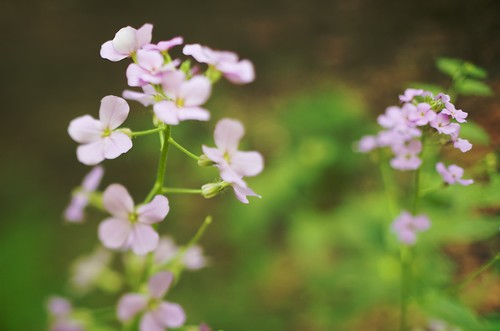
I first became aware of freelensing a few months back when photojojo published an article about it. It seemed pretty cool, and in the wake of all the tilt-shift photos online (especially the time lapse stuff) I thought I'd give it a try. Unfortunately, I just wasn't able to get images that I was happy with. Last week, photographer friend Tim Ho posted a shot that renewed my interest in freelensing. (side note: if you've never seen his work I highly recommend checking out Tim's photostream. He's got a great eye, especially for color, and is becoming quite an accomplished strobist.)
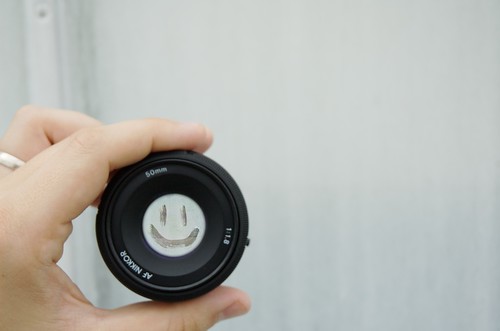
OK, back it up a bit. What is freelensing? Freelensing is the art of shooting through a lens that isn't attached to your camera. The main reasons to freelens are to create a tilt-shift look with your photos, or to get closer focusing for macro shots. The latter is the same as using an extension tube or bellows, it allows you to get closer to the subject resulting in a larger image on the sensor. The tilt-shift goodness is really what I was after, and considering a tilt-shift lens costs mega bucks, doing it for free seemed like a pretty sweet deal. After doing a little reading, I realized that my earlier failures were due entirely to user error (of course). The key to freelensing is to focus your lens to infinity and keep it *as close as possible* to the camera. In other words, put the lens on the camera like you were going to mount it, but don't twist it in to lock it. Then ever so slightly begin tilting the lens and watch the plane of focus move around. Once you get an image you're happy with, shoot, rinse, repeat.
A few caveats:
1. Your lens is not attached to your camera. This can result in damage to your lens, the mirror, or the sensor, and will probably attract a bit of dust into the camera body. Do this at your own risk.
2. If your lens has an aperture ring, you're all set. If you shoot Canon, stop your lens to the aperture you want by holding down the DOF preview button while removing your lens. If you shoot Nikon, you're going to have to physically hold open the aperture lever on the back of your lens. A small piece of folded up paper, a broken up match stick, or even blue sticky-tack can be used. Be extremely careful when messing around with your lens. Again, this isn't the safest thing in the world...
3. Exposure is going to be all manual, all the time. Your histogram is invaluable for this sort of thing. Learn to love it.
4. Getting what you want in focus is rather difficult at first. Take plenty of shots, and be patient with it. You can even mount your camera to a tripod, making it easier to manipulate the lens without throwing everything off.
5. Longer lenses work better, apparently. Don't ask me why. My 50mm worked really well for this (especially because it has an aperture ring), so that would be my recommendation.
That's about all I can think of. It's another fun little "trick" that can give you some interesting results. I highly recommend playing around with it a bit (as long as you aren't squeamish about shooting with a detached lens), see what you get. Feel free to share your results here or in the [tob] flickr group.
For more discussion on freelensing and some awesome photos, check out the freelensing group on flickr.
~S
[title of blog] on flickr
© 2010 Simon Hucko
Well, I gave myself an extra day and I *still* missed my deadline. Sorry everyone. I promise I'll get back into the groove with this whole blog thing soon.
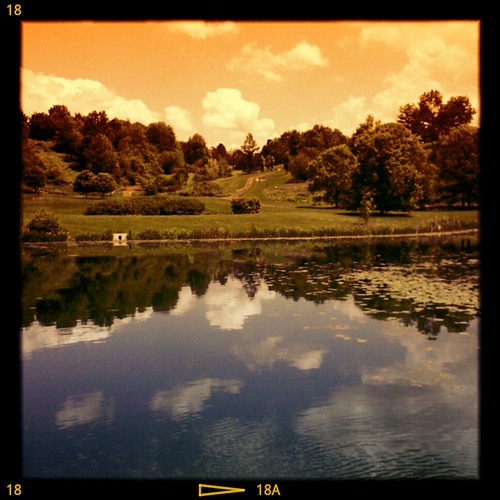
In case you missed the review, I got a new toy last week. As such, I've been shooting an awful lot on it. (I did take the bigboy camera out and play with freelensing a bit, but that's a discussion for another day...) Camera apps for Android are still somewhat limited, but Vignette came highly recommended on the internets and I have to say, it rocks my world. All the low-fi fun you could ever want right at your fingertips. This week's photo was made using a "tobacco" gradient filter, which gives your skies a dramatic orange tint. I really like the effect combined with the water at the bottom of the frame, and I have some killer shots in mind for this effect in the future.
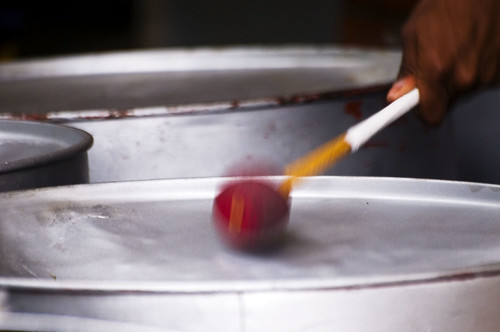
This week's pick is "Strike" by irv_b:
© irv_b
I'll admit, I have a bit of a thing for detail shots of hands at work. This one is very well executed, though - it definitely tells the story of what's going on. The little bit of motion blur is excellent, adds a nice dynamic feel to the photo and you can almost hear the sound of the drum. This would be perfect for some sort of promo material for the band (flyer, program, etc). Great eye and timing.
Ok, that's it for this week. I promise I'll get my act together here and start posting on time again. Keep on shooting!
~S
[title of blog] on flickr
© 2010 Simon Hucko
What? A phone review? Sorry everyone, just got a new toy and I felt like sharing my thoughts about it (especially as it applies to being a photographer). If that's not your cup of tea, feel free to move on. For the rest of you...
My wife and I finally upgraded to smartphones last week. Originally we were talking about switching to AT&T and getting iPhones, but we wound up staying with Verizon and getting matching Motorola Droids. The main reason for this decision was that they were on sale, buy one get one free. Hard to argue with a $200 savings. Another reason that we stuck with Verizon is that we didn't have to wait for our contract to expire next month to avoid paying a fee. Finally, my wife wanted a phone with a physical keyboard - she has an iPod touch and doesn't like typing on it. (I've found that I use the virtual keyboard 99% of the time, but sometimes it's nice to have physical keys to press.)
I was worried I would be unhappy with Android and wish I had held out for an iPhone, but thankfully that's not the case. It still feels a little rough around the edges (especially when it comes to app availability and quality), but the fact that Android is gaining marketshare every day means that the playing field should level out pretty quickly. The important apps are all there, including highly integrated twitter and facebook apps that can sync up with your address book. You also get the option of sharing out photos to twitter or facebook (among other sites) right from the gallery on the phone, which is nice. One thing that's seriously lacking is a good flickr app (at least, I haven't been able to find one). I had to resort to using the e-mail uploading for flickr, which isn't all that bad (especially because "e-mail" is one of the sharing options in the photo gallery), but it's certainly not ideal.
The camera on this phone seems to be pretty good. There are a few nice features missing that I would have liked to see. The most critical lapse is the lack of any kind of exposure adjustment. From what I can tell, exposure compensation is available in the API, so I'm not sure why it hasn't been implemented (maybe the camera doesn't support it?). I hope that they fix this at some point, since the auto-exposure algorithm seems to be a little aggressive and deals with high contrast scenes by blowing out highlights, which is usually the opposite of what I want. 5MP seems a bit extreme, too, I can only imagine how small the photosites are (which leads to lower dynamic range and higher noise). Low light performance is poor, as expected, but the built in LED "flash" is a nice feature. The light is very harsh and a little cool (blue), but it's better than being stuck without one. The camera does auto-focus pretty well, but you're stuck with whatever it thinks you want. A touch to focus feature would be great. The "macro" focusing gets pretty close (within 2 inches or so), which is fun to play with.
I bought Vignette (the only non-free app I have on my phone) to use instead of the stock camera app, and dang is it good - fully functional camera controls plus a ton of framing and filter options for after you take the shot. The app generates a small preview that you can try different looks on until you find the one you like, then processes and saves the full version in the background once you're done. You can even import old photos from your gallery to edit. The only drawback I've found is the inability to stack the different filters. For some reason, there is a small set of options that you can toggle on or off to "stack," but for everything else you have to process the photo with one and then re-import it and process it with another to get a stacking effect. Certainly not a deal breaker, but it would be a nice update.
Overall, I'm very happy with my new phone. The glossy screen (hard to see in direct sunlight) and limited camera controls mean that it won't be completely replacing my point n shoot, but it's nice to have a camera with me 24/7 and a way to share images with everyone instantly. If you're a photographer and haven't gotten a smart phone yet, don't feel like you have to get an iPhone. Android is very photographer friendly, and while it doesn't quite rival the iPhone, it definitely gets the job done. Look for more competitive features in future updates, too.
edit: Forgot to mention the screen. I believe it's something like 854x480, which means that widescreen 480p video will display at its native resolution (and looks really really nice). The wide aspect ratio makes viewing photos a little goofy, but it would be easy for me to upload a set to Picasa that's formatted for the screen. (Forgot to mention that, too - Piacasa integrates with your gallery so that all of your Picasa web albums are available on your phone instantly). The high gloss finish isn't ideal for bright sunlight and shows the smudges from your greasy fingers like nothing else, but I just keep a small microfiber cloth in my pocket to clean the screen and camera when necessary.
~S
[title of blog] on flickr
© 2010 Simon Hucko
Sorry I'm late again this week. Life has been totally crazy, and I can't seem to catch up with everything I have to do. It's going to be a super busy weekend, too, so between that and the holiday (Memorial Day here in the States) I'm going to extend the deadline this week until Monday at midnight, with my post on Wednesday. Find some time this long weekend to take a photo, you have no excuses!
My photo this week comes from my playing with a new technique. In case you missed the blog post with all the goods on Monday, check it out here. Suffice to say I'll be playing some more with this technique until I get a good feeling for when and how to best use it. Also, thanks to some inspiration from a photographer friend of mine, look for some experiments with freelensing in the near future.
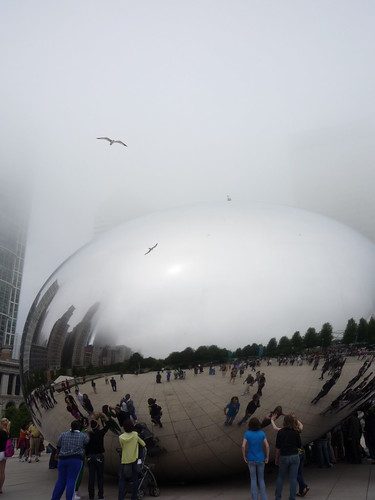
Congratulations to kristanhoffman for this week's winning photo:
© Kristan Hoffman
I've never been to Chicago, but these big metal orb things seem to be the thing to go and get your picture taken with. I think my favorite part about this image is that she embraced the foggy weather and used it to present a somewhat non-traditional shot of the sculpture. The fact that the city just fades away behind it puts the focus entirely on the sculpture and the people, and also lends some nice contrast to the buildings in the reflection. My (close) second favorite part of this image is the flying seagull and its reflection. Perfect timing and composition with that one, and again it emphasizes the contrast between the foggy blankness at the top of the frame and the people and reflected buildings at the bottom. Wonderful shot.
~S
[title of blog] on flickr

If you're a photographer and you're not on flickr by now, well, you should be. Flickr is a great photo hosting site with a lot of nice features, including the ability to edit when your photo was uploaded so you can sequence them properly. Unfortunately, flickr doesn't allow you to set a future date for your upload, so you can't schedule your photo posts ahead of time. I'm not sure why, but they don't. This feature is also absent from all of the flickr uploading software/plugins that people use.
Enter loadlater.com, a project my friend Matt Mendick has been working on that was just opened up for public beta. Loadlater is a simple web upload interface that allows you to fill out all the photo information (including which sets and groups you want it added to) and then schedule a time for it to post to flickr.
Why would you want to schedule your uploads for later? The best use in my mind is to space out your photos so that people don't get overwhelmed. Rather than uploading all 50 photos from your most recent vacation at once, you can set them to upload in smaller batches (1-5ish is most effective) every day. That way people are more likely to look at them all, rather than glancing at the first few and then giving up. This is also good if you upload daily (like me) and are going out of town, you can set your uploads for while you're gone. Or even if you're not going anywhere, you can schedule the whole set after you finish editing so that you don't forget to upload one day (which I tend to do from time to time).
If that sounds like something you might be interested in, give it a shot and send any questions/comments/feedback to Matt using the contact link on the site. If you like it, let him know - this is something he's working on in his free time.
~S
[title of blog] on flickr
© 2010 Simon Hucko
I know, I do a lot of writing about fast primes here. There's a reason, though. These lenses are relatively inexpensive and add a lot of creative potential to your kit. I've already talked about the nice shallow depth of field and the advantages in low light. Today I'm going to talk about a new (to me) trick I started playing with last week.
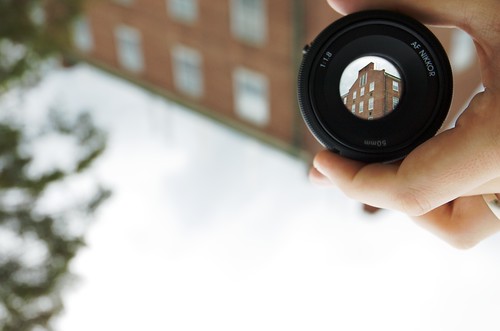
I've seen a few shots before where people set their 50 down on a table and shoot through it, leaving everything out of focus except what appears in the glass. I'm not sure exactly how this bit of physics magic happens, but suffice to say it takes framing your subject to the extreme. I'm not quite sure what possessed me to give it a try when I went out for my walk the other day. Could have been the gray weather combined with the usual route, I needed something else to get the creative juices flowing. For some reason, the idea of shooting through my 50 came to mind, and I decided to give it a try.
Technical info: set your prime wide open. My 50 has an aperture ring, so that's no problem. Canon shooters, I think you have to put the lens on your body, set the aperture you want, hit the DOF preview button, and remove the lens. If you can't do either of these, there should be an aperture control lever on the back of the lens somewhere, you'll have to manually hold it open while you shoot (or come up with some way to hold it open, fold up a piece of paper or something). I put my kit zoom on my camera set to f/5.6 for relatively shallow depth of field. Most shots were taken between 35-50mm with the focus racked all the way in. Frame the subject you want with the prime (easiest when you're not looking through your camera), then line the shot up through your camera and vary the lens to camera distance until you get the subject in focus. This takes a bit of getting used to, especially because the image in the lens is flipped. Shoot, repeat. A wider angle includes more of the scene in the shot, a longer angle makes the image in the lens a larger part of the frame.
It's not something I'll do all the time, but it's a fun little trick to have up your sleeve. I'm sure there will be situations where it'll be the perfect little detail shot or a fun new perspective on something that's been photographed a million times before (famous monuments or landmarks, for instance).
I encourage you to give it a try. Just be very careful not to drop or scratch your lens, and make sure you clean any dust or smudges off before mounting it back on your camera. Feel free to share your results in the [tob] group or in the comments here. Also, if you have any other creative ways to use the gear you have, we'd love to hear about it!
_________________________________
Get your own here:
Nikon 50mm f/1.8D AF Nikkor Lens for Nikon Digital SLR Cameras
Canon EF 50mm f/1.8 II Camera Lens
~S
[title of blog] on flickr
© 2010 Simon Hucko
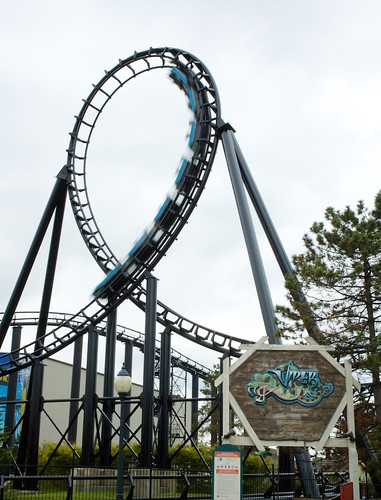
I spent Saturday at an amusement park with my wife and her choir (150 7th graders). Finally got my DSLR batteries charged, so I brought the camera and took some photos (mostly of the kids). I had this shot in my head of a coaster streaking around the loop. Must have something to do with all of the "bending time" stuff I've been talking about here. Unfortunately the weather was pretty gray and I wound up underexposing this shot by a bit, but thanks to the power of RAW I was able to bring the levels up and add a little bit of color and punch back to it.
My favorite this week comes from q-pix:
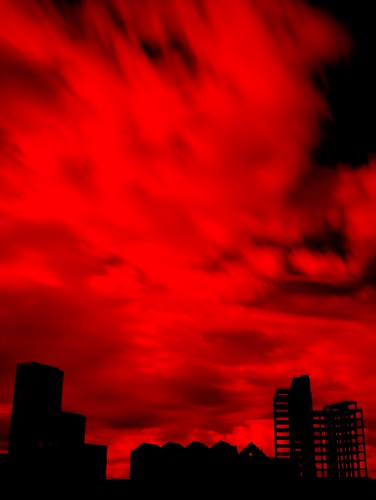
© q-pix
I like the idea of using an IR filter with a color shot. DSLR's have built in filters to remove IR light, too, so it winds up extending your exposure considerably. Probably not something you'd want to use on every photo, but I really like the effect on this shot. The sharp silhouette of the buildings contrasted with the fiery red clouds gives it an apocalyptic feeling. Great idea, and very well executed.
~S
[title of blog] on flickr
![[title of blog]](https://blogger.googleusercontent.com/img/b/R29vZ2xl/AVvXsEhJ8bvx_9_zOAREbXcrJRML7aVvJMbb90IYYYuyti384jeZHYQ9t8MK6_Kpt_1P4-pZw-QfF9kh4Sqci0vbopzLme862PPhuyPJcc7pRLUW1K1aNzts5YzuXIhgonq66MpjJCqfiWtfwUw/s1600-r/waterfall.png)


 Posts
Posts

