skip to main |
skip to sidebar
© 2009 Simon Hucko
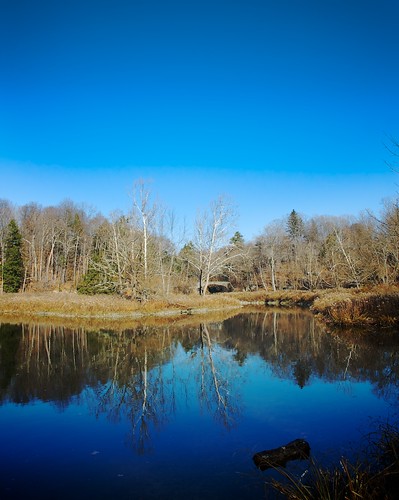
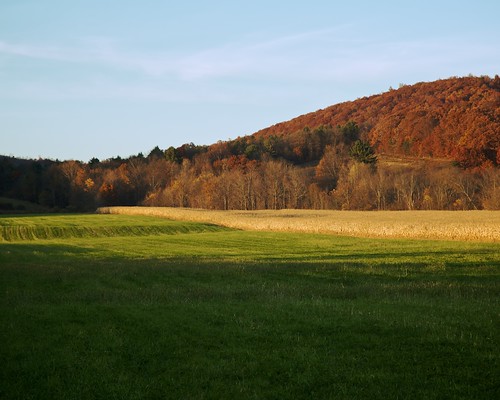
I went and walked around campus here at Cornell a week ago and took some photos. It was a beautiful sunny day, and when I imported the lot and started editing I realized that there was a lot of blue. So... it's time for blue week! I'll post a new one every day this week with a little quip about it and possibly a tip or two.
Today's photo was taken at the lake on campus, and makes use of the reflection of the trees in the water. You can see I have a "rule of thirds" thing going on with the water line to separate the picture, which is a typical composition for landscape photography. The log and grass in the lower right hand corner help to break up the reflection and add a little interest to the foreground.
However, you'll notice a giant line across the sky instead of a nice gradient. That wasn't there when I was editing on my computer, and is a result of converting from a RAW adobeRGB file to a sRGB jpeg. sRGB is a smaller color space than adobeRGB, meaning that it can't represent as wide a range of colors. Usually you won't notice anything after the conversion, but in this case there was a gap in the blues for the gradient in the sky, resulting in that ugly line. There also may be some compression artifacts going from the raw file to jpeg. If I were to have this printed I would save it as a 16 bit .tif file in adobeRGB and make sure the printer was aware of the issue and did what they could to prevent any banding. I could also go back to the original file and convert it to sRGB right away, so that after editing there wouldn't be any issues with conversion.
I'm not going to worry about it, as I'm not planning on having it printed, but it's a good example to make you aware of these things. Always check and double check your images in the right file type and color space before having them printed, or you could be surprised by some nasty results.
~S
[title of blog] on flickr
© 2009 Simon Hucko
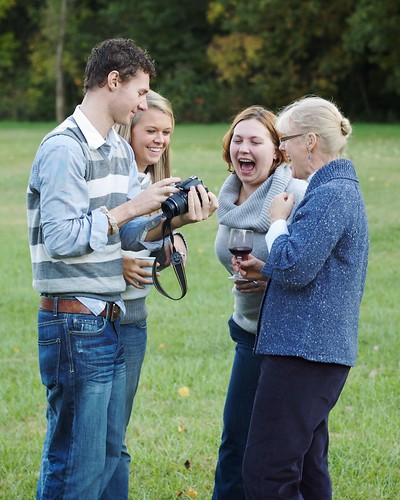
It's getting to be that time of the year again. No matter what your holiday customs are, I'm sure at some point you're going to be hanging out with the family eating, drinking, and engaging in general merriment. And, being the crafty photographer that you are, you're going to want to exploit your family for practice document this event for everyone.
Holiday gatherings (at least here in the northeast) mean shooting inside with little to no natural light depending on the weather and time of day. Since I have yet to meet someone kind enough to light their house to ISO 200 f/8 1/100th, you're going to have to be resourceful to get those shots. These kind of events are great for pulling out the fast prime - not only do you get the shutter speed you need in low light, but it's easy to isolate people against noisy backgrounds by utilizing that nice shallow depth of field. It's also a much stealthier option than blasting a flash into someone's face, letting you capture more candid moments. The drawback to this is that you're generally limited to shooting one or two people at a time, and you may still not have a fast enough shutter speed to stop motion (especially if there are little kids running around).
The other option is to bust out the flash. If you have some sort of flash unit, you're golden. Set it up to bounce off the ceiling for a nice soft fill light (don't forget the bounce card for a little catch light in people's eyes). If you don't have a flash unit, you're stuck with the pop-up. Dial it down a little, and set it to rear curtain sync to try to bring in some of the ambient. That will help make it more natural looking. You can even tape a white paper napkin or tissue over the flash to help diffuse it so you avoid blown out hot spots on people's skin. The downside to flash is that it's much more obtrusive - people instantly know you're taking a picture, and if there's a pre-flash they may have time to blink and screw up your shot. It also takes a little bit for the flash to recycle, so you might miss shots while you're waiting for the ready light to come on.
No matter what you choose, get your camera out right away and start shooting. People will be a little camera shy at first or start posing for you, but after half an hour of your shutter banging away they will stop caring and you can get those great candids that you're after. Watch people in conversation for characteristic expressions. Wait for the punchline of a joke or the funny twist in a story and be ready to capture people's reactions. Get some detail shots of the food and the people preparing it. Have everyone crowd around after the meal and get a group shot (a tripod and remote release make this quick and painless - get everything set up before hand with a stand in and then bring them all in, fire off a few frames, and let them get back to the festivities). See if you can get the oldest members of the family away for a quick portrait at some point - it will give you a chance to talk to them a bit about themselves and you'll be glad to have the photos down the line. Most importantly, don't get too caught up in taking photos to actually spend time with and talk to your family and friends.
Have a great holiday season, and feel free to share your photos with us here on the blog or in our flickr group!
~S
[title of blog] on flickr
© 2009 Simon Hucko
I am a whole-hearted believer in digital photography. It is a wonderful learning tool, and the flexibility and control you have over your images is stunning.
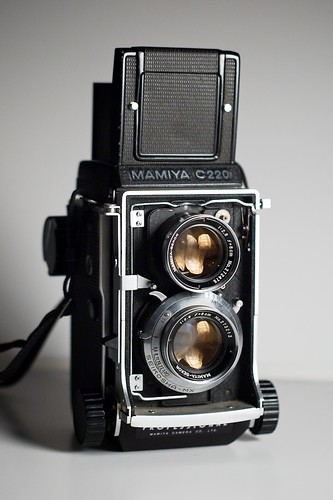
So why on earth have I started shooting film? There are a couple of factors that have motivated me to cross over to the analog side. One of the main ones is simply the fact that I've never really shot film before, aside from the occasional snap on the family point n shoot. I was curious, and wanted to see what it was all about. Another big factor is that my dad used to shoot professionally, and still has all of his darkroom gear (and a bathroom in the basement that could serve nicely as a darkroom). This made it very easy for me to consider developing my own film, since the costs would be limited to film and chemicals.
Finally, along came the Mamiya C220 TLR (pictured above) that pushed me over the edge. Cornell University has a photo society, and they have a small repository of gear that you can borrow on a weekly basis. When I saw the TLR on the list, I couldn't help myself, and arranged to borrow it. Luckily for me, there isn't a very high demand for it (since no one here knows how to use it, apparently) so I was told I could hang onto it as long as I wanted, or until someone else put in a request. When I picked up the camera, the guy in charge of the lending said "I have no idea how to use that. Good luck. Just don't break it."
So far it's been quite an experience. The camera is all manual, all mechanical, all the time. No built in meter, no automatic exposure, no batteries, you even have to manually cock the shutter before every photo. I've been metering with my DSLR (either as a spot meter or digital polaroid), and spending plenty of time setting up each photo. The camera uses 120 (medium format) film, and gets 12 shots per roll, so there's no room for sloppy shooting. Each frame costs somewhere in the neighborhood of 50 cents for film and chemicals, not to mention the time involved. To add to the fun, the viewfinder is a mirror image of what's in front of the lens, so it takes some getting used to. There are also parallax and bellows effects that come into play when focusing on anything closer than 15 feet or so, so you have to adjust your framing and exposure to counteract these. And of course, there's no display on the back that pops up the image review and histogram each time you press the shutter. You get to find out after you finish the roll and develop it whether or not you got the shot.
All of that adds up to being much more deliberate about taking a photo. I find a subject. I scout out the angles and lighting to find the framing I want. I meter the scene. I set the exposure on the camera. I spend time framing the shot, fighting with the reversed viewfinder and the lack of zoom. Finally, I take a deep breath and press the shutter. *Click* I say a silent prayer that it turns out ok, and move on to my next subject. Rinse. Repeat.
I find this process to be very satisfying. A lot more thinking goes into each frame than when shooting digital, and pressing the shutter has a feeling of finality to it (like an emphatic period at the end of a long sentence). Then the excitement and anticipation begins wondering how the roll will turn out.
Which is where I will end this article. I developed two rolls this past weekend, but more on that later along with some sample images (still working out how I'm going to get those). In the mean time, turn off your image review and shoot on manual for a day or two, see how it turns out :)
~S
[title of blog] on flickr
© 2009 Simon Hucko
If you're starting to get serious about photography, it's very easy to become discouraged by looking at other people's work. You start comparing your shots to the beautiful contrasty perfectly-composed richly-colored photos that you see on someone's website and think that you'll never be good enough.
Here's the secret: everyone started in the same place, and had to work to get where they are now. By putting your efforts into learning a few valuable skills, you can greatly improve your photography in less time than you might think.
First and foremost, shoot a lot. I mean, a lot a lot. And don't just fire off 5 of the same shots in a row, spend some time covering your subject from different angles, with different framing, at different focal lengths, using a different aperture/shutter combination, at different times of the day. Digital is invaluable for this type of learning - you can spend an afternoon shooting, go home, download all of your photos, and immediately get feedback on what works. More importantly, you'll get feedback on what doesn't work, or (best of all) what is almost right but needs some tweaking. Those are the ones that give you the little "ah ha!" moment, and inspire you to go and improve a concept or technique.
Second, delete all the crap. Just get rid of it. You don't need 500 mediocre photos of a flower sitting on your hard drive. Pick the 5 or so that speak to you in some way and delete the rest. Not only will this clear up space on your hard drive, but will keep you from digging through the dregs of your photography to get to the gems. Instant ego boost. And ego is important as an artist. If you don't believe in your work, who else will?
Third, learn how to process your images. Even with the best equipment, no one's photos look stunning straight out of camera. So you may not have the most expensive lens in the world, but it's easy to add contrast and color via software. You can even cheat and add some blur to your backgrounds in photoshop. Fix your exposure if necessary, and note any trends in your shots (hint: usually they'll be underexposed) so that you can start to fix them in camera. Pay attention to how photos that you like are processed, and learn to emulate the look. Once you really understand how all of the sliders and numbers and filters work, you can apply them to an image to express your artistic vision. Crop your photos to get the desired composition and aspect ratio, and to remove elements that take away from your image. You'll start to know just by looking at a photo what direction you want to take it, and how to get it there. Run noise reduction on your photos, and make sure they're sharpened (preferably by you at the end of your workflow, not by the camera shooting jpeg).
Finally, only share your best work with the world. I've said this before, but it bears repeating. Remember those 500 flower photos? Pick the best one, and share only that one. No one out there has to know you took 499 other photos that aren't as good. They see your one excellent shot and think "wow, what a great photographer!" It's sort of like the "chain is only as strong as its weakest link" philosophy - your skills as a photographer are judged by every image you show, so stack the deck in your favor and only show off your best stuff. One mediocre image can drag your entire portfolio down. Don't waffle and show 4 of the same images (vertical, horizontal, color, black and white...), pick one and stick to it. (I've been guilty of this lately, so this is as much a reminder to me as it is to all of you.) And continue raising your standards as you improve. Something that would have been a hero shot a few months ago might just be average for you now. Don't be afraid to go back and replace older photos with your newer, better work.
Don't get discouraged. Photography is an art, but it's also a skill. Things like exposure, post processing and even composition can be learned through trial and error. Review and critique every photo you take, and you'll learn very quickly what you like and don't like. Play around with different processing techniques and software and you'll learn what works best for you, and how you can get the look you want. Keep learning and improving, and shoot often. Eventually, you'll be the one with the website that everyone oo's and ah's over.
~S
[title of blog] on flickr
© 2009 Simon Hucko
One of my favorite features of Flickr (and one that I think gets overlooked by most people) is the Flickr world map. Type in a place in the search box and hit go, and soon your screen will start filling up with photos. Why should you care? It's great if you're visiting somewhere new and are trying to scout out locations to shoot. Just look for areas with a lot of dots and see what people are photographing there. You can restrict your search even more with keywords, or zoom in on a smaller location and re-search (you have to do this in order to get updated results). It's a nice way to see what people have discovered, and to find inspiration for your own work.
How does it work? Photos can get geo-tagged one of two ways - via GPS or manually. There are several different flavors of GPS tagging. Some cameras have a GPS receiver built right in and pictures are automatically tagged. Some cameras can accept an external unit that feeds the camera GPS information every time the shutter is clicked. Or you can separate the two, using a GPS logger and special software to match the time stamp on your photo to the location recorded by the logger. Flickr will use this information to place your photos on the map automatically.
Tagging manually is another option. You probably don't want to manually tag every photo you take, but it's very easy to do it with a chosen few (click the "add to your map" link next to your image). I've been using this method and it works very well for me. I try to be selective about what I tag, avoiding photos that have no relevance to the location (happy snaps, tight portraits, indoor shots, party pics, etc.)
Check out the maps. Look at your neighborhood, by your office, in the nearby park. I bet you'll discover something you didn't know was there.
___________________________________________________
On a completely unrelated note, I've had the awesome opportunity of borrowing a Mamiya C220 TLR this past week. It's been a very cool experience, shooting film on a completely manual all mechanical camera. Look for a post or two about my experience once I get the film developed and scanned.
~S
[title of blog] on flickr
Yes, I've touched on detail shots before. But I like them, so I'm going to devote another post to them with a slightly different twist.
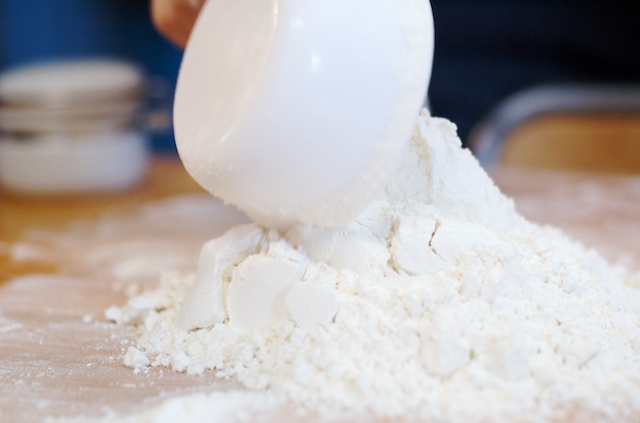
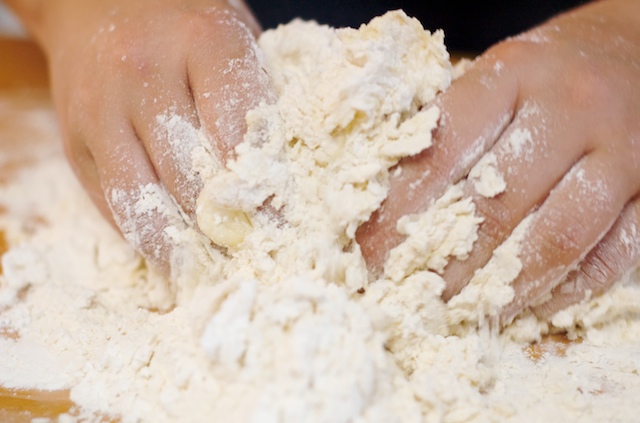
My last post about detail shots suggested adding them to your coverage of an event to add to the story. This post is about covering an entire story with detail shots. I'm not saying you should shoot a wedding this way (please please don't), but small every day events can be covered very nicely with just a few close-ups. The following few frames tell the story of making pasta, but focused entirely on the food and the hands making it. I took some wider shots, but I think that these have the most impact and are perfectly capable of telling the story on their own.
Measuring out flour:
Adding the eggs:

Mixing it together:
Forming the dough:

Kneading the dough:
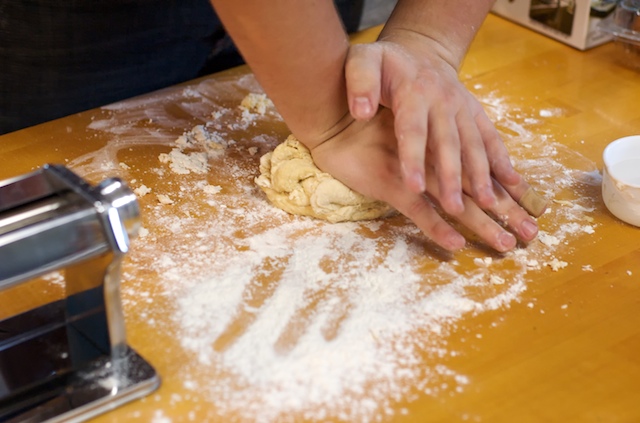
(Image credit: Rachel Hucko)
The finished product:
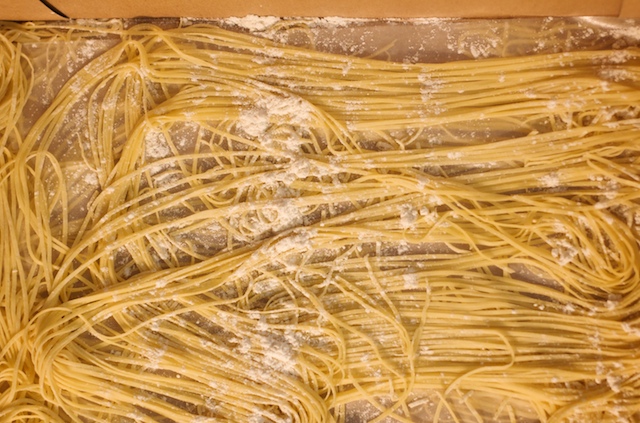
(Image credit: Rachel Hucko) All images © 2009 Simon Hucko
(Note: I don't have any shots of rolling out the pasta, unfortunately, but that's a two person job and we didn't have anyone to take pictures. Maybe next time.)
See? Nothing but hands and food, but it makes a fun little photo essay capturing the experience. I have some wider shots with our faces that I added in to the mix, but they're certainly not necessary to tell the story. Give it a shot: pick an every day activity and document it entirely with little details. You can turn your boring afternoon at the laundromat into a great photo essay, or capture your kitchen in a whole new way. Throw in a few different shots (wide shot of the location, a few portraits of people at work, etc) and you could even print it out as a coffee table book and give it to people as a gift. Nothing like a little artsy fun to get your creative juices flowing.
~S
[title of blog] on flickr
![[title of blog]](https://blogger.googleusercontent.com/img/b/R29vZ2xl/AVvXsEhJ8bvx_9_zOAREbXcrJRML7aVvJMbb90IYYYuyti384jeZHYQ9t8MK6_Kpt_1P4-pZw-QfF9kh4Sqci0vbopzLme862PPhuyPJcc7pRLUW1K1aNzts5YzuXIhgonq66MpjJCqfiWtfwUw/s1600-r/waterfall.png)


