skip to main |
skip to sidebar
© 2009 Simon Hucko
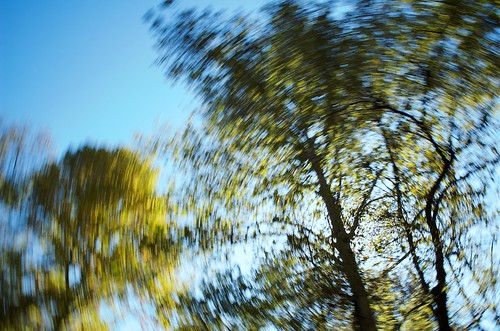
No, it's not radial blur in photoshop. I did this in-camera on a photowalk I took recently. This walk was just for fun - a quickie over my lunch break to enjoy the nice weather and play around with a few new things. I'm not sure why I decided to start spinning my camera as I took photos, but I'm glad I did. I must have taken about 50 of these in various places. Some had way too much spin, some had the center of the spin at the edge or out of the frame, and some just looked blurry, but the one above turned out just right.
The lesson here? Don't be afraid to play around with new things. It's a lot of fun, and might even produce a few unique photos. Also, never underestimate the power of volume when you're experimenting with something like this. The more photos you take, the more likely you'll walk away with one that you like.
~S
_____________________________________________________________
edit: Way to talk about a technique and not tell you how to do it. Sorry all (and thanks Kristan for the reminder). This is how I arrived at the photo above. Your mileage may vary.
I was shooting around 1/100th of a second. The motion I used was sort of a flip of the wrist, trying to keep the rotation around the axis of the lens and not my hand. This was made much easier by my new hand strap, since I didn't have to worry about throwing my camera in the process...
The motion was about a 120 degree rotation (started around vertical and ended a bit past horizontal). I pre-focused and locked exposure on where I wanted to shoot, started the rotation, then pressed the shutter and followed through after I heard the mirror flip back. The timing of all of this is probably harder with a point n shoot, but not impossible, especially if you pre-focus. You'll just have to press the shutter a little earlier.
And, most importantly, I did it a lot. It's going to take some practice and some luck to get this to work out right. Out of the 100 or so frames I've taken with a spin, I've really only liked 3 or 4.
Hope that helps...
[title of blog] on flickr
© 2009 Simon Hucko
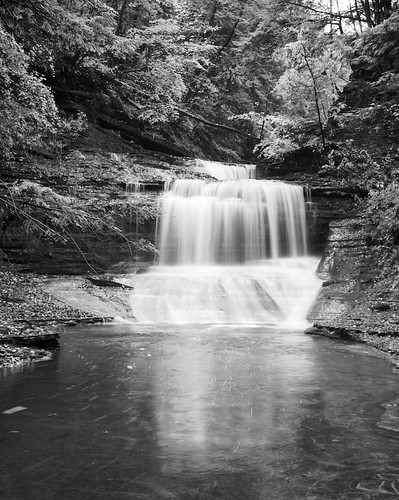
Ever wonder why your waterfall photos don't have that same dreamy, smooth look that you see in professional photographs? The trick is time. Long exposures work wonders with moving water, making soft cottony clouds out of the foam and spray. The good news? This effect is very easy to get with a minimal amount of special equipment.
You will need:
- Moving water of some sort
- Camera with aperture control
- Tripod
- Cable release or remote for your camera (optional, but it helps)
- Neutral Density (ND) filter for your lens (may be optional, depending on conditions, but highly recommended)
Set up your camera on your tripod. Frame your shot. Drop your ISO to its lowest setting. Close down your aperture to the f/11-f/22 range. Check your exposure time, aiming for a second or more. If it's too bright for you to get a long exposure, time to start thinking about neutral density filters (more below). Because it was pretty dark in the gorge, I was able to get a 1 second exposure at f/22 at ISO 200 (my camera's lowest ISO) without an ND filter, but it only could have helped the image. A cable release or remote will help to reduce camera shake, resulting in a sharper image.
A neutral density filter essentially acts as sunglasses for your camera, reducing the amount of light that enters the lens. (Neutral density means that it blocks all wavelengths of light equally and won't introduce a color cast to your photo.) They come in many strengths, from 1 or 2 stops up to 8 or so. There are two primary uses for a neutral density filter - the first is to be able to use a larger aperture in bright conditions (important when shooting with a flash and worrying about sync speed or shooting video), and the second is to extend exposure time for waterfalls, clouds, etc.
If you're using a point n shoot, you can actually use your sunglasses as a makeshift filter. Bonus points if they're polarized. This doesn't work with SLR lenses, so you're going to have to purchase one. I recommend shelling out for a good quality multi-coated glass filter, as anything else will just degrade your image quality and you won't be happy with the results.
Next time you go hiking around, bring your tripod along and impress everyone with your silky smooth waterfalls. It's worth the hassle.
~S
[title of blog] on flickr
© 2009 Simon Hucko
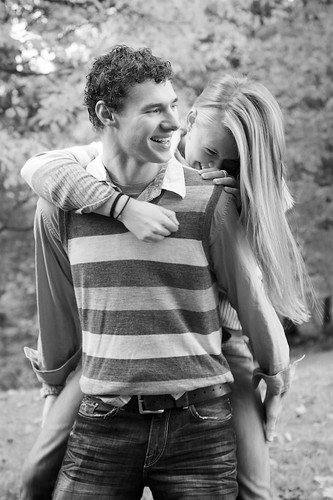
My family had a gathering over the weekend, so naturally I spent the whole day with a camera near at hand. The great thing about hanging out with your family and friends is that they (usually) don't object to having their picture taken.
My brother asked me to take some photos of him and his girlfriend, which I jumped right on. I usually shoot in a more journalistic style, and so it was a new experience for me to "direct" a session - scouting a location, choosing poses, etc. It wound up being a pretty natural shoot, my wife and parents were hanging out around me and we were all laughing and having a good time. I did a little bit of prodding for poses ("stand here, face this way, try jumping on his back"), but because it was so relaxed their personality really came through and I just had to capture that. It was a great experience for me, and I got to do it without the pressure of having a client or a paid model to worry about.
Photographing friends and family can be a great way to practice and to build your portfolio. Don't be afraid to step outside of your comfort zone a little - you learn the most by doing and making mistakes. Just remember - keep the mistakes to yourself and only share the keepers with everyone else. ;)
~S
[title of blog] on flickr
![[title of blog]](http://1.bp.blogspot.com/_dADuhpc-QVg/TJkTQCq15KI/AAAAAAAAKtQ/usbfWPD7pjc/S1600-R/waterfall.png)


