skip to main |
skip to sidebar
© Simon Hucko 2011. Please do not use without permission
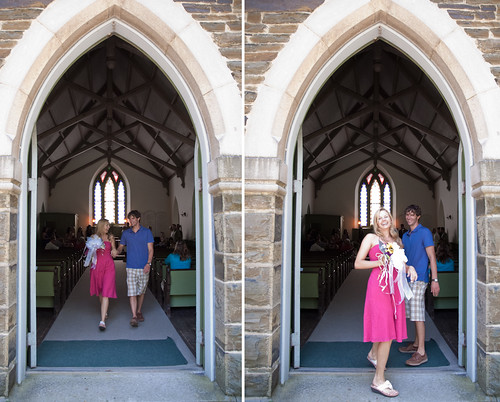
This past weekend marked the 4th wedding that I've attended in the last 8 weeks. Between the weddings, bachelor parties, bridal showers, and the various holidays and family occasions, I've basically been busy every weekend from early February until today. Not that I'm complaining, mind you - it's been a fun year so far and I had a chance to reconnect with some friends that I haven't spent much time with since high school. It does, however, provide somewhat of an excuse for why I've been neglecting the blog here, and why I've been lucky to post 1 photo per week to Flickr. Now that I'm done with weddings for the year, I should have more time to shoot and blog about it.
© Simon Hucko 2011. Please do not use without permission
A side effect of attending so many weddings and completely missing spring waterfall season is that my photographic interests are starting to shift. I will always have a place in my heart for gorges and streams, but I'm finding myself driven more and more toward photographing people. I've always enjoyed documentary candids of friends and family, and hanging out with them at 4 weddings gave me a lot of opportunity to take those kinds of photos. I'm starting to get an itch to do some street photography, and while I haven't quite worked up the courage to walk up to a stranger and stick a camera to my face I'm starting to "practice" without my camera. I'm also getting sucked in to portrait photography, something I used to have no interest in whatsoever, and even agreed to shoot my wife's cousin's senior photos. Expect to see some changes in the type of work I post here.
© Simon Hucko 2011. Please do not use without permission
I'm not sure what my point is (or if I even really have one), just thought I'd give you all an update on how things were going. For those of you in the US and Canada, how was your long weekend? Any good fireworks photos or party candids you care to share?
~S
[title of blog] on flickr
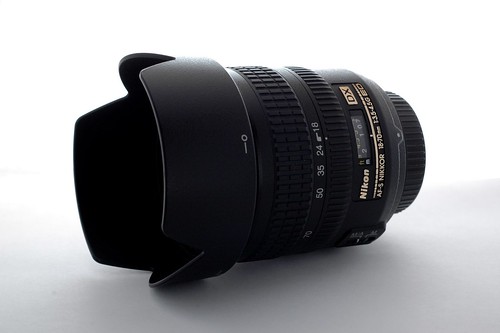
After seeing the flurry of activity on Twitter about a kickstarter project designed to hold your lens cap on your strap, I was rather surprised that so many photographers feel like they need a "solution" for their lens cap. Here's what I do:
When I pull my camera out, I take the lens cap off with my left hand and stick it in my back pocket. There it stays until I'm done shooting or want to switch lenses. Cap goes back on, and lens goes back in the bag. Most lens caps are pretty durable, so sitting on them isn't an issue. Since I've conditioned myself to always put the cap in my pocket, I never have to scramble around trying to find it. I noticed condensation on the cap from my body heat/moisture sometimes - simple solution is to put it in my pocket so that the "front" of the cap (the side that goes away from the lens) is facing my backside. That way any condensation will happen there and won't get on the lens when I cap it back up.
What do you do with your lens caps? Do you use a strap or some sort of system to keep track of them while shooting?
~S
[title of blog] on flickr

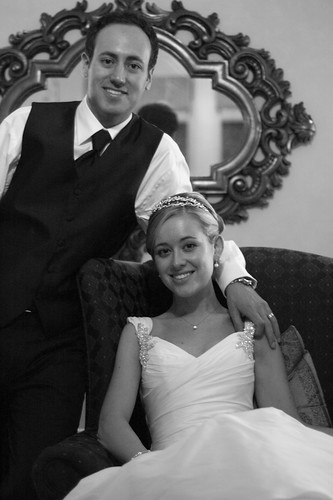
photo: Corey / Martin
Last night I was browsing through photos in the Wedding Photography group on Flickr when I came across the above portrait. I clicked through to see it larger and was struck by the connection of the subject to the camera. The depth of field is pleasingly shallow without being so razor thin that half her face is out of focus. The lighting is soft yet directional. I would be proud to have taken that shot, which is generally how I measure other people's photography.
Then I glanced over at the exif and couldn't quite believe what I read. I clicked the link and examined it in detail. This was taken with a Canon Rebel T2i (a basic consumer DSLR) and the 18-55 kit lens. A closer analysis of the lighting suggests that she was standing near a window, no flashes or fancy studio tricks.
That's right, an entry level camera with kit lens and a window were all that the photographer needed to make this great portrait.
edit: I'm not 100% sure about the window light anymore, I did some looking through the photographer's stream and he shoots about 50/50 available light/flash. Even if it was a strobe in a softbox, though, you could get the same effect with a window.
It's easy to play the "if only I had this (lens/camera/flash/accessory) I would be a better photographer" game. Heck, I'm guilty, and have been fighting serious gear lust lately. Would I shoot a wedding with a Rebel and a kit lens? Probably not. (There's a reason that the pro's use professional gear.) Am I inspired to take my photos to a new level using only the gear I have? You bet.
What's your excuse?
~S
[title of blog] on flickr
© Simon Hucko 2011
After declaring that I wasn't going to renew my pro account on Flickr, I had a few conversations with various people about the merits of Flickr in general and if it was worth seeking out a new community to share photos. The common criticisms I see of Flickr are that people post too many mediocre photos (lack of editing) and the relatively worthless comments that people give ("nice shot" "great capture" etc etc). I agree whole heartedly with these complaints, but I've found that there are a few tricks to having a more interactive, constructive experience on Flickr.
First off, how you approach Flickr largely depends on what you're aiming to get out of it. Some people use Flickr as a way to share photos with family and friends. Nothing wrong with that, but everything I say below probably doesn't apply to you. Others use Flickr as a way to get their 15 minutes of fame, and go the extra mile to get as many contacts, comments, views and faves as possible. Again, if that's your thing, nothing wrong with that, but you're probably not concerned with the quality of photos and feedback that you see on the site. I know people who are looking for a place to make some close friends and use Flickr as much for the social aspect as for the photography. A lot of what I say may still apply to you, but who your contacts are will depend on other factors. In any case, you can always create another free account and use it as your "portfolio"/critique account.
Dealing with a lack of editing is really an issue of who you make a contact. The first thing you should do if you haven't already done it is change your preferences to only display 1 photo per contact on your home page (instead of 5). Now you get to see the latest offering from 10 people instead of potentially only 2. Every so often, go through your contact list and get rid of people who you regularly skip over when you see new photos from them. Flickr doesn't notify people when you de-contact them, so there's a pretty good chance they'll never even know. I also am pretty picky about who I add as a contact in the first place and don't automatically "follow back" people who add me. I check out their streams to make sure there's a large percentage of images in there that I'm interested in, and to get an idea for what and how often they post. Even if they take some great photos, if it's of a subject or style I'm not really interested in I'll probably give it a pass. It sounds picky and kind of mean, but this really helps me focus in on the types of photos I'm interested in.
The next step is to be an active commenter on the people whose work you admire. If you like a photo, give it a fave and write a bit about why (not just "great shot," but "I like how the red in the background really helps the yellow subject pop.") Once people see that you a. enjoy their work and b. actually have insightful things to say about it, they'll most likely start returning the favor. Negative critique is a bit more tricky, and is something you'll probably have to build up to. Hopefully you can find a few people to trade honest feedback with this way. (Note, if you expect people to pay attention to your work, you have to limit your uploads to only your best stuff and spread out your posts to 1, maybe 2 a day.)
Another way to get relevant feedback is to put your photos in very specific groups. Follow the same principles as marketing - most people won't care about your photo, but if you find a group that focuses on your subject or location that will help add relevance and you'll get more interest from the members. For example, let's say you take a great photo of a waterfall. You could put it in a "post a cool photo" group, but most likely it'll get lost in the volume and variety of shots being posted. A quick search will lead you to the "waterfalls" group, which is made up of people who are interested in photographing waterfalls. Your photo is immediately more relevant, and your chances of getting views and comments from the group members goes way up. A bit more digging gets you to the "waterfalls of New York" group, where you happened to take your photo, and you're even more likely to get seen. Find out if you have a group for your city or area and join that. Really into close up shots of forks? There's a group for that. Also, look for a critique group. There are plenty on Flickr, some better than others. Read the description, check out the forum, and click on a few photos to see what sort of feedback people are getting. Stay away from those award groups and try to find one that really aims to give constructive critique. I haven't really explored critique groups, so I don't have a good recommendation for you. If anyone knows of some good ones feel free to leave them in the comments and I'll add them here.
So there you go, some of the tips and tricks I've picked up along the way. If you have any others I'd love to hear them, as I'm always looking to get a little more out of my Flickr experience.
~S
[title of blog] on flickr
© 2011 Simon Hucko
I got an e-mail the other day saying that my "pro" account on Flickr is set to expire in two weeks. Rather than punch in my credit card and shell out another $25, I decided to take another look at the benefits of a pro account and see what I'd be missing if I didn't renew. Flickr kindly provides a summary of the differences on their FAQ page.
In short, I'd be limited to 300MB of photo uploads a month, would only be able to view my latest 200 photos, and would lose my stats tracking (plus the addition of ads and a few other limitations that aren't really relevant to me). So I made the decision not to renew, and if you're a serious photographer and use Flickr like I do, you can probably drop your pro account too. Here's why:
I use Flickr to share what I consider the "better" photos that I've taken. I generally only upload one or two photos a day (or zero, if I haven't gone shooting recently) and I resize all the photos to 1024p before uploading. A typical resized photo that I upload is 500-600KB, so I can upload 500 photos before hitting my monthly limit. No sweat.
The 200 photo limitation is a bit of a drag, but since I'm not using Flickr as a backup service I don't really care to have my entire photo library online. It is nice to be able to dip back into my older stuff from time to time, so I found a workaround thanks to some helpful folks on Flickr. If you make a group and add all your photos to it, you will be able to access them through the group even if they are no longer available to you on your photo stream. I made one for myself and added all my photos, so when my pro account expires I'll still be able to view them all. I'm not 100% certain what will happen to the photos on my blog here that are hosted on Flickr - I think they should stay active, but if they all break I'll have to find another solution for hosting.
Finally, the stats tracking was a nice feature to have, but not an essential one. It was cool to be able to see how people were finding my photos and to keep track of where they were being posted on the web. I'll have to start checking services like TinEye more often to keep an track of things.
So it seems to me that I'll be just fine without a "pro" account. If I change my mind, upgrading will give me access to everything just like if I had renewed.
Who is the pro account for, then? Seems like the only ones who really need it are the people who dump 1000 unedited vacation photos straight from their camera to Flickr, or use it to share the 300 happy snaps from their latest family gathering with Aunt Betsy. There's certainly nothing wrong with that, but I generally use Facebook for that sort of thing.
My account expires June 9th. I'll let you know how things go. What about you, do you have a pro account? Why or why not?
~S
[title of blog] on flickr
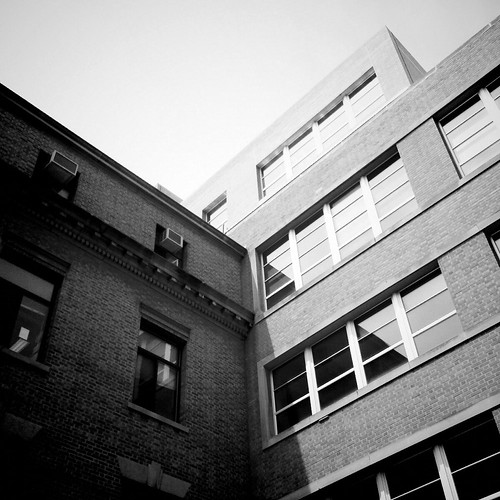
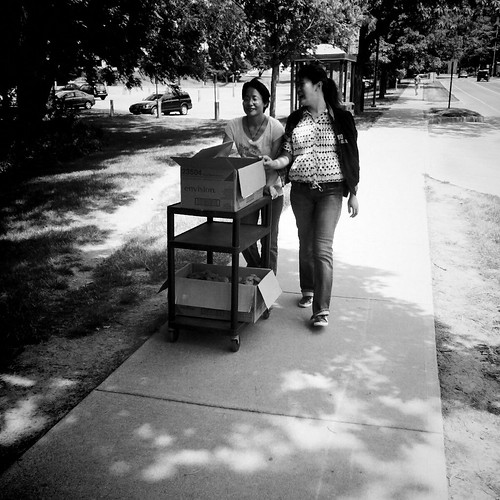
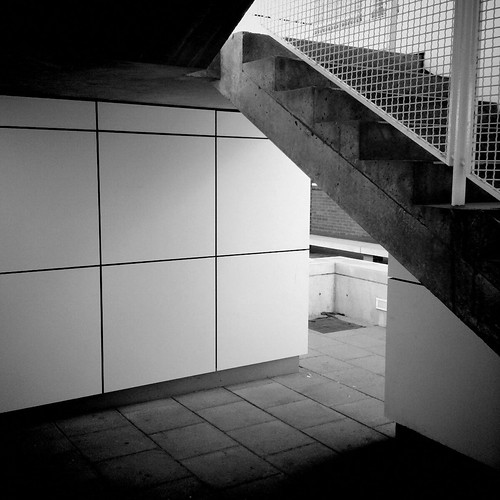
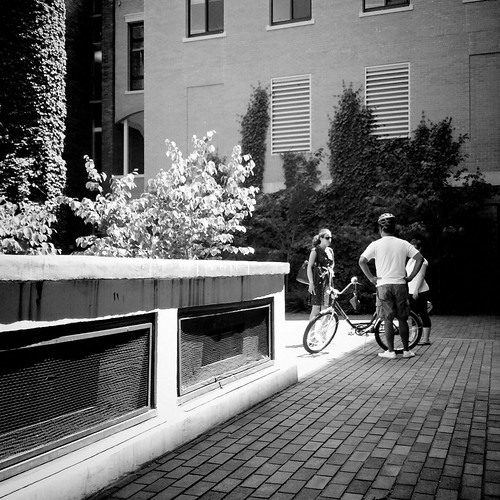
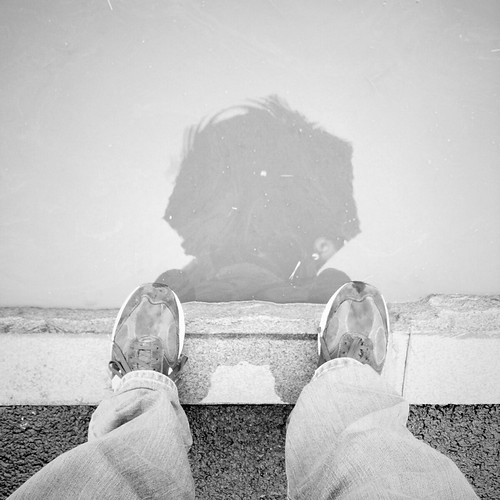
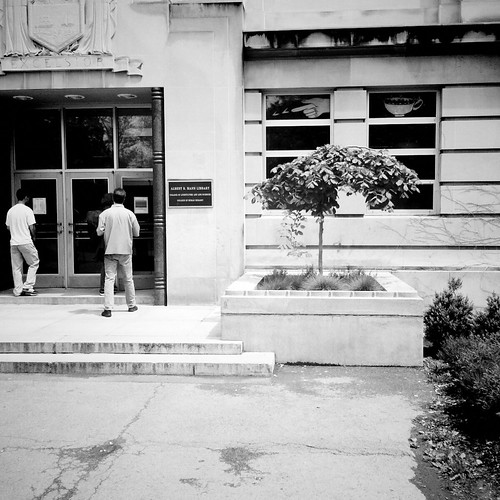
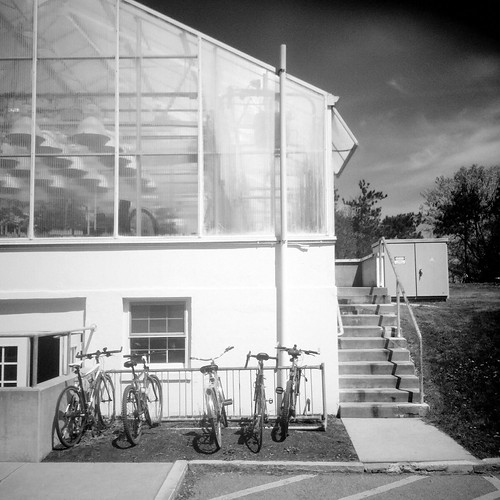
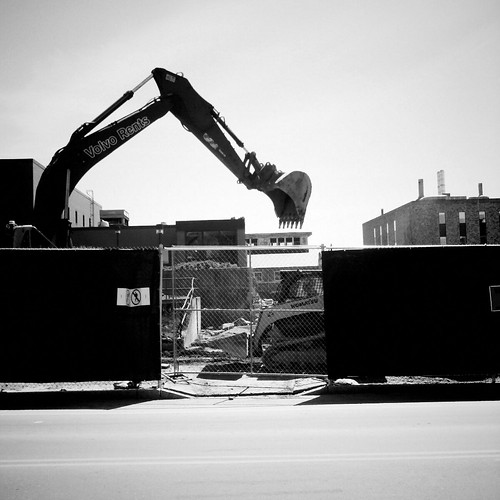
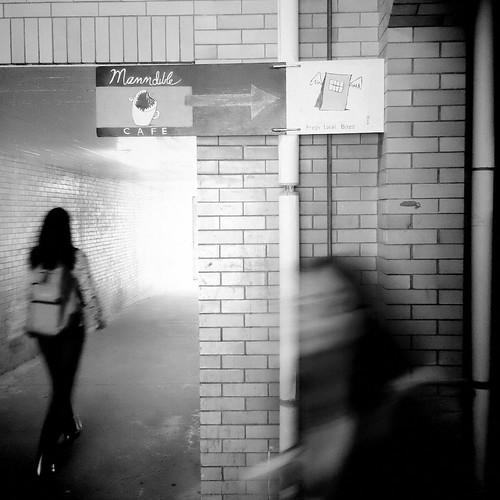
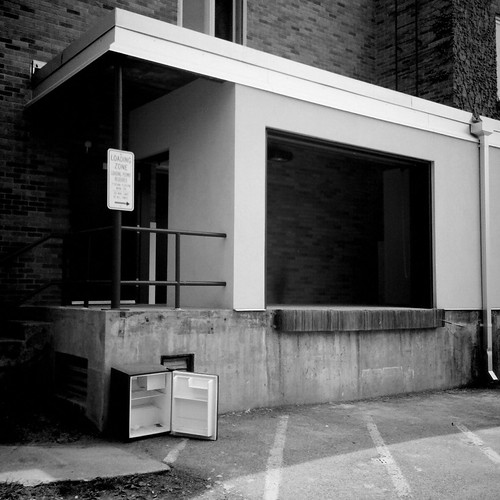
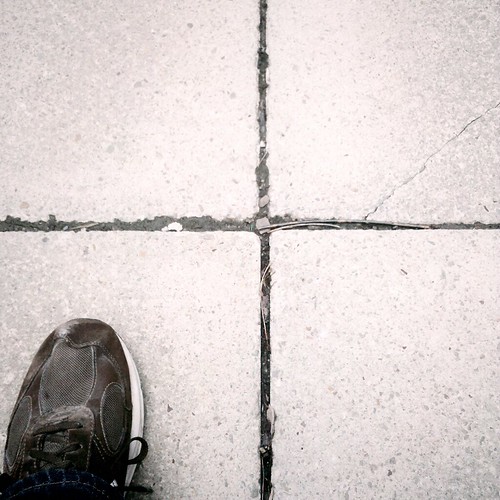
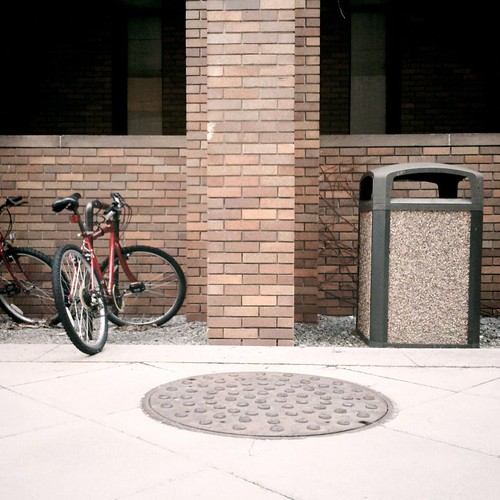
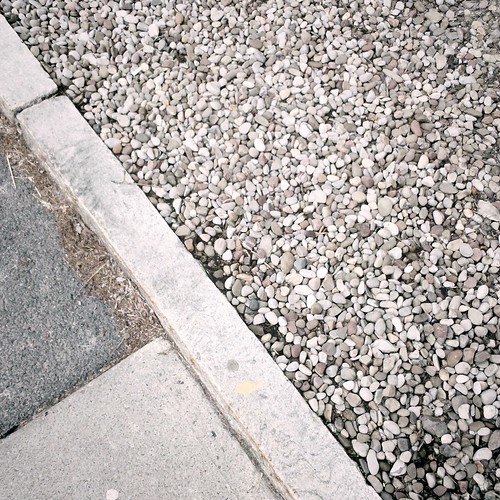
Recently, as part of my efforts to lose some weight and get back in shape, I've been taking a walk every day to get a cup of coffee. As part of this routine, I've been pulling out my phone and taking at least one photo per day. Most of them make it to Flickr, some of them make my "Just for fun" posts, but even if I wind up deleting whatever I take the physical act of composing a shot and pressing the shutter keeps my creative juices flowing. It's also a chance for me to experiment a little and take the sort of throwaway shots that I don't usually think about when I'm out with a more serious camera. Just looking down at my feet and finding a composition that works can be fun and liberating. Hopefully this will encourage me to experiment a bit more with my regular Photography (capital P).
In other news, my new (old) tripod came in yesterday, so I'm back in business. It's the perfect drizzly grey weather for waterfalls this week, so I have to find a chance to get out and shoot some.
~S
[title of blog] on flickr
Note: I re-posted this, since it seemed to have disappeared from Blogger yesterday while they were having issues. If you've already read it, go ahead and skip it. Nothing new here.
___________________________________________________________
In case you missed the buzz on twitter yesterday, photo hosting/sharing service TwitPic has just updated their ToS. The important bit is here:
You retain all ownership rights to Content uploaded to Twitpic. However, by submitting Content to Twitpic, you hereby grant Twitpic a worldwide, non-exclusive, royalty-free, sublicenseable and transferable license to use, reproduce, distribute, prepare derivative works of, display, and perform the Content in connection with the Service and Twitpic's (and its successors' and affiliates') business, including without limitation for promoting and redistributing part or all of the Service (and derivative works thereof) in any media formats and through any media channels.
You also hereby grant each user of the Service a non-exclusive license to access your Content through the Service, and to use, reproduce, distribute, display and perform such Content as permitted through the functionality of the Service and under these Terms of Service. The above licenses granted by you in media Content you submit to the Service terminate within a commercially reasonable time after you remove or delete your media from the Service provided that any sub-license by Twitpic to use, reproduce or distribute the Content prior to such termination may be perpetual and irrevocable.
In other words, TwitPic is saying that anything on their service is fair game to them and any subscribers, copyright be damned. This is the result of a few lawsuits from people who's images got taken from their service and used without permission, most notably the iconic image of the flight that went down in the Hudson river. They wash their hands of it, and want no responsibility in protecting your copyright. They could even license (sell) your images to news corporations or other companies if they wanted to, and you couldn't do anything about it under these terms.
My suggestion? Time to switch to yfrog. Their ToS is much more friendly, no rights grabbing, and they will honor any takedown notice you give them.
If you are an Android user, you can change your default picture sharing service in the official twitter app. Go to Settings -> Photo upload service and select "yfrog." I'm not sure about iPhone users, perhaps one of you can comment here with how to make that change. If the iPhone twitter app doesn't offer anything but twitpic, I suggest finding a 3rd party client that does.
I'm not a huge copyright avenger or anything, but this is a pretty big slap in the face to twitpic users. I settled on yfrog, but if you have any other recommended photo sharing services I'd love to hear about them in the comments.
~S
[title of blog] on flickr
© 2011 Simon Hucko
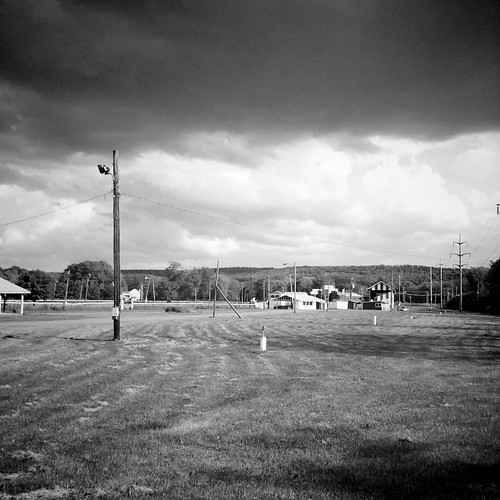
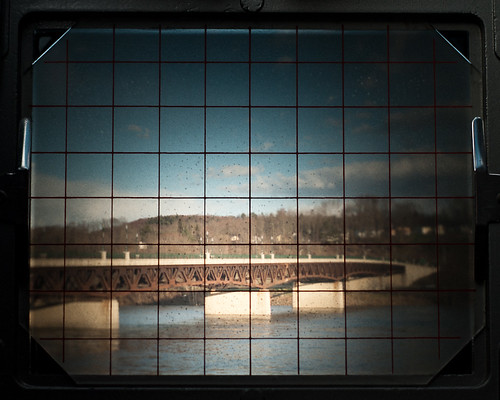
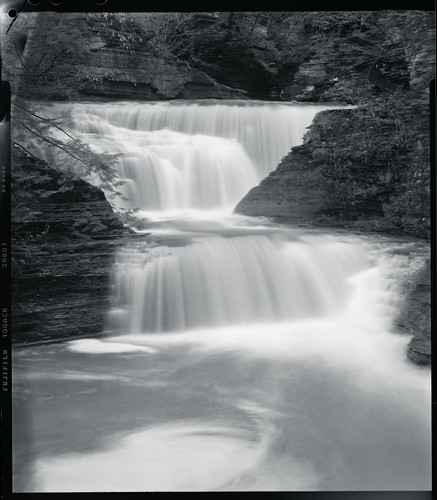
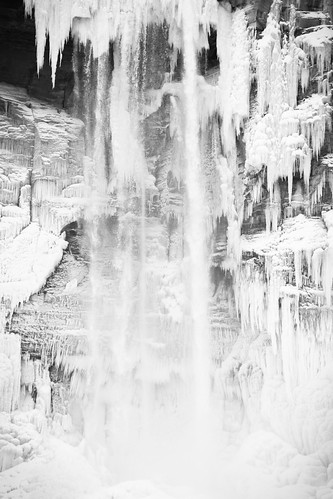
So, after much talk, planning, gear acquisition, changing bag panic, back strain, missed exposures, a broken tripod and a botched night of developing, I finally have an image to share with you guys from the 4x5. I'm not particularly thrilled with it, but it was the best of the 4 sheets I shot, and I felt like I owed you guys *something* after all the build-up.
Long story short, 4x5 is hard. There are a lot of ways to screw things up, and I managed several of them. But, learning is part of the fun (and the reason I rushed out to shoot a few sheets in less than ideal conditions), and I'm excited to keep trying and get a handle on the process. Once I'm finally competent, the payoff will be amazing. As badly as these shots came out, the level of detail I was able to get in some of the images was stunning. I still have to work out my exposure and development (something I've been struggling with all along this film journey), but once it gets there I expect to make some of my all-time favorite images with this camera.
Unfortunately, I broke my tripod on day 2 of shooting with the beast, so no more photos from it for a while. Double unfortunately, it's prime waterfall season and I'm stuck here without any tripod, so I have to rectify that asap. That seems to be the way of things, though.
Once I have a more solid and reliable workflow in place I'll do a post about the process beginning to end. For now, enjoy my blurry, scratched, low-contrast shot above. Certainly more to come in the future.
~S
[title of blog] on flickr
This has nothing to do with photography and everything to do with the US military strike in Pakistan yesterday. If you're tired of reading about it, I don't blame you, feel free to skip this one. I know this is a photography blog and talking about the death of Osama bin Laden is pretty far off topic, but I couldn't help but write about how I feel about the situation. Sorry.
I totally missed the news last night, so this morning I was greeted by a storm of reports in my RSS reader and on twitter/facebook. After I had figured out what happened, I watched President Obama's speech. Say what you want about the man, he is an excellent speaker, and delivered what I believe to be the perfect reaction to this situation: a somber recounting and rememberence of the lives lost, a "yes we can" moment about Americans accomplishing what they set out to do, and a few cautionary words that the war on terror is far from over. No "Mission Accomplished" banner, no gloating, no overtly political agenda.
Listening to him speak dragged up memories of The September 11th. The principal coming on the PA to announce what had happened. The deafening silence through the school. TV's being wheeled out. Watching the second plane crash into the towers in real time. Reports of other planes being hijacked. A smoldering wreck at the Pentagon. The panic and fear that I felt at the time, wondering where and when the next attack would come. Sorrow for those who lost friends or family members in the attacks. Gratitude that I wasn't directly affected.
I remember the silence in the skies that week while all the planes were grounded. When flights resumed, my heart would race a bit every time I heard the sound of a jet engine in the sky. I remember an incredible surge of patriotism, and seeing American flags flying on every porch. I remember George Bush announcing our invasion of Afghanistan to capture Osama bin Laden and put a stop to al Qaeda. I remember a government and a people moving forward as one.
10 years later, the military finally found and killed bin Laden. Am I happy that he's dead? I think so, but I feel like it's a bit of a hollow victory. I'm happy for the closure that it must have brought to people who were affected by the 9/11 attacks, but I know that in the grand scheme of things it really doesn't change anything. I'll still get groped on the way through airport security and have to put my shampoo in a little plastic bottle inside a little plastic bag. Our troops will continue operations overseas, and more Americans will die. Even if we manage to completely disrupt al Qaeda, new terrorist groups will emerge and threaten our people. On top of that, we're still battling our way out of a recession, dealing with violent natural disasters, almost shutting down our government due to political posturing and indecision, and facing a looming energy crisis.
Killing bin Laden is an important and certainly historical event, but I don't feel the urge to celebrate in the streets and yell obscenities about it. I think it's an opportunity to remember those who were lost 10 years ago, and to move forward with determination onto the next issue. And the next one after that. To gain back a bit of that unity and citizenship that we felt 10 years ago. To put aside some of the petty squabbling and focus on the bigger issues.
What do you think?
~S
[title of blog] on flickr
One of the few shots that turned out. © 2011 Simon Hucko
Just a quick PSA: if you buy an old film camera with a built in meter, always always check the meter before shooting a whole roll with it, or at least shoot a test roll first of unimportant stuff before shooting something you'll want images from.
I made that mistake last weekend and shot most of a roll on Easter relying on my Canonet's meter. I wasn't paying much attention to what aperture the camera was selecting (it's a shutter priority auto kind of thing), and it's hard to judge light levels indoors anyway, so I wasn't too concerned. A few days later I went for a walk to finish off the roll and realized that the meter was way off. Like 2+ stops off, judging by sunny 16. I knew right then and there that I probably ruined all my Easter photos.
After finishing the roll I did the best I could to salvage the images. I stand developed the negs in Rodinal 1:100 for 90 minutes, which is recommended for a 1-2 stop push. As I had feared, most of the negs were extremely thin with no shadow detail. I probably could have extended the development out to 2 hours, but even then I'm not convinced I would have recovered any more in the shadows (at some point the film just isn't sensitized by light and no matter how much development you give it it'll come out blank).
So, if you buy a film camera and plan on using the meter, make sure you test it against another meter or sunny 16 before shooting a roll through it. That way you won't end up with a roll of blank negatives from your next holiday gathering.
~S
[title of blog] on flickr
Fellow film-nut Dan Domme posted a great article over on his blog outlining some of the advantages of film photography over digital. Since I didn't have a post ready for this week, I'm just going to link you to his. Thanks, Dan ;)
"In Which I Counter an Argument: 10 reasons film is superior to digital"
I'm not saying you shouldn't shoot digital (and neither is Dan), but there are a lot of good reasons to give film photography a try and see how you like it. A lot of what Dan says lines up with my motivations for shooting film, and while it's not the best medium for every type of photography (I don't think I could ever bring myself to shoot a wedding all on film), it certainly has a valid place in the photography universe still.
If you like what you read, you should give Dan a follow on twitter (@yeknom) and check out his work on flickr. And of course, his blog.
~S
[title of blog] on flickr
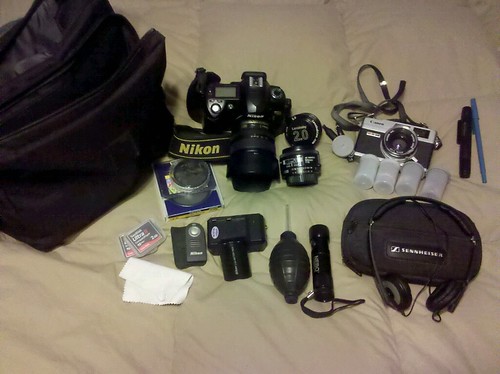
click through to see notes on what everything is
Since I just returned from a quick trip to Florida, I thought I'd talk a little bit about traveling with camera gear and what extra concerns shooting film adds to the situation.
First off, the goal for flying with camera equipment is to carry as much of it on with you as possible. I believe it was Chase Jarvis that said that if you're planning on checking any equipment, you should be 100% comfortable with throwing the bag down a flight of concrete stairs. Things like tripods, light stands and cables can probably be checked no problem, but the rest of it you're going to want to carry on. Camera bags count as your personal item, and you can also sling a camera around your neck and stuff a lens or two into your pockets if you're really crunched for space (anything on your person does not count as extra baggage.) Fortunately (or sadly, depending on your perspective) I don't own nearly enough camera equipment for that to be an issue.
In any case, you're going to want to whittle down your kit to only what you'll need on your trip. I shot a combination of digital and film on this trip, so that meant 2 camera bodies and the relevant accessories. Fortunately my film camera is pretty small and has a fixed lens, so the entire thing fits into one lens slot in my bag. My D70 with kit lens fits very nicely in the middle even with the lens hood on, so there's slot 2. The Lensbaby and my 50 stack on top of each other in the 3rd slot to round out the kit. I could probably have done without the Lensbaby, but it weighs essentially nothing and wasn't competing for space with anything, so it came along for the ride. As far as accessories go, I kept my pretty standard setup. I did ditch my ND filter because I knew I wouldn't need it. The remote stayed, but again it weighs practically nothing and takes up almost no space in the bag, so it didn't make much of a difference. A blower, microfiber cloth and lens pen should be staples in any photographer's bag - if you don't have them, you really should. They're not too expensive, and help you get the best image quality you can. I also brought along my LED flashlight, which is more the Boy Scout in me than anything else (always be prepared). The noise cancelling headphones got added for the flight, since this was my carry on. Any other miscellanea got removed and put into storage for the weekend. Some of it might not make its way back into the bag.
One thing you don't want to skimp on is storage/film and batteries. I had a total of 8 GB of flash cards (enough for 1400 raw files) and 4 rolls of film, two color and two black and white. That's way more than enough to carry me through a long weekend, but if something big happened I'd have extra frames to burn. Extra batteries and/or your charger are key, too. I bought a nice cheap charger off Amazon to replace my Nikon one that I lost in the shuffle of moving - it's super compact and doesn't need a cord, so it can live right in the bag.
A few words about film: There is a chance that film can be affected by the x-ray scanners when going through the airport. Never *ever* put film into your checked luggage, since the x-ray they use on checked baggage is way more powerful than the one used at security screening and will mess up your film. The general rule of thumb is that anything over 400 ISO could be fogged by the scanners at security, too. I brought relatively slow film with me (Kodak Gold 200 and Fuji Acros 100), so I wasn't concerned about the x-ray. If you're shooting faster film, or are going for a paid job or some once in a lifetime event, you can ask to have your film hand inspected. Typically they'll try to talk you into sending it through the scanner anyway, especially if you don't have anything faster than 400 ISO. A trick for that is to carry a roll of 3200 ISO film with you (Ilford makes one), even if you're not planning on shooting it. If you plan on asking for hand inspection, remove all the rolls from the boxes ahead of time and carry it in a separate plastic bag. Let them know as soon as possible that you want a hand check so that you don't have to wait around a long time for it. (If you're travelling with a lot of film, I suggest calling ahead to the airport and letting them know so they can set aside some time to check through it all.) The security agent will look at it all and swab it for explosives. Once the machine is satisfied, you get your film back and are on your way. Back in the day photographers used to put film in a lead bag to protect it from the x-ray and send it through the scanner, no hand inspection needed. You can still buy them, but I don't recommend using one. It's just going to raise red flags to the screener and you'll have to get the film hand inspected anyway (and probably receive closer scrutiny on everything else).
One final word of advice is to neatly roll up and tie off any cables you might have in your bag (USB, chargers, whatever). A big rats nest of wiring and electronic equipment will probably get your baggage (and possibly your person) hand inspected.
________________________________________________________________
I wrote the bulk of this before going on the trip, and now that I'm back I figured I would add a few comments. Did I use everything I packed? Nope. I didn't even shoot as much as I thought, spent most of the weekend living life instead ;) Would I have packed anything differently? No, probably not. There was the potential to need everything I brought with me, and given different weather and/or more shooting I would have used more of what I brought. The important thing is that I had everything I needed and didn't kill myself schlepping it all around. Great weekend.
~S
[title of blog] on flickr
© 2011 Simon Hucko
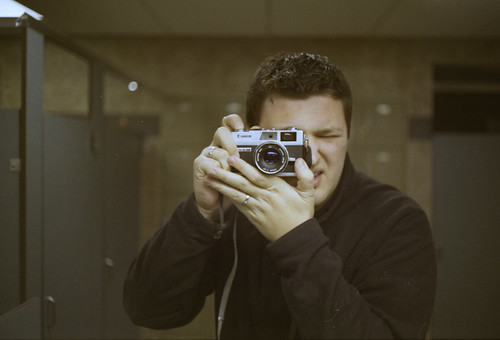
Went out for the night on Saturday. Grabbed my DSLR, slapped my 50 on it, threw it over my shoulder, and carried it around with me all night. Most of the time the lens was uncapped, with no filter or hood on it.
I bumped it into a few things, spilled a little beer on it, grabbed it with greasy chicken wing hands, and took a lot of photos that I wouldn't have gotten with my phone camera, or even my point n shoot. A quick wipe down with a microfiber cloth and the camera looks no worse for wear.
I'm not saying you should abuse your camera, but it's probably a lot tougher than you give it credit for. Don't be afraid to grab it and bring it along with you. You bought it to take photos with, not to sit in your bag looking pretty.
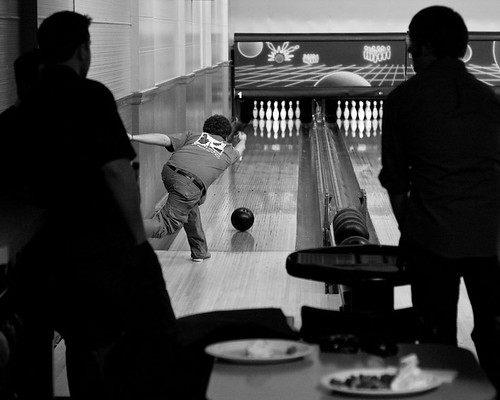
Oh, and the 50 was definitely the right choice. Plenty fast for me to get a nice motion stopping 1/100th shutter at the bowling alley, plus it was small enough that I didn't have to worry about what it was bumping into. At the bar after, I popped up the flash (gah) and set a nice slow shutter (1/10th) to let a little ambient burn in. That way things didn't look like they were shot in a cave.I did end up getting some weird ghosting on some of them, but for bar snaps they turned out just fine.
Next week: travelling with cameras (and film).
~S
[title of blog] on flickr

Hey everyone, just wanted to let you know that I wrote a review of my experience with Lens Rentals over at Shutter Photo. If you're interested, the review can be found here.
I've already plugged Shutter Photo here, but if you're still not a reader I suggest subscribing to their feed. Travis does a great job balancing out gear, technique and inspiration, and I always enjoy reading his latest posts.
Have a great weekend, everyone.
~S
[title of blog] on flickr
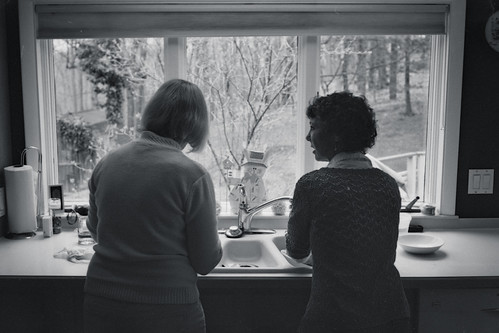
[No image with this, I don't have releases for the students and don't feel comfortable putting it up without permission. Sorry]
This past weekend I had my first experience as a "professional" photographer - I ran a "get your photo taken with Cinderella and the Prince" photo booth at the middle school show my wife directed. I say "professional" in quotes because I wasn't actually paid (I donated my time for the fundraiser), but people were purchasing my photos and expecting good results. And to be honest, part of me was terrified.
OK, as far as high-pressure photoshoots go, grip-and-grins at the local school play aren't really going to make or break my career, but my reputation (and my wife's and the school's) could definitely be affected by this. Worse, I went into it with no practical lighting experience and almost no portrait experience. You might argue that I should have said "no," but I knew I could at least meet the minimum expectations. For a $5 5x7, all I had to do was get the kid in focus next to Cinderella and the prince. Smiles, good lighting and quality prints are all icing on the cake. I've spent enough time over at Strobist to muddle my way through a 2 umbrella setup, and I think the results turned out pretty well - everyone is well-lit with a bit of directionality to it (anything more dramatic wouldn't be appropriate for this type of shoot, anyway). The monolights I rented from LensRentals.com had enough power for me to shoot at f/8 ISO 200 with a minimum amount of tweaking in post required. I ordered prints from Mpix, and while I haven't seen them yet I know the quality will be good, as always.
A few things I learned from the process:
- Having the right gear is key. Renting a lighting setup was the best decision I made, and something I knew I would have to do right from the beginning. I heard several comments about how "professional" things looked, which was important. None of those parents knew I'd never done anything like this before, and because I did my research and looked the part, they never will. (Unless they read my blog, of course.) I also made sure to dress nicely so that parents would take me seriously and not have any qualms about me photographing their children: it's always better to over-dress for a shoot than to under-dress.
- Some kids just don't want their picture taken. Parents who stand to the side and yell at the kid don't help, either. ("Look at the camera!" "Smile!" Meanwhile, the kid looks right at their parent who is yelling and gets nervous. Duh.) A crowded lobby is far from ideal for a portrait session, especially with stressed out little kids in costume. (Have you ever met royalty before? It's pretty nerve-wracking.) I did the best I could, but a few just wouldn't have it and ran away in tears. I'd like to think I had nothing to do with that.
- Watch the eyes, and always take multiple photos. This goes back to the parents on the sidelines: the nervous kids kept looking at them for assurance. Not a problem, just make sure you're aware of it so you don't get them looking the wrong way. I always pointed to the lens and said "look right here" before taking a picture, that seemed to work pretty well. I took at least 2 photos of every kid to make sure I got a good one (more if I knew there were issues), which was a good policy. More is better, obviously, but we had a lot of kids to get through. Watch out for people taking photos over your shoulder, as the kids won't know what camera to look at. I didn't mind them grabbing a shot (hey, they already paid for the print, a snapshot for Facebook is ok by me), but more than one and I'd ask them to stop so I could get the photo they paid for. Everyone was understanding about that. If I do something like this again I'll make sure to collect e-mail addresses so I can send a low-res jpeg with my signature on it for web use, that way we can enforce "no photography" and cut down on some of the distraction.
- Good help makes things go a lot more smoothly. Cinderella and the Prince were great with the kids, and spent a minute talking to them before each photo. This helped them relax, and I didn't even speak up until the kid looked more comfortable. Things were a little crazy on the paperwork end. We had kids run up to get a photo before their parent had even started filling out a form, which I didn't anticipate. Fortunately we got it all worked out in the end, but next time I will go in with a much more systematic approach where I look at each order form before taking a photo. Shame on me for not running things better, but this is how we learn.
So, in the end, I'm glad I took a little bit of a risk and stepped outside my comfort zone for this one. With my growing reputation as "the photographer" among family and friends (and now at my wife's school), I'm sure this won't be the last of these types of events that I'll be asked to do. Now that I've gotten one under my belt, I feel a lot more comfortable saying yes and taking more on. I'm not suggesting that you agree to do things you really aren't prepared for, but you can handle more than you think. (Start small, work your way up, and always do your research.) Even if things don't run 100% smoothly (they never do), you can learn from the experience and be that much better the next time. As long as you show up and act the part, people won't question your ability. You might feel like a duck (calm on the surface, paddling furiously under the water), but you'll make it through.
Any of you have a similar experience? Would love to hear about it in the comments.
~S
[title of blog] on flickr
© 2011 Simon Hucko
If you've been shooting for any length of time you've probably had the experience where you share an image that you're really proud of and are a bit miffed that it doesn't get more feedback and attention. Similarly, sometimes photos that you consider a "grab shot" get rave reviews from others. It's a bit of a humbling experience, but I think it teaches us a valuable lesson: just because you worked hard to make a photo doesn't mean that it's a great photo.
It's so easy to get attached to photos that we worked hard to make, but in the end the image has to stand on its own to the viewer. That's not to say that context isn't important sometimes, but in general I feel like if you have to explain why your photo is so "great" then you probably missed the mark.
This is mostly relevant when deciding what to present as a portfolio or some other representation of your work. Go through and select a pool of what you feel is your best work, then open it up to others to make your final selection. The most valuable feedback will probably come from other photographers who have a similar style to you - they know what you're trying to achieve with your images and can cut through the BS pretty quickly.
I'm not saying that you shouldn't work hard to make great images, just learn be honest with yourself about the quality of your work and let the bad or mediocre stuff go no matter how long or hard you worked to take it. On the flip side, always take a second for that "grab shot" when something catches your attention, it may be the easiest portfolio shot you've ever taken ;)
~S
[title of blog] on flickr

Travis over at Shutter Photo is holding a black and white photo competition to celebrate their third anniversary, with some pretty kick ass prizes for the winner. I highly encourage you to head over to the contest page and check it out. No rights grab, just a straight up contest. And, as an added bonus, I was asked to be a judge. (Sorry, no bonus points for being a [tob] reader.)
Submission deadline is March 18th. Go! Do!
~S
[title of blog] on flickr
© 2011 Simon Hucko
Last week I talked about buying a film camera. This week I'm going to talk a bit about the different types of film that are available and how to choose what to shoot. If you're just looking for my recommendations, skip down to the bottom.
Digital camera sensors are designed to respond to light in a flat, uniform way. No matter what ISO you choose, most RAW images look pretty much the same, give or take some noise - linear light response, low contrast, flat colors. This gives you a pretty uniform starting point for post processing, and lets you create the look you want after the fact (punch up the color, convert to black and white, add contrast, desaturate a bit, etc.). You don't really have to think about the final look of a shot when you take it (although you should at least have some idea of where it's going to set the best lighting and exposure), and you can create multiple versions of an image after the fact with different looks.
With film, on the other hand, what film you choose to load into your camera (and how you choose to shoot and develop it) has a big impact on how the final image will look, so you have to give it some thought ahead of time. The biggest difference from shooting digital is that you can't change your ISO on the fly, so you have to choose an ISO and stick to it for the whole roll. Much like with digital shooting, higher ISO films will have a more pronounced grain than "slower" films, and tend to be higher contrast and show less detail. If you plan on shooting handheld in a range of conditions (sunny to indoor), 400 speed is probably a safe bet. If you don't have to worry about low light there are a lot of nice films from 100-200 ISO. If you're shooting a concert at a dimly lit bar, you might have to push your film to 1600 or higher to get usable shots.
Once you have an idea of what conditions you'll be shooting in, your next big decision is color or black and white. There are two types of color film, color negative (also called color print film, C-41 process) and slide film (also called color positive, reversal, transparency, and E6 process). As the names suggest, color negative films give you a negative image that is suitable for traditional optical printing, whereas slide films give you a positive image that can be projected or viewed on a lightbox.
C-41 is the most common type of film, and film and processing is readily available at drug stores and places like Target, Costco, WalMart, etc. Color negative is probably the easiest way to shoot film, since you can drop off a roll for developing and often times get the lab to scan it for you (generally low quality unless you use a professional lab, but good enough for Flickr). If you have a scanner, most labs will do development only if you ask (although you may get some strange looks and questions this way). This is generally much more cost effective and lets you control how your images are scanned (better color and quality), but means more work on your end before you can share your photos. Color negative film also tends to be the most forgiving with exposure, and you can typically miss by a stop or two in either direction and still get a good image. In that sense, color negative film is similar to shooting RAW in digital - you have more dynamic range and wiggle room with your final images. Unlike digital, underexposure of color negative film tends to block up the shadows and gives a purplish color cast to the image, so it's generally better to err on the side of overexposure unless you're looking for that effect.
E6 (slide film) is more specialized and is just about impossible to find in a store. Most slide films range from 50-100 ISO, so they're not practical for indoor or low light shooting without a flash. The dynamic range of slide film is also much smaller than color negative, and because it's a positive process you have to be careful not to blow your highlights (much like with digital), or you lose the information. In this respect, slide films are kind of like the JPEG of the film world. E6 films tend to be very sharp with vivid colors, and are best viewed in person through projection or on a lightbox with a loupe.
You can also process slide film in C-41 chemistry (commonly known as "cross-processing" or "x-pro"), which gives you a negative image on the film. This tends to give higher saturation and color casts, especially when treated as color negative film during scanning or printing. Color negative film comes on an orange backing whereas slide film has a clear base, so scanning on the "color negative" setting adjusts for the orange and will give your cross-processed image a green cast. This is what you'll typically see when looking at cross-processed images, and is what your hipster camera app tries to simulate. You can also scan them as a color positive and invert using Photoshop, which gives a more normal looking image with only slight changes in color and saturation.
Finally, black and white film. There are a lot of different black and white films available, ranging from ISO 25 to ISO 3200. Different black and white films have different grain and tonal range characteristics, generally following the "higher ISO films have larger grain, less fine detail and more contrast" rule. Unlike shooting color, where every film is run through the same chemicals for the same time and temperature, black and white film developing times vary based on what film it is and what developer you're using. This means that if you send your black and white film into a lab, they're going to have to manually process it, which gets very expensive very quickly. Processing black and white at home is easy and pretty inexpensive, so if you're planning on shooting film I highly recommend developing your own black and white a few times just for the experience. (And who knows, you might even like it! I'll write more about home developing in the future.) Whatever you do, *do not* let someone run your black and white film through a C-41 machine, you'll end up getting back blank negatives due to a bleaching step in the process. Skip the drugstore on this one, or you'll be sorry.
Where to buy? Freestyle Photo is my new favorite place for all things film. Sometimes Adorama or B&H have better prices (and shipping from them is much faster since I live on the east coast), but Freestyle definitely has the best selection. I advocate buying fresh film from a retail distributor whenever possible, since it lets retailers and manufacturers know that people are still interested in shooting film. If you really can't afford it or plan on shooting a *huge* amount of film, then buying on eBay is a good way to go. Plenty of professional photographers have freezers full of film that they're looking to get rid of. Look for "cold stored" in the listing - even if the film is expired, if it has been stored in a fridge or freezer it should be ok to use.
I keep saying "freezer" - film is happiest being stored frozen, just make sure you take it out and let it thaw a day or so before loading. Putting it in the fridge is better than nothing, so if you have an old dorm fridge lying around you can divide it between film and beer. I generally zip mine into a plastic bag just to keep it separate from the food, but that's not really necessary. If you have to store it at room temp, find the coolest place possible (preferably in a drawer or cupboard out of the sun). Heat will break down the emulsion on a film, and lead to faded colors, more grain and possibly other signs of damage. C-41 film is especially susceptible to bad storage, so take extra care if you buy expired color film online.
So there ya go, a pretty basic overview of film. There's a lot more to talk about (especially with black and white), so I'll write up more in the future. To close, though, I'm going to give a few recommendations of what film to shoot. I haven't shot with all of these, so some of them are based on what I've seen on Flickr, but they're on my list for the future. (Click on the links to pull up a Flickr search for images tagged with the film name.)
E6: Don't bother, just shoot digital. For serious. (If you can argue with me about why you should shoot E6, you're probably beyond my skill level with this stuff anyway.) If you want to try cross processing, find the cheapest stuff on eBay (probably expired) and use that. No sense paying for good film that you're just going to intentionally mess up.
C-41: I like Kodak Gold (100, 200, 400, it's all good), and that's probably the only "consumer" film that I'd recommend. The new Kodak Portra 400 is supposed to be a fantastic emulsion, and has a huge exposure latitude. Once I burn through the Gold in my freezer, that's probably what I'll switch to for color.
Black and White: It's hard to go wrong with Kodak Tri-X, a classic 400 speed film and a great one to start with when developing your own (very forgiving). Lately I've become enamored with the look of Fuji Neopan 100 Acros, and have a few rolls waiting their turn in the freezer.
I don't have a whole lot of experience with different film stocks, so if you have one that you like please share in the comments. As always, questions or comments are appreciated :)
~S
[title of blog] on flickr

© 2009 Simon Hucko
I keep talking about film here on the blog, and some of you might be interested in taking the plunge but aren't quite sure where to start. I thought I would throw together a few tips and tricks about buying into and starting to shoot film, from the perspective of someone who got started on photography with digital.
If you've never shot a roll of film, I highly recommend getting a 35mm SLR with a built-in meter. This will be the most familiar to you coming from a DSLR. If you're a Nikon shooter, you're in luck - Nikon hasn't changed its lens mount in 65 years or whatever, so you can share lenses between your digital and film body. For an experience almost identical to your DSLR without the image review window, check out something like the F80 (this will even take those G lenses as long as they're full frame). If you want more of a manual camera, the FE or F3 are both great options. It's hard to go wrong with any of the manual bodies, though, and since the F mount hasn't changed you can share lenses with your digital body just fine, as long as they are AI, AI'd, AI-S, AF, AF-D or AF-S and have an aperture ring. For you Canon users, I think any EOS body will work with EF mount glass (including the Rebel line). Canon changed their mount not too long ago, so the older manual Canon bodies won't work with modern lenses. There are two other SLR's I can recommend - the Canon A-1 (FD mount) and the Pentax K-1000 (K mount). Neither one is compatible with modern lenses, but they're both well built manual cameras and are the recommended "first SLR" that I see a lot on the film forums. Since the lenses aren't compatible with modern cameras, they tend to be less expensive, so if you don't already have a large lens collection that might be a good way to get the most bang for your buck.
Once you decide on a camera, you have to figure out where to buy it. Very few 35mm film cameras are still being manufactured new, so you're going to have to dive into the used market. Buying used gear can be a bit tricky, as it's much more of a free-for-all than new in the box equipment from a store. There are three sources I can recommend: KEH, eBay, and Craigslist. Each has their own pros and cons.
KEH.com is the closest to a retail experience that you're going to get with used gear. They have a pretty big selection, and their prices are fixed (no bidding or haggling). All of their gear is inspected and graded before being listed, and from what I've heard they tend to be pretty generous with their grading (ie something listed as "bargain" can actually be in pretty good shape with just a few dings). KEH is definitely the "safe" option, as they know what they're doing and will offer customer support and a return policy that you don't get elsewhere. You do pay a bit of a premium for that, but their prices are pretty fair. You certainly can get stuff for less on eBay or Craigslist, but it's a bit more risky. I always check KEH to get an upper-limit idea of how much to pay for something, even if I'm planning on buying it elsewhere. Think of it as the "blue book" value for used camera equipment.
eBay is probably where most film equipment gets bought and sold. There can be some great deals to be had, but there are also a lot of overinflated prices and bad quality thrown into the mix. "Buy it now" prices are usually a good bit higher than what winning bids go for on the same items, so unless you're all about convenience I would pass on that. Look for good seller ratings and listings with photos of the actual item for sale. Check the description for comments like "film tested, no light leaks, shutter speeds are good," and other wording that shows that the seller has some knowledge of the camera and what condition it's in. "Recently CLA'd" is great, it means that the camera was recently serviced and should be in good operating condition. (CLA stands for Clean, Lubricate and Adjust, and typically involves replacing light seals, making sure that the shutter is accurate, and cleaning any gunk on the camera, especially any optical surfaces.) Watch out for "I don't know anything about cameras" or the wording "as is" - it's not a no go, but usually a bit of a red flag that the seller either hasn't tested the equipment or is trying to hide some defect. Sometimes these turn out to be the best deals, because other buyers get scared off, but there's also a good chance that you're going to purchase an overpriced paperweight. It all depends on how much of a gambler you are. Don't get sucked into bidding wars - set a top price you'd be willing to pay for an item given what it is and what condition it's in, and then walk away. If you're persistent, you will eventually get what you want at a reasonable price. If you're hasty or emotional, you're likely to wind up overpaying for something.
Finally, depending on where you live, Craigslist can be a great source of deals. Craigslist is sort of like fishing - you just have to cast a line out there and see what turns up. It's not the place to go if you're looking for something specific. I recommend adding the photo/video listings to your RSS feed so that you can keep an eye on what's out there. There are typically three types of seller on Craigslist. One is the old photographer who is finally switching to digital or is retiring and wants to sell their film gear. You probably won't get any great deals from them, but they'll know a lot about the condition of their equipment and will likely have a lot of good quality stuff available for sale, including darkroom setups. The next type is the "I bought this camera for a film class a year ago" listing, where the person took a black and white photography class and was required to buy a SLR for it. From what I've seen, they're usually a bit over-optimistic when setting a price ("but I just paid X dollars for it a year ago!"), and the equipment tends to be lower quality (more modern plastic bodies with kit zooms.) You might be able to talk them down on price, but know that this camera probably won't give you that lifetime of use that a metal, more professional SLR will. Third, you have the people who inherited a box of camera stuff and have no idea how much it's worth. Prices from them can be all over the place, but these are usually where the best deals can be had. Listings are usually vague ("I have a box of camera stuff"), so definitely set up a time to look at what they have and talk pricing. It's more effort, but you might be able to get your setup for a steal.
If you get the chance to handle a camera before buying, do a few quick checks to make sure everything works well. Open the back of the camera (typically done by pulling up on the rewind lever) and look at the light seals (foam, felt or string around where the back and the body meet). Run a finger over them - they should have a little give and not flake off all over the place. If they do, you're going to need new light seals (not difficult, but a messy job that will cost you some time and materials). Fire the shutter a few times at different speeds. Of course you can't time them exactly, but 1/125th should be noticeably faster than 1/30th, and you know what 1 second should sound like. Check the meter - point it at something light, then something dark, and make sure it changes. You can reality check it with Sunny 16 if you're outside or near a window. If the battery is dead, check the battery compartment for corrosion (flaky white crystals). If it's there, there's a chance the wiring is fried and the meter won't work even with a fresh battery. Make sure all the mechanicals work smoothly, on both the camera and any lenses. Check the optics for mold - dirt and grime will clean off no problem, but mold can ruin a lens. Little scratches in the coating are ok, but big dings could cause flare. "Pretty" doesn't really matter - as long as the camera is light tight and the mechanics function well a little brassing, scuffing or dents won't hurt anything.
Most SLRs come with a 50mm prime attached, usually in the f/1.4-f/2 range. I recommend sticking with just that lens for a bit as you learn more about the camera and about shooting film in general. If you feel the need to diversify you can add two more inexpensive primes, a 24/28/35mm on the wide end and an 85/105 on the tele end, typically around f/2.8. That triplet of primes (maybe 4, I understand wanting a 24 and a 35 on the wide end) should cover you for just about everything you'll want to shoot. I highly recommend staying away from older zoom lenses, as they tend to be of lower quality (it took a while for the engineering and coating to get to where it is today). It also defeats the purpose of shooting film, IMO - I shoot film to slow down and put more thought and effort into my photos. If I want speed and convenience I'll grab my DSLR.
So there ya have it. I'll write a bit about choosing film in the future. Any questions or comments are always appreciated :)
~S
[title of blog] on flickr
This post stands as my entry for a Nikon F3 giveaway over at Rob Boyer's blog RB|Design. I'm new to Rob's blog, but it seems to be a great resource for Aperture users, and he talks a good bit about film and photography in general, so it was an easy add to my RSS reader.
If you're at all interested in shooting film, I highly recommend entering this contest. It will only take a few minutes, and the prize (a F3 body, possibly with lens) will set you up for shooting 35mm film for the rest of your life, if you so choose. Nikon pro bodies are built like a tank, and the F3 has a reputation for being solid and reliable. It has manual film advance and rewind, which is a large part of the tactile fun when shooting film, and has a built in center-weighted meter for shooting in manual or aperture-priority mode. If you have a Nikon DSLR, you can share lenses between the two bodies (as long as they have an aperture ring on them), meaning you won't have to add the expense and weight of another set of glass. That's the main reason that I'm entering this giveaway - I had a N2000 that let me do the same thing, but that died on me over Christmas.
I'm not usually a Ken Rockwell fan, but he has a good overview of the F3 at his site. Just make sure to take his opinions with a grain of salt, especially if you go digging around to other articles. This one is pretty straightforward without any of the usual KR BS, because it's mostly tech specs.
If you enter and don't win, there are still plenty of easy ways to get into 35mm. I'll have a post up later this week about buying film equipment.
Good luck!
~S
[title of blog] on flickr
© 2011 Simon Hucko
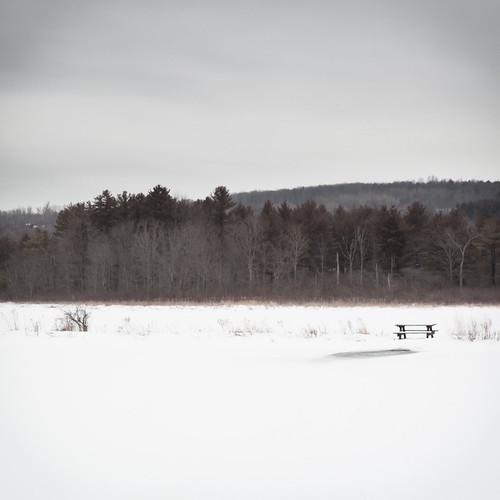
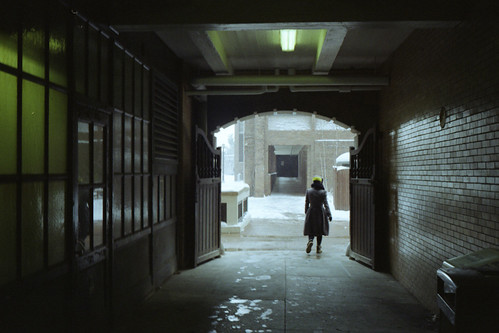
Well, it's been a little over 3 weeks since my last post, and in that time I've taken maybe 10 frames. Not starting the year off well here. I think it's time to man up and start working on my laundromat project, because it's far too cold to do much of anything outside at the moment. I do plan on getting out for some more winter stuff, but when it's 15 degrees (F) and gray like it is here today it's hard to get motivated...
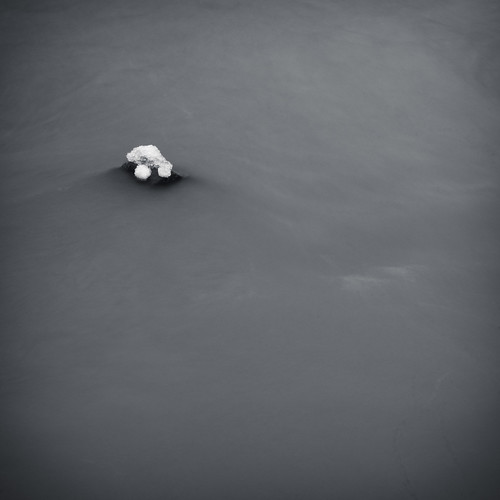
This week's tip is partially a reminder to myself as well as some advice for anyone else going through the winter blahs right now: It's ok to take bad photos. Not every frame you take is going to be a work of Art. Just the act of picking up a camera and making yourself point it at something and press the shutter can begin to rekindle the creative process, and you may end up with something you like by the end of it. And if you don't, no big loss, just format your card and try again next time. This is where having a project can help - you already did your creative thinking and just have to execute on a theme. It doesn't have to be a large project, either. Something like the classic "lock yourself in a room and take 50 different photos" exercise is perfect for a cold winter day when you're looking for things to shoot.
So that's it, just a quick tip this week. Trying to get back in the saddle with photography and blogging. What do you do when you're in a bit of a funk? Would love to hear about it in the comments.
~S
[title of blog] on flickr
© 2011 Simon Hucko
In keeping with my goal to shoot more film this year, I used some Christmas money to buy a Canonet QL17 G-III rangefinder. The Canonet falls into the category of compact 35mm rangefinders which were popular during the 70's. Most of these cameras can be found on eBay for around $40. Beware that at that price you may have to do some maintenance to the camera (especially changing old light seals and cleaning the rangefinder). Not terribly difficult, but if you don't trust yourself you can pay more for a CLA'd model that should work great for you. (CLA = Clean Lubricate and Adjust, standard parlance for a camera tune-up.) After some research on the different cameras available, I settled on the Canonet as the best bang for the buck.
So why a rangefinder? The main reason is that I was curious. There's a lot of talk about rangefinders, especially in the street photography crowd (Leica being the ultimate "street" camera), so I wanted to give it a try and see how they differed from a SLR. I figured it would be a good fit for my laundromat documentary project, as that will probably have a bit of a "street" vibe to it. Another big reason I got the Canonet is the compact size and all-mechanical operation. This will be a very easy camera to carry around anywhere, and the nice fast 40mm f/1.7 lens means it will be great for indoor gatherings (parties, family dinners, nights out at the bar). The Canonet is basically my 35mm point n shoot - while I do have to make a few decisions and focus manually, it's quite quick and easy to operate and should hold up better than the plastic pieces of crap that litter Goodwill sales bins all across the country.
Last week I loaded a test roll of Kodak Gold 200 into it and blew through 24 frames during a walk around campus. While using the camera and after seeing the results, I realized that there was going to be a bit of a learning curve for me. Rangefinder focusing isn't intuitive for me yet, so it would take me a second to process what I was looking at and focus. That should get better with a little practice. The lens is also fairly wide (40mm), and after looking through my photos I realized that I wasn't nearly close enough when trying to photograph people. This should be easier when shooting friends and family, but it's something I will have to come to terms with if I want to shoot strangers. It was also a weird experience to be so disconnected from the lens, and I found that my framing suffered several times because of it. Finally, scanning 35mm film (especially color) is not so easy. I had a hard time getting good color from my scans, and the sharpness and detail of the scan sucked. Scanning is something I have very little experience with, so I have a long way to go there.
My next roll through the Canonet will be black and white. Looking forward to processing that myself. Hopefully the scanning will go better, too. I'll try to document the process and write about it here.
I found this video that talks a bit about rangefinders and simulates focusing with one. The guy even has a Canonet. It's a little weird, especially toward the end, but it should give you an idea of what handling and using one of these cameras is like.
~S
[title of blog] on flickr
Now that the 52 weeks project is finished, I thought I'd share a few thoughts on how it all went and pick a few of my favorite submissions from our top contributers.
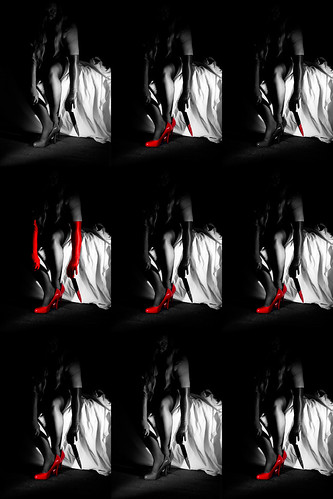
Big props to irv_b for his 41 photos, earning him the #2 spot behind me. Irv didn't start his project until February, so it looks like he'll make it to 52 on his own. One of my favorites from him was "femme mosaic," a pop-art style collage:
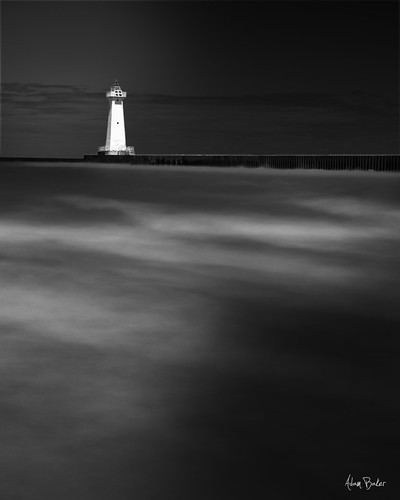
Coming in 3rd for number of submissions was [Adam_Baker]. Even though he may not have always submitted on time, I always enjoy Adam's photography. If I had to pick a favorite, it would be "Outer Light":
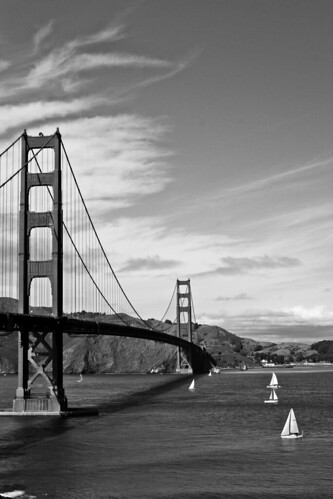
Next up is chofler. Catherine shared a lot of great food shots, but I think my favorite from her was "Golden Gate":
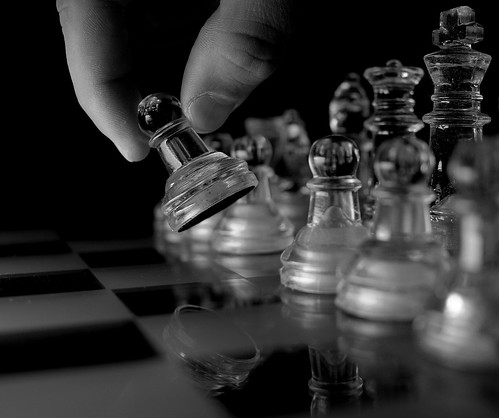
Finally, rounding out the top 5 is q-pix. Andrew had a lot of great photos, with plenty of black and white. My pick from him is "Chess":
Just realized all my picks were black and white, but hey, them's the breaks. Thanks to everyone who participated this year, I hope it helped you grow your photography even a tiny bit, or at least to meet some new photographers whose work you enjoy.
~S
[title of blog] on flickr

© 2011 Simon Hucko
Week 52 is here at last! I actually managed a semi-decent photo this week, too, and on time. Good way to end the series.
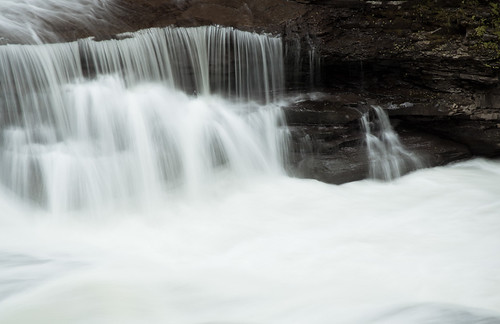
I was inspired by all the wonderful holiday photos last week, so I took this (rather unoriginal) photo of our Christmas tree. I liked the relationship of the ornaments to one-another, and the feeling of depth in the photo. It always feels nice to put the 50 on the camera, a very different mindset from the "frame it with the zoom and blast away" that I get with my kit lens. Not that I don't like my zoom, I've made some great shots with it, but the 50 just has so much more character. I've been jonesing for something a little wider, too, perhaps a 35 f/2 is in my future at some point...
My pick this week is "Amplitude" by [Adam_Baker]:
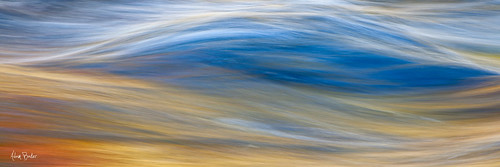
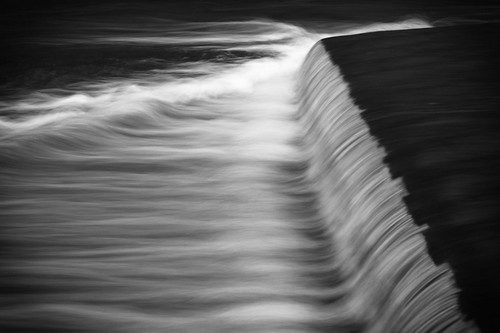
It's a bit of a cheat, considering this was taken in October, but I think it's a nice way to start the new year. Click through the photo for Adam's description and a link to "theft size," where you can really see the textures and different colors coming together. A 1/4 second shutter leaves some great texture in the water, similar to my triangle photo. I'm definitely going to play more with those middle shutter speeds this year, as they can give some very interesting results. Thanks for sharing this with us, Adam.
So that's it! 52 weeks! Amazing how time flies. We've had some great photos this year, so next week I'll do a wrapup for the year and pull a few of my favorites. As I said in my resolutions post yesterday, I'm not doing another 52 weeks project this year. I'll probably leave the group open and running if you guys are interested in continuing (or if you know people who want to do a project). If someone wants to step up as a leader I'd be happy to give them moderator rights to the group, and as always anyone is free to post on the discussion board there. I'm glad I did the project, but I'm looking forward to taking my photography in a different direction this year. Thanks to everyone who participated.
~S
[title of blog] on flickr
![[title of blog]](https://blogger.googleusercontent.com/img/b/R29vZ2xl/AVvXsEhJ8bvx_9_zOAREbXcrJRML7aVvJMbb90IYYYuyti384jeZHYQ9t8MK6_Kpt_1P4-pZw-QfF9kh4Sqci0vbopzLme862PPhuyPJcc7pRLUW1K1aNzts5YzuXIhgonq66MpjJCqfiWtfwUw/s1600-r/waterfall.png)