skip to main |
skip to sidebar
© 2011 Simon Hucko
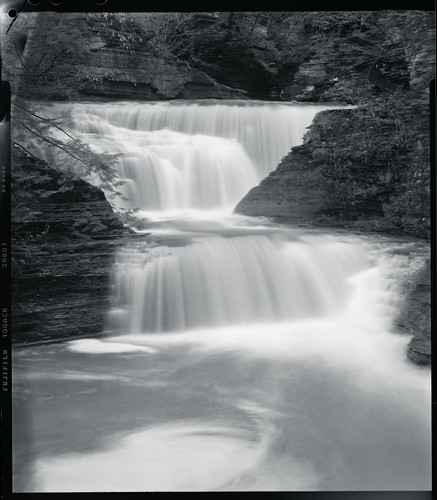
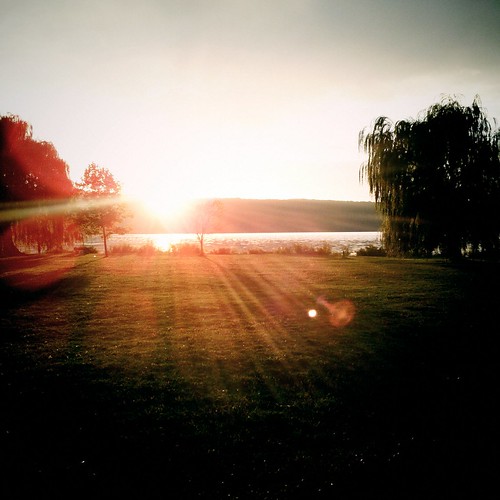
So, after much talk, planning, gear acquisition, changing bag panic, back strain, missed exposures, a broken tripod and a botched night of developing, I finally have an image to share with you guys from the 4x5. I'm not particularly thrilled with it, but it was the best of the 4 sheets I shot, and I felt like I owed you guys *something* after all the build-up.
Long story short, 4x5 is hard. There are a lot of ways to screw things up, and I managed several of them. But, learning is part of the fun (and the reason I rushed out to shoot a few sheets in less than ideal conditions), and I'm excited to keep trying and get a handle on the process. Once I'm finally competent, the payoff will be amazing. As badly as these shots came out, the level of detail I was able to get in some of the images was stunning. I still have to work out my exposure and development (something I've been struggling with all along this film journey), but once it gets there I expect to make some of my all-time favorite images with this camera.
Unfortunately, I broke my tripod on day 2 of shooting with the beast, so no more photos from it for a while. Double unfortunately, it's prime waterfall season and I'm stuck here without any tripod, so I have to rectify that asap. That seems to be the way of things, though.
Once I have a more solid and reliable workflow in place I'll do a post about the process beginning to end. For now, enjoy my blurry, scratched, low-contrast shot above. Certainly more to come in the future.
~S
[title of blog] on flickr
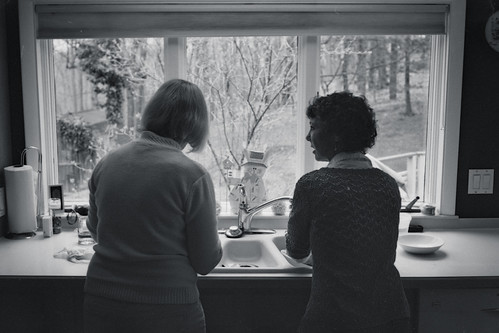
One of the few shots that turned out. © 2011 Simon Hucko
Just a quick PSA: if you buy an old film camera with a built in meter, always always check the meter before shooting a whole roll with it, or at least shoot a test roll first of unimportant stuff before shooting something you'll want images from.
I made that mistake last weekend and shot most of a roll on Easter relying on my Canonet's meter. I wasn't paying much attention to what aperture the camera was selecting (it's a shutter priority auto kind of thing), and it's hard to judge light levels indoors anyway, so I wasn't too concerned. A few days later I went for a walk to finish off the roll and realized that the meter was way off. Like 2+ stops off, judging by sunny 16. I knew right then and there that I probably ruined all my Easter photos.
After finishing the roll I did the best I could to salvage the images. I stand developed the negs in Rodinal 1:100 for 90 minutes, which is recommended for a 1-2 stop push. As I had feared, most of the negs were extremely thin with no shadow detail. I probably could have extended the development out to 2 hours, but even then I'm not convinced I would have recovered any more in the shadows (at some point the film just isn't sensitized by light and no matter how much development you give it it'll come out blank).
So, if you buy a film camera and plan on using the meter, make sure you test it against another meter or sunny 16 before shooting a roll through it. That way you won't end up with a roll of blank negatives from your next holiday gathering.
~S
[title of blog] on flickr
© 2011 Simon Hucko
Last week I talked about buying a film camera. This week I'm going to talk a bit about the different types of film that are available and how to choose what to shoot. If you're just looking for my recommendations, skip down to the bottom.
Digital camera sensors are designed to respond to light in a flat, uniform way. No matter what ISO you choose, most RAW images look pretty much the same, give or take some noise - linear light response, low contrast, flat colors. This gives you a pretty uniform starting point for post processing, and lets you create the look you want after the fact (punch up the color, convert to black and white, add contrast, desaturate a bit, etc.). You don't really have to think about the final look of a shot when you take it (although you should at least have some idea of where it's going to set the best lighting and exposure), and you can create multiple versions of an image after the fact with different looks.
With film, on the other hand, what film you choose to load into your camera (and how you choose to shoot and develop it) has a big impact on how the final image will look, so you have to give it some thought ahead of time. The biggest difference from shooting digital is that you can't change your ISO on the fly, so you have to choose an ISO and stick to it for the whole roll. Much like with digital shooting, higher ISO films will have a more pronounced grain than "slower" films, and tend to be higher contrast and show less detail. If you plan on shooting handheld in a range of conditions (sunny to indoor), 400 speed is probably a safe bet. If you don't have to worry about low light there are a lot of nice films from 100-200 ISO. If you're shooting a concert at a dimly lit bar, you might have to push your film to 1600 or higher to get usable shots.
Once you have an idea of what conditions you'll be shooting in, your next big decision is color or black and white. There are two types of color film, color negative (also called color print film, C-41 process) and slide film (also called color positive, reversal, transparency, and E6 process). As the names suggest, color negative films give you a negative image that is suitable for traditional optical printing, whereas slide films give you a positive image that can be projected or viewed on a lightbox.
C-41 is the most common type of film, and film and processing is readily available at drug stores and places like Target, Costco, WalMart, etc. Color negative is probably the easiest way to shoot film, since you can drop off a roll for developing and often times get the lab to scan it for you (generally low quality unless you use a professional lab, but good enough for Flickr). If you have a scanner, most labs will do development only if you ask (although you may get some strange looks and questions this way). This is generally much more cost effective and lets you control how your images are scanned (better color and quality), but means more work on your end before you can share your photos. Color negative film also tends to be the most forgiving with exposure, and you can typically miss by a stop or two in either direction and still get a good image. In that sense, color negative film is similar to shooting RAW in digital - you have more dynamic range and wiggle room with your final images. Unlike digital, underexposure of color negative film tends to block up the shadows and gives a purplish color cast to the image, so it's generally better to err on the side of overexposure unless you're looking for that effect.
E6 (slide film) is more specialized and is just about impossible to find in a store. Most slide films range from 50-100 ISO, so they're not practical for indoor or low light shooting without a flash. The dynamic range of slide film is also much smaller than color negative, and because it's a positive process you have to be careful not to blow your highlights (much like with digital), or you lose the information. In this respect, slide films are kind of like the JPEG of the film world. E6 films tend to be very sharp with vivid colors, and are best viewed in person through projection or on a lightbox with a loupe.
You can also process slide film in C-41 chemistry (commonly known as "cross-processing" or "x-pro"), which gives you a negative image on the film. This tends to give higher saturation and color casts, especially when treated as color negative film during scanning or printing. Color negative film comes on an orange backing whereas slide film has a clear base, so scanning on the "color negative" setting adjusts for the orange and will give your cross-processed image a green cast. This is what you'll typically see when looking at cross-processed images, and is what your hipster camera app tries to simulate. You can also scan them as a color positive and invert using Photoshop, which gives a more normal looking image with only slight changes in color and saturation.
Finally, black and white film. There are a lot of different black and white films available, ranging from ISO 25 to ISO 3200. Different black and white films have different grain and tonal range characteristics, generally following the "higher ISO films have larger grain, less fine detail and more contrast" rule. Unlike shooting color, where every film is run through the same chemicals for the same time and temperature, black and white film developing times vary based on what film it is and what developer you're using. This means that if you send your black and white film into a lab, they're going to have to manually process it, which gets very expensive very quickly. Processing black and white at home is easy and pretty inexpensive, so if you're planning on shooting film I highly recommend developing your own black and white a few times just for the experience. (And who knows, you might even like it! I'll write more about home developing in the future.) Whatever you do, *do not* let someone run your black and white film through a C-41 machine, you'll end up getting back blank negatives due to a bleaching step in the process. Skip the drugstore on this one, or you'll be sorry.
Where to buy? Freestyle Photo is my new favorite place for all things film. Sometimes Adorama or B&H have better prices (and shipping from them is much faster since I live on the east coast), but Freestyle definitely has the best selection. I advocate buying fresh film from a retail distributor whenever possible, since it lets retailers and manufacturers know that people are still interested in shooting film. If you really can't afford it or plan on shooting a *huge* amount of film, then buying on eBay is a good way to go. Plenty of professional photographers have freezers full of film that they're looking to get rid of. Look for "cold stored" in the listing - even if the film is expired, if it has been stored in a fridge or freezer it should be ok to use.
I keep saying "freezer" - film is happiest being stored frozen, just make sure you take it out and let it thaw a day or so before loading. Putting it in the fridge is better than nothing, so if you have an old dorm fridge lying around you can divide it between film and beer. I generally zip mine into a plastic bag just to keep it separate from the food, but that's not really necessary. If you have to store it at room temp, find the coolest place possible (preferably in a drawer or cupboard out of the sun). Heat will break down the emulsion on a film, and lead to faded colors, more grain and possibly other signs of damage. C-41 film is especially susceptible to bad storage, so take extra care if you buy expired color film online.
So there ya go, a pretty basic overview of film. There's a lot more to talk about (especially with black and white), so I'll write up more in the future. To close, though, I'm going to give a few recommendations of what film to shoot. I haven't shot with all of these, so some of them are based on what I've seen on Flickr, but they're on my list for the future. (Click on the links to pull up a Flickr search for images tagged with the film name.)
E6: Don't bother, just shoot digital. For serious. (If you can argue with me about why you should shoot E6, you're probably beyond my skill level with this stuff anyway.) If you want to try cross processing, find the cheapest stuff on eBay (probably expired) and use that. No sense paying for good film that you're just going to intentionally mess up.
C-41: I like Kodak Gold (100, 200, 400, it's all good), and that's probably the only "consumer" film that I'd recommend. The new Kodak Portra 400 is supposed to be a fantastic emulsion, and has a huge exposure latitude. Once I burn through the Gold in my freezer, that's probably what I'll switch to for color.
Black and White: It's hard to go wrong with Kodak Tri-X, a classic 400 speed film and a great one to start with when developing your own (very forgiving). Lately I've become enamored with the look of Fuji Neopan 100 Acros, and have a few rolls waiting their turn in the freezer.
I don't have a whole lot of experience with different film stocks, so if you have one that you like please share in the comments. As always, questions or comments are appreciated :)
~S
[title of blog] on flickr

© 2009 Simon Hucko
I keep talking about film here on the blog, and some of you might be interested in taking the plunge but aren't quite sure where to start. I thought I would throw together a few tips and tricks about buying into and starting to shoot film, from the perspective of someone who got started on photography with digital.
If you've never shot a roll of film, I highly recommend getting a 35mm SLR with a built-in meter. This will be the most familiar to you coming from a DSLR. If you're a Nikon shooter, you're in luck - Nikon hasn't changed its lens mount in 65 years or whatever, so you can share lenses between your digital and film body. For an experience almost identical to your DSLR without the image review window, check out something like the F80 (this will even take those G lenses as long as they're full frame). If you want more of a manual camera, the FE or F3 are both great options. It's hard to go wrong with any of the manual bodies, though, and since the F mount hasn't changed you can share lenses with your digital body just fine, as long as they are AI, AI'd, AI-S, AF, AF-D or AF-S and have an aperture ring. For you Canon users, I think any EOS body will work with EF mount glass (including the Rebel line). Canon changed their mount not too long ago, so the older manual Canon bodies won't work with modern lenses. There are two other SLR's I can recommend - the Canon A-1 (FD mount) and the Pentax K-1000 (K mount). Neither one is compatible with modern lenses, but they're both well built manual cameras and are the recommended "first SLR" that I see a lot on the film forums. Since the lenses aren't compatible with modern cameras, they tend to be less expensive, so if you don't already have a large lens collection that might be a good way to get the most bang for your buck.
Once you decide on a camera, you have to figure out where to buy it. Very few 35mm film cameras are still being manufactured new, so you're going to have to dive into the used market. Buying used gear can be a bit tricky, as it's much more of a free-for-all than new in the box equipment from a store. There are three sources I can recommend: KEH, eBay, and Craigslist. Each has their own pros and cons.
KEH.com is the closest to a retail experience that you're going to get with used gear. They have a pretty big selection, and their prices are fixed (no bidding or haggling). All of their gear is inspected and graded before being listed, and from what I've heard they tend to be pretty generous with their grading (ie something listed as "bargain" can actually be in pretty good shape with just a few dings). KEH is definitely the "safe" option, as they know what they're doing and will offer customer support and a return policy that you don't get elsewhere. You do pay a bit of a premium for that, but their prices are pretty fair. You certainly can get stuff for less on eBay or Craigslist, but it's a bit more risky. I always check KEH to get an upper-limit idea of how much to pay for something, even if I'm planning on buying it elsewhere. Think of it as the "blue book" value for used camera equipment.
eBay is probably where most film equipment gets bought and sold. There can be some great deals to be had, but there are also a lot of overinflated prices and bad quality thrown into the mix. "Buy it now" prices are usually a good bit higher than what winning bids go for on the same items, so unless you're all about convenience I would pass on that. Look for good seller ratings and listings with photos of the actual item for sale. Check the description for comments like "film tested, no light leaks, shutter speeds are good," and other wording that shows that the seller has some knowledge of the camera and what condition it's in. "Recently CLA'd" is great, it means that the camera was recently serviced and should be in good operating condition. (CLA stands for Clean, Lubricate and Adjust, and typically involves replacing light seals, making sure that the shutter is accurate, and cleaning any gunk on the camera, especially any optical surfaces.) Watch out for "I don't know anything about cameras" or the wording "as is" - it's not a no go, but usually a bit of a red flag that the seller either hasn't tested the equipment or is trying to hide some defect. Sometimes these turn out to be the best deals, because other buyers get scared off, but there's also a good chance that you're going to purchase an overpriced paperweight. It all depends on how much of a gambler you are. Don't get sucked into bidding wars - set a top price you'd be willing to pay for an item given what it is and what condition it's in, and then walk away. If you're persistent, you will eventually get what you want at a reasonable price. If you're hasty or emotional, you're likely to wind up overpaying for something.
Finally, depending on where you live, Craigslist can be a great source of deals. Craigslist is sort of like fishing - you just have to cast a line out there and see what turns up. It's not the place to go if you're looking for something specific. I recommend adding the photo/video listings to your RSS feed so that you can keep an eye on what's out there. There are typically three types of seller on Craigslist. One is the old photographer who is finally switching to digital or is retiring and wants to sell their film gear. You probably won't get any great deals from them, but they'll know a lot about the condition of their equipment and will likely have a lot of good quality stuff available for sale, including darkroom setups. The next type is the "I bought this camera for a film class a year ago" listing, where the person took a black and white photography class and was required to buy a SLR for it. From what I've seen, they're usually a bit over-optimistic when setting a price ("but I just paid X dollars for it a year ago!"), and the equipment tends to be lower quality (more modern plastic bodies with kit zooms.) You might be able to talk them down on price, but know that this camera probably won't give you that lifetime of use that a metal, more professional SLR will. Third, you have the people who inherited a box of camera stuff and have no idea how much it's worth. Prices from them can be all over the place, but these are usually where the best deals can be had. Listings are usually vague ("I have a box of camera stuff"), so definitely set up a time to look at what they have and talk pricing. It's more effort, but you might be able to get your setup for a steal.
If you get the chance to handle a camera before buying, do a few quick checks to make sure everything works well. Open the back of the camera (typically done by pulling up on the rewind lever) and look at the light seals (foam, felt or string around where the back and the body meet). Run a finger over them - they should have a little give and not flake off all over the place. If they do, you're going to need new light seals (not difficult, but a messy job that will cost you some time and materials). Fire the shutter a few times at different speeds. Of course you can't time them exactly, but 1/125th should be noticeably faster than 1/30th, and you know what 1 second should sound like. Check the meter - point it at something light, then something dark, and make sure it changes. You can reality check it with Sunny 16 if you're outside or near a window. If the battery is dead, check the battery compartment for corrosion (flaky white crystals). If it's there, there's a chance the wiring is fried and the meter won't work even with a fresh battery. Make sure all the mechanicals work smoothly, on both the camera and any lenses. Check the optics for mold - dirt and grime will clean off no problem, but mold can ruin a lens. Little scratches in the coating are ok, but big dings could cause flare. "Pretty" doesn't really matter - as long as the camera is light tight and the mechanics function well a little brassing, scuffing or dents won't hurt anything.
Most SLRs come with a 50mm prime attached, usually in the f/1.4-f/2 range. I recommend sticking with just that lens for a bit as you learn more about the camera and about shooting film in general. If you feel the need to diversify you can add two more inexpensive primes, a 24/28/35mm on the wide end and an 85/105 on the tele end, typically around f/2.8. That triplet of primes (maybe 4, I understand wanting a 24 and a 35 on the wide end) should cover you for just about everything you'll want to shoot. I highly recommend staying away from older zoom lenses, as they tend to be of lower quality (it took a while for the engineering and coating to get to where it is today). It also defeats the purpose of shooting film, IMO - I shoot film to slow down and put more thought and effort into my photos. If I want speed and convenience I'll grab my DSLR.
So there ya have it. I'll write a bit about choosing film in the future. Any questions or comments are always appreciated :)
~S
[title of blog] on flickr
This post stands as my entry for a Nikon F3 giveaway over at Rob Boyer's blog RB|Design. I'm new to Rob's blog, but it seems to be a great resource for Aperture users, and he talks a good bit about film and photography in general, so it was an easy add to my RSS reader.
If you're at all interested in shooting film, I highly recommend entering this contest. It will only take a few minutes, and the prize (a F3 body, possibly with lens) will set you up for shooting 35mm film for the rest of your life, if you so choose. Nikon pro bodies are built like a tank, and the F3 has a reputation for being solid and reliable. It has manual film advance and rewind, which is a large part of the tactile fun when shooting film, and has a built in center-weighted meter for shooting in manual or aperture-priority mode. If you have a Nikon DSLR, you can share lenses between the two bodies (as long as they have an aperture ring on them), meaning you won't have to add the expense and weight of another set of glass. That's the main reason that I'm entering this giveaway - I had a N2000 that let me do the same thing, but that died on me over Christmas.
I'm not usually a Ken Rockwell fan, but he has a good overview of the F3 at his site. Just make sure to take his opinions with a grain of salt, especially if you go digging around to other articles. This one is pretty straightforward without any of the usual KR BS, because it's mostly tech specs.
If you enter and don't win, there are still plenty of easy ways to get into 35mm. I'll have a post up later this week about buying film equipment.
Good luck!
~S
[title of blog] on flickr
© 2011 Simon Hucko
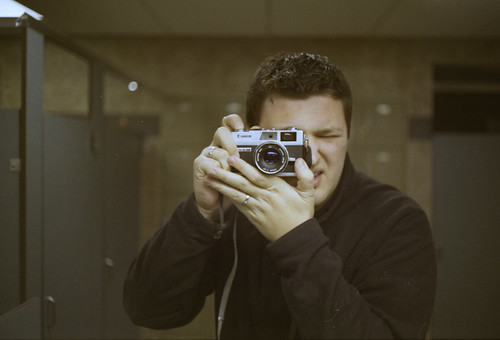
In keeping with my goal to shoot more film this year, I used some Christmas money to buy a Canonet QL17 G-III rangefinder. The Canonet falls into the category of compact 35mm rangefinders which were popular during the 70's. Most of these cameras can be found on eBay for around $40. Beware that at that price you may have to do some maintenance to the camera (especially changing old light seals and cleaning the rangefinder). Not terribly difficult, but if you don't trust yourself you can pay more for a CLA'd model that should work great for you. (CLA = Clean Lubricate and Adjust, standard parlance for a camera tune-up.) After some research on the different cameras available, I settled on the Canonet as the best bang for the buck.
So why a rangefinder? The main reason is that I was curious. There's a lot of talk about rangefinders, especially in the street photography crowd (Leica being the ultimate "street" camera), so I wanted to give it a try and see how they differed from a SLR. I figured it would be a good fit for my laundromat documentary project, as that will probably have a bit of a "street" vibe to it. Another big reason I got the Canonet is the compact size and all-mechanical operation. This will be a very easy camera to carry around anywhere, and the nice fast 40mm f/1.7 lens means it will be great for indoor gatherings (parties, family dinners, nights out at the bar). The Canonet is basically my 35mm point n shoot - while I do have to make a few decisions and focus manually, it's quite quick and easy to operate and should hold up better than the plastic pieces of crap that litter Goodwill sales bins all across the country.
Last week I loaded a test roll of Kodak Gold 200 into it and blew through 24 frames during a walk around campus. While using the camera and after seeing the results, I realized that there was going to be a bit of a learning curve for me. Rangefinder focusing isn't intuitive for me yet, so it would take me a second to process what I was looking at and focus. That should get better with a little practice. The lens is also fairly wide (40mm), and after looking through my photos I realized that I wasn't nearly close enough when trying to photograph people. This should be easier when shooting friends and family, but it's something I will have to come to terms with if I want to shoot strangers. It was also a weird experience to be so disconnected from the lens, and I found that my framing suffered several times because of it. Finally, scanning 35mm film (especially color) is not so easy. I had a hard time getting good color from my scans, and the sharpness and detail of the scan sucked. Scanning is something I have very little experience with, so I have a long way to go there.
My next roll through the Canonet will be black and white. Looking forward to processing that myself. Hopefully the scanning will go better, too. I'll try to document the process and write about it here.
I found this video that talks a bit about rangefinders and simulates focusing with one. The guy even has a Canonet. It's a little weird, especially toward the end, but it should give you an idea of what handling and using one of these cameras is like.
~S
[title of blog] on flickr

With the arrival of the new year, I thought I'd lay out some goals for myself for 2011:
First of all, no 52 weeks or 365 projects. The 52 weeks thing went pretty well for me last year, but there were times when I was in a bit of a rut with my photography, and forcing myself to come up with an image every week had more of a negative effect on my creativity than I thought it would. Rather than set a quantity of photos to take this year, my goal is to improve the quality of my photography. I hope to do this by putting more planning and forethought into my images, looking ahead a few months at a time to decide when and where I want to go shoot. I didn't capture nearly as many fall photos as I had wanted this year, and a big part of that was the lack of planning on my part - the leaves changed, and I went "OMG I have to shoot!" but didn't know where to start.
I would like to start (and hopefully finish) a documentary project that I've been kicking around for about a year now. I plan on going to the local laundromat and photographing/interviewing people there, and hopefully compiling it into a book of some sort. I expect that I'll get some interesting stories and conversations out of it, and hopefully some good photos to go with it. This also falls into the "get over your fear of photographing strangers" category, I'm hoping that the boredom of waiting for laundry will make people more amenable to me.
I plan on shooting my laundromat project on film, which is another goal for the year. I've been slowly collecting the necessary equipment to develop my own black and white (thanks in large part to my dad giving me his entire darkroom setup), so I plan on doing that somewhat regularly this year. I'm also liberating a 4x5 view camera from my dad's closet, so I'll be learning how to use that. I plan on blogging about the 4x5, and I'll probably do a few posts on shooting and developing your own black and white.
My biggest project this year will be National Photo Essay Month (aka NaPhoEMo) during November. A play on NaNoWriMo, the idea is to do the photographic equivalent of 50,000 words of a novel. Since a picture is worth 1,000 words, that translates into a 50 image photo essay. 50 images is a *lot* for a photo essay, so the scope will have to be large enough to avoid redundancy and filler. I may set myself up for success by cutting that number in half (25 photos), at least for the first year. I'll be blogging more about that and trying to drum up a group of people for the project as it gets closer, so start thinking about a photo project that you've been interested in.
What are your goals for 2011? Do you have any projects in mind? Where do you want your photography to go this year?
~S
[title of blog] on flickr
© 2010 Simon Hucko
Practice makes perfect, and photography is no exception to that rule. One of the best things about the digital photography era is the ability to shoot a nearly unlimited number of photos without worrying about additional cost. Now anyone can burn through 100+ frames experimenting with lighting or a new technique or a different subject, whereas the expense associated with such an exercise 10 years ago limited things like that to film school and driven amateurs with a large slush fund. Not only can you shoot as much as you want, there's no delay between pressing the shutter and seeing the image. No waiting to finish off the roll and sending it off for processing (or spending a few hours in the darkroom yourself developing and printing) to find out that you missed the focus or exposure on an otherwise great shot. This, along with the ease of sharing and getting feedback on your work, makes digital photography an incredible learning tool.
It also makes you sloppy.
It doesn't matter if you get it right the first time. Or the second. Or even the tenth. Just keep plugging away until you get something good enough to rescue in your software editing package of choice. Who cares, it's all free, right? Not exactly. What about the time you spend taking multiple photos of one thing until you get it right? How about the time spent in post processing fixing stuff that you could have gotten in camera. And then there's storage, if you're one of those digital pack rats who can't delete a photo you're going to be snapping up hard drives and bogging down your computer with giant photo libraries.
But there's another hidden cost in there - you stop learning your craft. Why spend time on making the perfect exposure when you can correct for it with a slider in post? If you miss on composition a little you can always crop down on the image. (Hey, 12 million pixels have got to be good for something, right?) Horizon a little crooked? No biggie, just straighten it as you go. And sure, these are just little fixes that take almost no time at your computer, but they add up (especially when you're doing them for those 327 frames you snapped on burst mode). On top of that, you're losing resolution and image quality along the way. It's nice to have these tools available, but you shouldn't be relying on them for every shot.
I think this is why so many photographers who started on digital are "discovering" film (myself included). Suddenly every shutter press costs something (from a few cents to a few dollars depending on the film, format and processing). There's no image review with histogram on the back of the camera, so you have to get exposure right the first time. If you take a shot and then walk a few feet and discover a better angle, you've wasted that first shot. You're stuck with whatever ISO film you have loaded in your camera, so you have to make sure you bring the right stuff for the type of shooting you'll be doing. Every film has its own look, too (especially color film), so that needs to be factored in to your final result. The net effect of this is that shooting film is much more patient and deliberate than shooting digital. That clunk of the shutter is like an emphatic period at the end of a long sentence: film choice, composition, lighting, metering, aperture and shutter speed, focus, timing, shutter. Unless your budget allows for unlimited shots, you'll quickly become more selective about what and how you shoot.
What's my point? If you've never done so, shoot some film. Find an old 35mm film camera on ebay or craigslist for cheap (bonus points if it's all manual) with a 50mm lens. Buy a roll or two of film from somewhere that still carries it (CVS around here happens to have a surprisingly decent supply and they still process in-house). Find a way to meter if your camera doesn't - you can use your DSLR for this, or even sunny 16 (ie the force), and make every single one of those 24/36 frames count. Get some 4x6 proofs printed and see how you did. Scan them and share them here or on Flickr. I bet you'll be back for more. Not only that, but it will change the way you look at digital photography - you will simultaneously be incredibly grateful for the ease and speed, and learn to slow down a little and make your images count more.
Note: Getting addicted to film is a dangerous game. You start with a bargain 35mm camera, and before you know it you're processing large format sheet film in your makeshift darkroom in the basement. Don't say I didn't warn you...
~S
[title of blog] on flickr
© 2009 Simon Hucko
I read a comment in a forum somewhere in the past week that really got me thinking. Unfortunately, I have no idea where I read it so I can't give it proper credit, but it definitely inspired this post. Thanks, anonymous photographer, for your insight.
For Christmas this past year, my dad was able to grab two rolls of Kodachrome for me. I immediately stuck them in the fridge and began plotting what to do with those 72 precious frames. The Photographer (capital P) in me called out for beautifully lit, color rich photos that will fully take advantage of this legendary film. I've been hoarding the shots, and to date have only taken 9 frames or so that I felt were "worthy" of this mighty emulsion.
Then I read something that has completely changed my perspective on what to do with this film. I'm still saving it for special shots, but my definition of special has been tweaked a little. First, some background:
If you're not aware, Kodachome is slide film. Unlike regular film, which produces a negative when developed, slide film gets processed into a positive image. The beauty of this is that the image is entirely self-contained. Anyone, anywhere, any time can pick up a slide and see what was documented there, no computer or fancy equipment necessary (although a loupe is helpful). Combine that with Kodachrome's long lasting dye process, and you have an archival image that will stand the test of time.
Let me put it this way: in 100 years, someone can pull out a box of slides and see grandma and grandpa standing in front of their first house. No hard drives that can't be plugged in, no ancient image formats to decode, just a pure analog image of something that might otherwise be lost forever.
With that in mind, I've decided to re-purpose my Kodachrome into a photographic time capsule. The remaining 63 frames will be of people, places and things that are important to me. Once I get the mounted slides back from the lab, I'm going to sit and write the important who/what/when/where/why on every slide in archival ink, and store them in an appropriate container with a loupe. If I can find a nice enough container, maybe my wife will even let me keep them out on the coffee table ;) I hope to pass these slides on to my children some day, and for them to become a sort of family history from the year 2010 (a very firm deadline, since the only lab that still processes Kodachrome is shutting down the machine at the end of December). It's a somewhat weighty and ambitious plan, but I think it's a good project and a good historical use for my photography. There will be plenty of other opportunities for "pretty shots."
Unfortunately, Kodachrome is pretty much non-existent these days. You might be able to find some for ridiculous prices on ebay still, but I don't recommend it. If you're interested in a project like this, any slide film will do. Modern emulsions and processes don't have the staying power that Kodachome does, but they should last long enough for a few generations to enjoy. You don't even need a fancy camera for it - since your goal is more documentary in nature you don't have to worry about nailing exposure every time or super shallow depth of field. Find a used 35mm point n shoot if you have to and use that. Subject and composition are king, and if you concentrate on that you can't go wrong. Of course, if you have any interest in film, buying a film SLR that will take the same lenses as your DSLR isn't a bad idea... Ebay and Craigslist are great places to snap up old 35mm gear, or you can hit up a few garage/yard/estate sales for a real steal.
If you're just not into film, you can do a similar project with prints. Make sure you get archival quality prints and find a good way to store and present them that will last for a while. A lot of printers now offer special coatings that are supposed to resist fingerprints and extend the life of the image, which might be worth looking into.
So what do you think? Is this a project you're going to do? Or am I just being sentimental and a bit of a film nut? Your thoughts, questions, comments and concerns are always appreciated.
~S
[title of blog] on flickr
© 2009 Simon Hucko
I am a whole-hearted believer in digital photography. It is a wonderful learning tool, and the flexibility and control you have over your images is stunning.
So why on earth have I started shooting film? There are a couple of factors that have motivated me to cross over to the analog side. One of the main ones is simply the fact that I've never really shot film before, aside from the occasional snap on the family point n shoot. I was curious, and wanted to see what it was all about. Another big factor is that my dad used to shoot professionally, and still has all of his darkroom gear (and a bathroom in the basement that could serve nicely as a darkroom). This made it very easy for me to consider developing my own film, since the costs would be limited to film and chemicals.
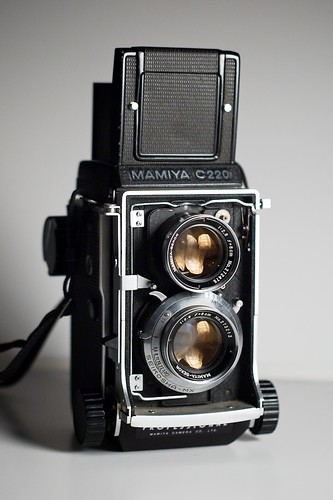
Finally, along came the Mamiya C220 TLR (pictured above) that pushed me over the edge. Cornell University has a photo society, and they have a small repository of gear that you can borrow on a weekly basis. When I saw the TLR on the list, I couldn't help myself, and arranged to borrow it. Luckily for me, there isn't a very high demand for it (since no one here knows how to use it, apparently) so I was told I could hang onto it as long as I wanted, or until someone else put in a request. When I picked up the camera, the guy in charge of the lending said "I have no idea how to use that. Good luck. Just don't break it."
So far it's been quite an experience. The camera is all manual, all mechanical, all the time. No built in meter, no automatic exposure, no batteries, you even have to manually cock the shutter before every photo. I've been metering with my DSLR (either as a spot meter or digital polaroid), and spending plenty of time setting up each photo. The camera uses 120 (medium format) film, and gets 12 shots per roll, so there's no room for sloppy shooting. Each frame costs somewhere in the neighborhood of 50 cents for film and chemicals, not to mention the time involved. To add to the fun, the viewfinder is a mirror image of what's in front of the lens, so it takes some getting used to. There are also parallax and bellows effects that come into play when focusing on anything closer than 15 feet or so, so you have to adjust your framing and exposure to counteract these. And of course, there's no display on the back that pops up the image review and histogram each time you press the shutter. You get to find out after you finish the roll and develop it whether or not you got the shot.
All of that adds up to being much more deliberate about taking a photo. I find a subject. I scout out the angles and lighting to find the framing I want. I meter the scene. I set the exposure on the camera. I spend time framing the shot, fighting with the reversed viewfinder and the lack of zoom. Finally, I take a deep breath and press the shutter. *Click* I say a silent prayer that it turns out ok, and move on to my next subject. Rinse. Repeat.
I find this process to be very satisfying. A lot more thinking goes into each frame than when shooting digital, and pressing the shutter has a feeling of finality to it (like an emphatic period at the end of a long sentence). Then the excitement and anticipation begins wondering how the roll will turn out.
Which is where I will end this article. I developed two rolls this past weekend, but more on that later along with some sample images (still working out how I'm going to get those). In the mean time, turn off your image review and shoot on manual for a day or two, see how it turns out :)
~S
[title of blog] on flickr
![[title of blog]](https://blogger.googleusercontent.com/img/b/R29vZ2xl/AVvXsEhJ8bvx_9_zOAREbXcrJRML7aVvJMbb90IYYYuyti384jeZHYQ9t8MK6_Kpt_1P4-pZw-QfF9kh4Sqci0vbopzLme862PPhuyPJcc7pRLUW1K1aNzts5YzuXIhgonq66MpjJCqfiWtfwUw/s1600-r/waterfall.png)


