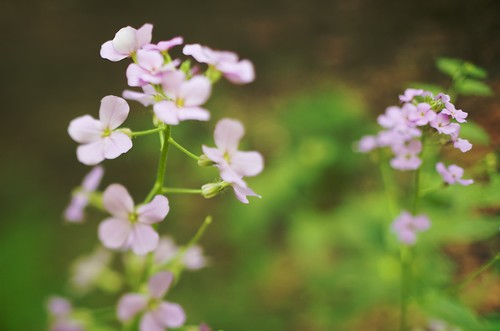
© 2010 Simon Hucko
I first became aware of freelensing a few months back when photojojo published an article about it. It seemed pretty cool, and in the wake of all the tilt-shift photos online (especially the time lapse stuff) I thought I'd give it a try. Unfortunately, I just wasn't able to get images that I was happy with. Last week, photographer friend Tim Ho posted a shot that renewed my interest in freelensing. (side note: if you've never seen his work I highly recommend checking out Tim's photostream. He's got a great eye, especially for color, and is becoming quite an accomplished strobist.)
OK, back it up a bit. What is freelensing? Freelensing is the art of shooting through a lens that isn't attached to your camera. The main reasons to freelens are to create a tilt-shift look with your photos, or to get closer focusing for macro shots. The latter is the same as using an extension tube or bellows, it allows you to get closer to the subject resulting in a larger image on the sensor. The tilt-shift goodness is really what I was after, and considering a tilt-shift lens costs mega bucks, doing it for free seemed like a pretty sweet deal. After doing a little reading, I realized that my earlier failures were due entirely to user error (of course). The key to freelensing is to focus your lens to infinity and keep it *as close as possible* to the camera. In other words, put the lens on the camera like you were going to mount it, but don't twist it in to lock it. Then ever so slightly begin tilting the lens and watch the plane of focus move around. Once you get an image you're happy with, shoot, rinse, repeat.
A few caveats:
1. Your lens is not attached to your camera. This can result in damage to your lens, the mirror, or the sensor, and will probably attract a bit of dust into the camera body. Do this at your own risk.
2. If your lens has an aperture ring, you're all set. If you shoot Canon, stop your lens to the aperture you want by holding down the DOF preview button while removing your lens. If you shoot Nikon, you're going to have to physically hold open the aperture lever on the back of your lens. A small piece of folded up paper, a broken up match stick, or even blue sticky-tack can be used. Be extremely careful when messing around with your lens. Again, this isn't the safest thing in the world...
3. Exposure is going to be all manual, all the time. Your histogram is invaluable for this sort of thing. Learn to love it.
4. Getting what you want in focus is rather difficult at first. Take plenty of shots, and be patient with it. You can even mount your camera to a tripod, making it easier to manipulate the lens without throwing everything off.
5. Longer lenses work better, apparently. Don't ask me why. My 50mm worked really well for this (especially because it has an aperture ring), so that would be my recommendation.
That's about all I can think of. It's another fun little "trick" that can give you some interesting results. I highly recommend playing around with it a bit (as long as you aren't squeamish about shooting with a detached lens), see what you get. Feel free to share your results here or in the [tob] flickr group.
For more discussion on freelensing and some awesome photos, check out the freelensing group on flickr.
~S
[title of blog] on flickr
![[title of blog]](https://blogger.googleusercontent.com/img/b/R29vZ2xl/AVvXsEhJ8bvx_9_zOAREbXcrJRML7aVvJMbb90IYYYuyti384jeZHYQ9t8MK6_Kpt_1P4-pZw-QfF9kh4Sqci0vbopzLme862PPhuyPJcc7pRLUW1K1aNzts5YzuXIhgonq66MpjJCqfiWtfwUw/s1600-r/waterfall.png)


No comments:
Post a Comment