skip to main |
skip to sidebar
I had the opportunity to make a few photo-related purchases for my birthday recently. Something that I've had my eye on for a while is a Lensbaby. Rather than drop $200+ on one of the new ones that I may end up not liking and never using, I opted for a used copy of the last generation of Lensbaby (Lensbaby 2.0). It's basically a Lensbaby Muse with a double glass optic built in, which I figured was a good (and inexpensive) way to get started with the whole Lensbaby thing.
First off, I will say there is a bit of a learning curve. From a technical standpoint, all Lensbabies are manual exposure only, so if you're not comfortable with that you may want to steer clear (the point is to be inspired, not frustrated). Focusing accurately can also be a little tough, and I wound up shooting multiples of most subjects until I got what I was after (image review is helpful for this). From a creative standpoint, there are certain shots and effects that work better than others with this lens, so it takes a bit to get a handle on how to best use it. Of course, there's no *wrong* way to use it (that's kinda the point), but certain looks were more appealing to me than others.
Rather than give a technical review, I'm going to go through a series of shots I took showing the different looks I was able to get from the lens, and you can draw your own conclusions from that. I think that's more meaningful, anyway.
The classic Lensbaby look:
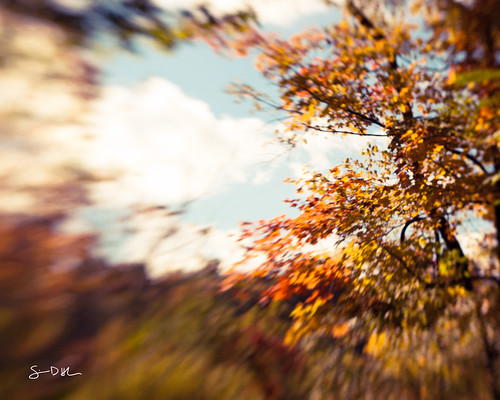
Focus in one part of the frame, everything else is blurring away from it. Because the blur is directional it takes on more of a zoom quality than an out of focus quality. This can be very effective in putting the emphasis on your subject. It also gets pretty old, pretty quickly (in my opinion, anyway), so I started looking for other ways to use the lens.
Tilt-Shift:
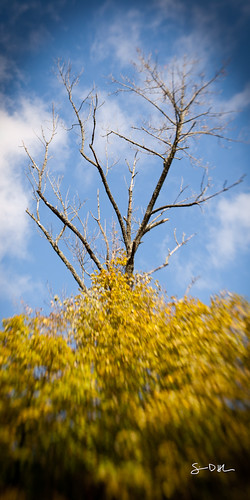
A Lensbaby is a pseudo-tilt/shift lens, but the field curvature of the optics messes with that and gives you a round sweet spot instead of a plane of focus. However, judicious framing and cropping can give you that tilt-shift look at the expense of some pixels. This is something I have to explore more.
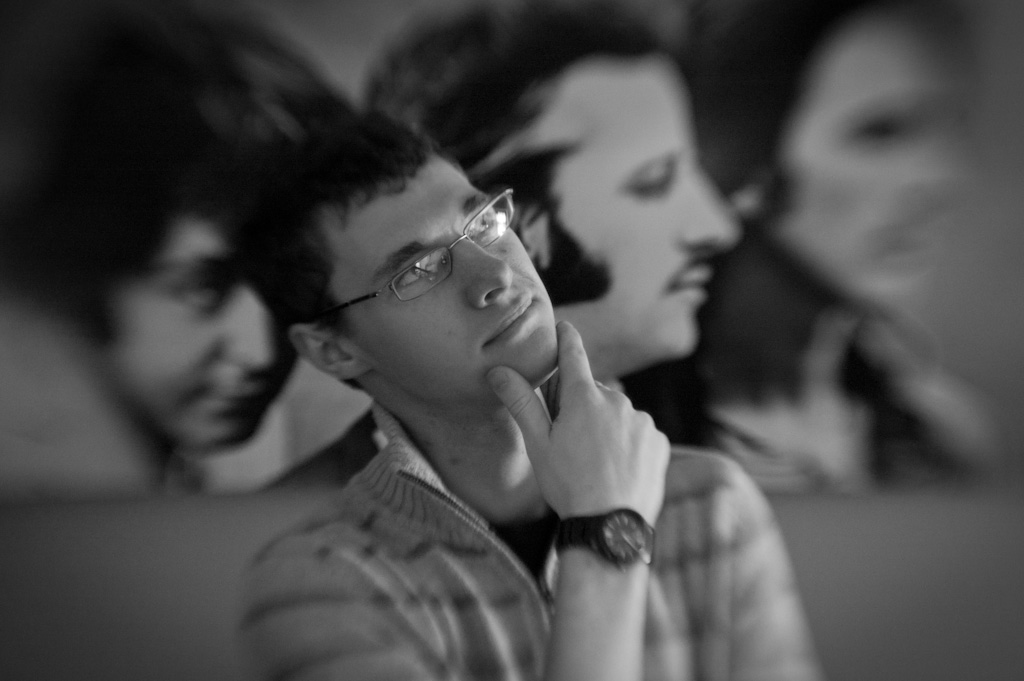
Shallow Depth of Field:
Just glancing at this photo, it looks like a standard shallow depth of field image. Closer inspection of what is and isn't in focus reveals that there is indeed some Lensbaberie going on, but it's a different feel from the standard Lensbaby look. This is entirely composition and subject dependent - you need to find the right situation to make this work.
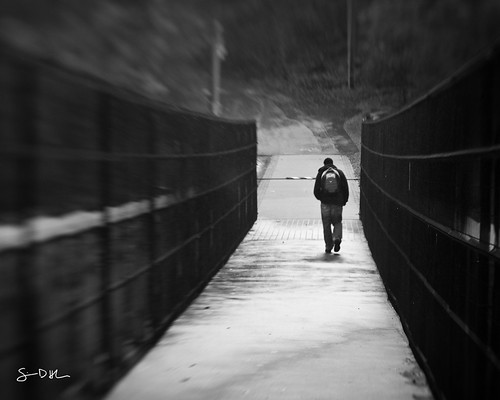
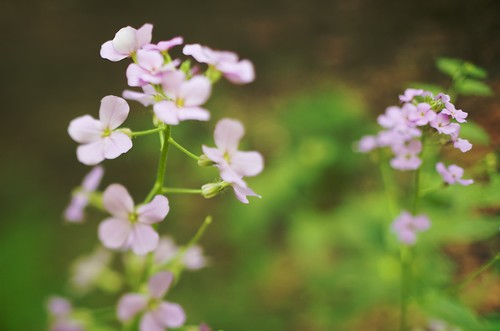
Lomo:
This is the look I see myself using most often - a reasonably sharp center blurring away at the edges. The square crop and vignette complete the illusion, and bingo bango - digital Holga. Seems to work best with mostly flat subjects at far distances.
Portrait:
This lens has some good potential as a portrait lens. It certainly puts the focus on your subject's face, and leads to a nice blur in the rest of the photo. I don't do a lot of portrait shots, but I'll have to play with this more. Maybe I'll do a family portrait series over the holidays with it. (Maybe.)
Overall I'm pretty happy with my purchase. Like any specialty lens, it's not something I'll use every day, but it's small and light enough to have earned a permanent spot in my bag. I think it will be a great cure for the blahs that settle in from time to time, and just might save my sanity this winter when the world gets gray and ugly. It also will be fun to pull out for some "different" shots at things like weddings, or on vacation at those touresty areas. And if nothing else, it's a good talking piece with other photographers.
~S
[title of blog] on flickr
© 2010 Simon Hucko
I first became aware of freelensing a few months back when photojojo published an article about it. It seemed pretty cool, and in the wake of all the tilt-shift photos online (especially the time lapse stuff) I thought I'd give it a try. Unfortunately, I just wasn't able to get images that I was happy with. Last week, photographer friend Tim Ho posted a shot that renewed my interest in freelensing. (side note: if you've never seen his work I highly recommend checking out Tim's photostream. He's got a great eye, especially for color, and is becoming quite an accomplished strobist.)
OK, back it up a bit. What is freelensing? Freelensing is the art of shooting through a lens that isn't attached to your camera. The main reasons to freelens are to create a tilt-shift look with your photos, or to get closer focusing for macro shots. The latter is the same as using an extension tube or bellows, it allows you to get closer to the subject resulting in a larger image on the sensor. The tilt-shift goodness is really what I was after, and considering a tilt-shift lens costs mega bucks, doing it for free seemed like a pretty sweet deal. After doing a little reading, I realized that my earlier failures were due entirely to user error (of course). The key to freelensing is to focus your lens to infinity and keep it *as close as possible* to the camera. In other words, put the lens on the camera like you were going to mount it, but don't twist it in to lock it. Then ever so slightly begin tilting the lens and watch the plane of focus move around. Once you get an image you're happy with, shoot, rinse, repeat.
A few caveats:
1. Your lens is not attached to your camera. This can result in damage to your lens, the mirror, or the sensor, and will probably attract a bit of dust into the camera body. Do this at your own risk.
2. If your lens has an aperture ring, you're all set. If you shoot Canon, stop your lens to the aperture you want by holding down the DOF preview button while removing your lens. If you shoot Nikon, you're going to have to physically hold open the aperture lever on the back of your lens. A small piece of folded up paper, a broken up match stick, or even blue sticky-tack can be used. Be extremely careful when messing around with your lens. Again, this isn't the safest thing in the world...
3. Exposure is going to be all manual, all the time. Your histogram is invaluable for this sort of thing. Learn to love it.
4. Getting what you want in focus is rather difficult at first. Take plenty of shots, and be patient with it. You can even mount your camera to a tripod, making it easier to manipulate the lens without throwing everything off.
5. Longer lenses work better, apparently. Don't ask me why. My 50mm worked really well for this (especially because it has an aperture ring), so that would be my recommendation.
That's about all I can think of. It's another fun little "trick" that can give you some interesting results. I highly recommend playing around with it a bit (as long as you aren't squeamish about shooting with a detached lens), see what you get. Feel free to share your results here or in the [tob] flickr group.
For more discussion on freelensing and some awesome photos, check out the freelensing group on flickr.
~S
[title of blog] on flickr
© 2009 Simon Hucko
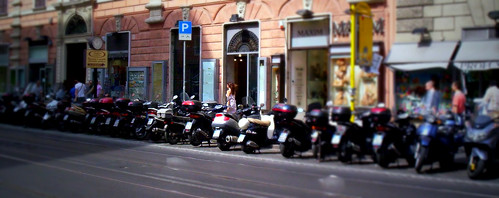
Remember those tilt-shift videos from Keith Loutit that I posted a while back? Tilt-shift lenses have the amazing ability to make scenes look like miniature models by manipulating the depth of field and tricking your brain. It's an awesome effect, but an expensive one to do in camera - most tilt-shift lenses cost around $2000. Yikes.
Fear not, there are plenty of ways to simulate the effect in post. I just tried out an online TiltShift Gadget from artandmobile.com, and have to say I really like the results. Click on my photo above to see it larger. Here's the original below:
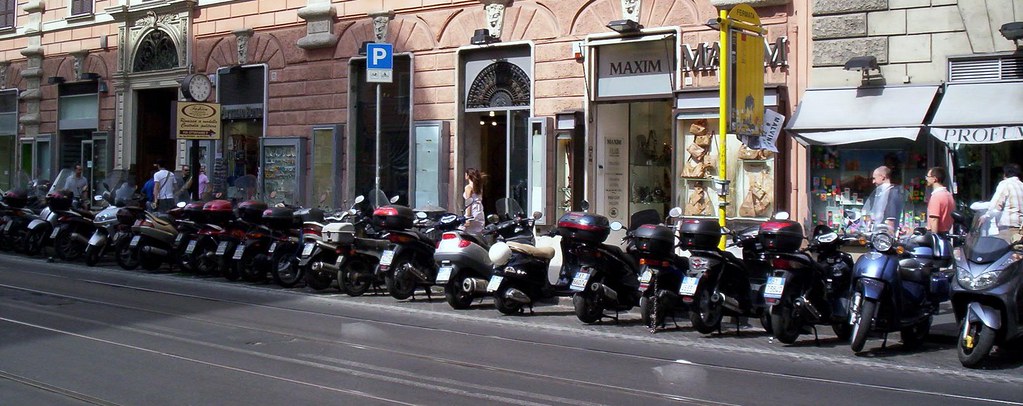
© 2007 Simon Hucko
The applet is designed for web use, so it doesn't play as nicely with images larger than 1600p. You can also download it as a stand-alone app, and install a plugin that supports drag-and-drop.
A fun little tool that's easy to use and definitely worth playing with. Give it a try, and share your results in the comments!
~S
![[title of blog]](https://blogger.googleusercontent.com/img/b/R29vZ2xl/AVvXsEhJ8bvx_9_zOAREbXcrJRML7aVvJMbb90IYYYuyti384jeZHYQ9t8MK6_Kpt_1P4-pZw-QfF9kh4Sqci0vbopzLme862PPhuyPJcc7pRLUW1K1aNzts5YzuXIhgonq66MpjJCqfiWtfwUw/s1600-r/waterfall.png)


