© 2010 Simon Hucko
I finally got out for a walk or two this week with my camera, and grabbed some photos I'm happy with. I've been in a bit of a rut lately for whatever reason, so it was nice to finally get some decent shots.
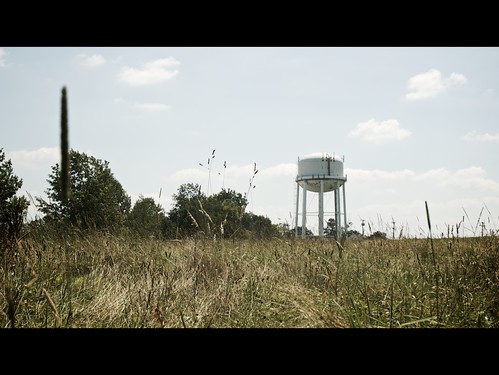
I also decided to try something new when processing these photos. I've been having fun mutilating photos taken with my phone camera, and thought I'd start being more aggressive with editing photos on my computer. I wanted to go for a "summery" look, given the heat lately and the bit of haze on the days I was shooting.
The first step was to warm the photos up a bit by changing the white balance, 'cause hey, summer is warm, right? I did this in post (one of the best parts of shooting RAW), but you could even do it in camera by selecting the "cloudy" or "shade" white balance option. I then knocked the saturation down to about 70%. This gives it a slightly washed-out look, which you experience in real life on those humid hazy days. You may have to go a bit farther, my starting point is already a little muted due to the RAW processing. I bumped the contrast a bit and added sharpening as part of my normal RAW workflow. The end result has a sort of washed-out film look to it that just says "summer" to me.
In the spirit of continuing to expand my processing prowess, I plan on trying out a few more looks and posting how I did it. I'm also going to try to explain why I did it. I think the motivation behind processing is important. If you're just applying some photoshop plugin because you think it looks cool and can't relate it back to the image, it doesn't really advance your art.
So what do you think? Did I get the "summer" look right? Any other looks you've seen and want me to take on? Comment!
~S
[title of blog] on flickr
![[title of blog]](https://blogger.googleusercontent.com/img/b/R29vZ2xl/AVvXsEhJ8bvx_9_zOAREbXcrJRML7aVvJMbb90IYYYuyti384jeZHYQ9t8MK6_Kpt_1P4-pZw-QfF9kh4Sqci0vbopzLme862PPhuyPJcc7pRLUW1K1aNzts5YzuXIhgonq66MpjJCqfiWtfwUw/s1600-r/waterfall.png)


No comments:
Post a Comment