![[title of blog]](https://blogger.googleusercontent.com/img/b/R29vZ2xl/AVvXsEhJ8bvx_9_zOAREbXcrJRML7aVvJMbb90IYYYuyti384jeZHYQ9t8MK6_Kpt_1P4-pZw-QfF9kh4Sqci0vbopzLme862PPhuyPJcc7pRLUW1K1aNzts5YzuXIhgonq66MpjJCqfiWtfwUw/s1600-r/waterfall.png)
© 2010 Simon Hucko. All rights reserved. Please DO NOT use without permission
Last time I talked about some of the technical aspects for shooting live performances. One thing I forgot to mention was what white balance setting to use. Most stage lights are bigger badder versions of standard light bulbs, so set your white balance to tungsten to accurately capture the colors that the lighting designer wanted to share. One exception to this is if a show is lit mostly with modern "smart lights" (sort of a projector on steroids), which I think are LED based. In that case, daylight white balance will give you a better starting point. You may have to tweak a little in post (not a problem 'cause you're shooting RAW, right?), but don't go too far or you'll ruin the ambiance.
Today I'll go into more of the process involved and how to get the shots you want:
If you have a fast zoom, set yourself somewhere that you can cover the whole stage at the wide end and get a 3/4 or tighter shot at the long end. If you don't have that kind of range (especially if you're relying on your fast prime), get ready to do some running. Sneaker zoom is invaluable. If the stage is raised, locate a sturdy chair you can stand on so that you can get to eye level or just below for the close up shots. For wider shots, back up. You'll do some shuffling back and forth and you might feel a little foolish, but the results are worth it. If you don't have a fast lens and are using a slower variable aperture zoom (ie your kit lens), you may need a tripod to combat camera shake. You're still going to want to be somewhat mobile so you can change your angle to get the shot you want, otherwise all of your photos will be taken from the same spot, which is boring.
If you're using a slow lens you're also going to have to worry about subject motion blur. Even if you put your camera on a tripod or have some sort of image stabilization (VR, IS, OS, etc), a slow shutter won't freeze the movement on stage. This means you're going to have to get good at catching your subjects when they pose. Even if they're constantly moving (dancing, pacing, gesturing, etc), there is a moment at the peak of every motion where they freeze. After watching the performers for a bit, you'll start to get a feel for their usual gestures and poses and be ready to capture them. Motion blur can be used as a creative tool to capture movement on stage, but it only works in certain instances. You won't be able to explain away an entire show's worth of blurry photos by claiming it was a creative decision ;)
Something that will help you capture the right moment is shooting in short bursts (2-3 frames). People like to blink or make weird transitional faces when they talk and sing, which you don't notice live but will look ridiculous frozen in a photo. Give yourself some insurance by shooting short bursts for each pose, increasing the odds that you'll get a normal looking shot. This is especially important if you're running into slow shutter speeds - typically shooting bursts will result in one image that's sharper than the others. This will increase the number of photos you take total, so make sure you have plenty of memory card space. Once you get the photos back on your computer, you can compare the shots from each burst and delete all but the best one.
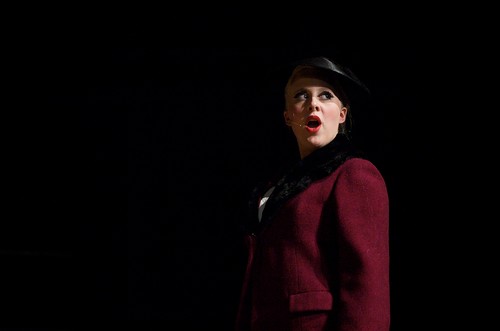
Like I said before, you're going to want to move around some to get different vantage points. This is especially true for the close up shots - part of the appeal of photos from a live event is that they get up close and personal with the performers, a view that the audience typically doesn't see. Be aware of what's in the background. If you're at a rehearsal, chances are good that the set is unfinished. One way to deal with this is to angle your shots so that the teasers (black side curtains) or the unlit sides of the stage become your background. This gives you a nice clean background and puts all of the focus on the performer (today's photo and the one from my last post are a good example of this).
Try not to get tunnel vision through the lens. Keep an eye out for what's happening on the rest of the stage and look for photo worthy moments to develop. Seek out "stage pictures" - good choreographers and directors will set up very nice little vignettes for you to capture. If possible, try to shoot more than one performance. The first time through you're going to miss a lot of shots because you're unfamiliar with how things go. The next time you'll be much better prepared to get into the right position to capture the moments and angles you want.
Finally, after sorting and editing the photos, make sure you share the good ones with the performers and the producer(s). Performers always love seeing pictures of themselves on stage, and if you schmooze with the producer you might be able to line up a paid job shooting some promo pictures and/or headshots the next time around.
Hope this was interesting for at least some of you. I promise I'll get that histogram post going sometime in the next week or two, if you're still confused about that. As always, any comments or questions are appreciated and encouraged.
~S
[title of blog] on flickr


No comments:
Post a Comment