![[title of blog]](https://blogger.googleusercontent.com/img/b/R29vZ2xl/AVvXsEhJ8bvx_9_zOAREbXcrJRML7aVvJMbb90IYYYuyti384jeZHYQ9t8MK6_Kpt_1P4-pZw-QfF9kh4Sqci0vbopzLme862PPhuyPJcc7pRLUW1K1aNzts5YzuXIhgonq66MpjJCqfiWtfwUw/s1600-r/waterfall.png)
© 2009 Simon Hucko
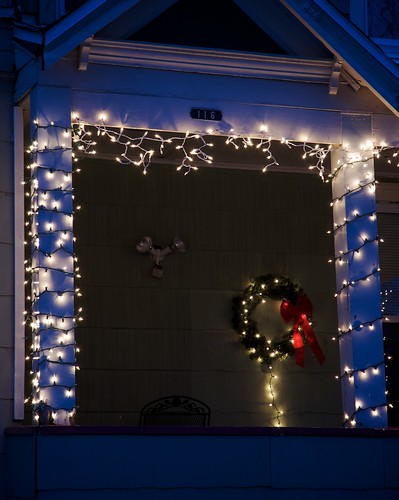
With the holiday season upon us, homes, stores, and even entire towns/cities are getting dressed up with lights. However, if you've gone and tried to take pictures of the lights before, you've probably been disappointed with how they turned out - bright blown out lights on an almost black background, possibly with some snow in the foreground if your flash fired.
Well, I'll let you in on the secret to getting good photos of Christmas (or any other) lights - don't wait until it's dark! It seems a bit counter-intuitive, why would you want to photograph lights when it's still light out? The key here is balance. Unlike your eyes/brain, your camera can only make sense out of a relatively narrow range of light. In order to get the most out of a photo, you want to make sure that every detail in that image falls within that range. Otherwise you end up with something like this:
[[Ok, so I wasn't able to do this properly, and don't have a "bad example" shot for you. But I trust you know what I'm talking about...]]
Blown out lights, dark black everything else. Not very pretty. Here's what you need to know:
- Get there early. Scout out a location, and get there around sunset. Make sure the lights will be on this early (if you know the people who own them or if they're yours, it shouldn't be too hard getting them to flip the switch a little early one night).
- Plop down your tripod and frame your shot. Try to get some sky in you photo for maximal effect. See if you can include some sort of reflection (ice, shop window, whatever) or other point of interest (wintry goodness, cars rolling down the street, etc). Not required of course, but could be cool.
- Set your white balance to tungsten... probably. Christmas lights (the old kind) will balance out perfectly to this and it'll give you a nice rich blue sky. The new LED lights could be more blue, so be aware of that. You may want to keep your white balance at daylight in that situation.
- Shoot and chimp! I know, we usually don't encourage this sort of behavior around here, but this is really the only way to go. When you first start off it will probably be too light out, and the lights will look pretty dull compared with the sky. As the light fades, however, you'll come to that magic point where everything starts to balance and the lights really start to pop against their surroundings. This is when you want to start shooting seriously, especially if you have moving elements in your frame to worry about (cars, people, and whatnot). Pretty soon, you'll notice your sky fade away and your photos start returning to the ugly blackness of before. That's it, show's over, time to go home and have some
That's all, folks. No fancy settings or gear required, just get out there at the right time of day and shoot away. So now not only will your Christmas decorations be better than your neighbor's, but your photos of them will be, too :)
~S
[title of blog] on flickr


OK, I feel dumb because I never thought of this myself, but as soon as I read it, I was like, OMG DUH!
ReplyDeleteThanks!
How does one "shoot and chimp"? Do I need a monkey to do this?
ReplyDelete@ Kristan - yep, first time I heard this I had one of those "duh" moments, too.
ReplyDelete@ Dan - chimping (wikipedia.org).
No primates necessary