![[title of blog]](https://blogger.googleusercontent.com/img/b/R29vZ2xl/AVvXsEhJ8bvx_9_zOAREbXcrJRML7aVvJMbb90IYYYuyti384jeZHYQ9t8MK6_Kpt_1P4-pZw-QfF9kh4Sqci0vbopzLme862PPhuyPJcc7pRLUW1K1aNzts5YzuXIhgonq66MpjJCqfiWtfwUw/s1600-r/waterfall.png)
© 2009 Simon Hucko
I've been shooting in RAW now for almost a month, and I thought I'd offer my observations on the differences between RAW and JPEG, and how it has affected my photography.
For those who don't know, some higher end point n shoot cameras and all DSLR cameras have the option of storing RAW files along with/instead of JPEG. A RAW file is a collection of unprocessed data from the camera's sensor. It is NOT an image file, and needs to be decoded in order to produce an image on the computer screen. In order to do this, you need some sort of RAW developer. There are a full range of these available - each camera company has their own, there are some free programs available (I recommend RawTherapee), and of course the two industry standards Lightroom (Adobe) and Aperture (Apple). My experience has largely been with Aperture, but any true RAW developer that gives you control over how the final image is generated will be similar.
The biggest change for me is in how I expose my images. When shooting .jpg, I would set my review mode to flash highlights that had clipped. I would often have to make a decision on what was more important - saving highlight detail or capturing enough detail in the shadows. I usually let the highlights go, since I only had so much dynamic range to work with and pulling up exposure on a .jpg immediately leads to noise issues. Now, however, my camera review mode is almost always set to display the histogram, and I try to push every image to just touch the right edge. If the dynamic range of the scene is very large, I can still pull up some shadow detail in post, which makes for a more realistic looking image, and I don't have the same noise issues as I would with .jpg.
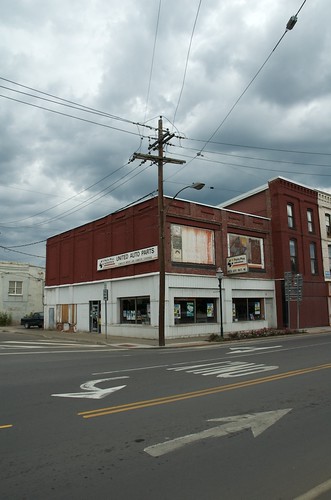
A good example of this was a shot I took while walking around Owego:
© 2009 Simon Hucko
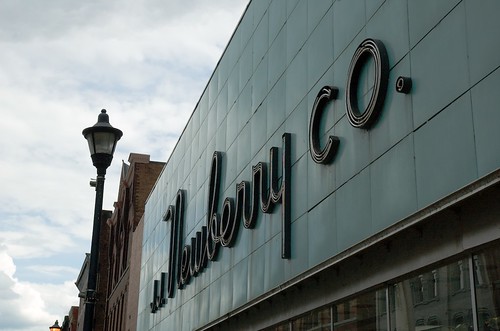
The dynamic range of this scene was pretty high, but I wanted to hold the cloud detail if possible. I was able to push the shadows and get a better exposed store front while still keeping texture in the sky. I also shot a bracketed exposure (3 frames +/- 2 EV) and merged it using a trial copy of the Hydra HDR plugin for Aperture (hence the watermark):
© 2009 Simon Hucko
In comparing the two, there is definitely a better balance in the tone mapped HDR photo, but the single RAW exposure did a pretty good job. I don't have a .jpg capture to compare with, unfortunately, but I can guarantee the shadow detail would have been much noisier.
If you haven't ever shot RAW, give it a try. Try one of the free developers and play around with adjusting exposure, sharpening, noise reduction, color balance, highlight recovery, tone curves, etc. You'll be amazed at how much more you can get out of your images.
~S


No comments:
Post a Comment