skip to main |
skip to sidebar
© 2009 Simon Hucko
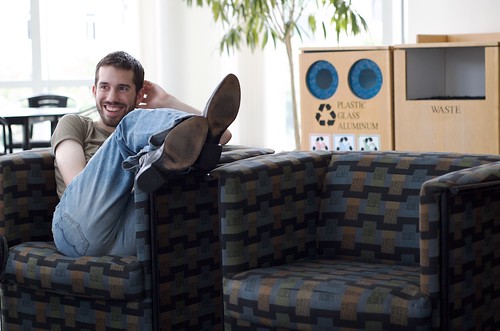
Today's tip relates to my post yesterday about re-setting your camera after a shoot. If you have a shoot planned where you know you're going to need a specific setup, pre-set your camera as close as you can before you go. This will help cut down on time spent changing lenses/dialing-in appropriate settings when you arrive.
For instance, if you're planning on getting up super early the next morning to shoot the sunrise, pull out your camera the night before and set everything to where you're going to want it (tripod plate on, low ISO, wide angle lens, narrow aperture, matrix metering, etc). That way, you won't have to try to set everything in the dark when you're tired.
This is also a good time to check to make sure all of your batteries are charged (including the ones for your flash or any other accessories you have), and that your camera bag is packed with everything you might need. Surprises in your images are good. Surprises in your gear, not so much.
The goal of pre- and re-setting your equipment before/after a shoot is to help prevent your gear from becoming an obstacle to your photography. Spend your time making images, not messing with your camera.
~S
© 2009 Simon Hucko
I'm sure we've all been in this situation before - you pull your camera out and fire off a few shots before realizing that the settings are where you left them from your last shoot, which happened to be something totally different (low light, macro, etc). You may still get some usable images, but they won't be ideal.
The best way I've found to combat that is to have a standard setup for your camera that you revert to every time. In the case of my DSLR, that means the standard zoom on camera, matrix metering selected, ISO 400, Aperture priority mode at f/8, and white balance set to daylight. Do I always shoot with these settings? Nope. In fact, it's pretty rare that I'll shoot with that exact setup. However, this way I always know what to expect and can quickly make the necessary adjustments.
If you get into the habit of resetting your camera after a shoot, you'll be much less likely to leave it in a strange configuration, and will have fewer "d'oh!" moments. This applies to point n shoots just as much, since even the ones without full manual control have a range of settings that you can change.
_____________________________________
In other news, I finally got all of my pictures uploaded from my weekend in Pittsburgh. Check them out here. Comments and feedback (both positive and negative) are always encouraged and appreciated.
~S
© 2009 Simon Hucko
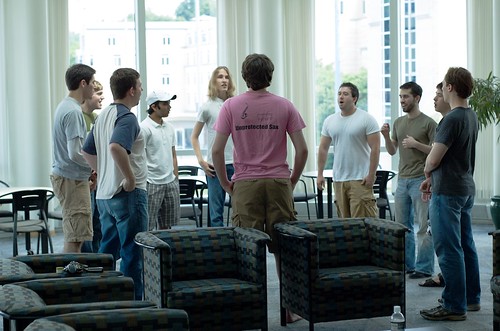
Today's tip is to learn how and when to shoot in manual mode. I usually do most of my shooting in aperture priority mode (A for the Nikonians or Av for you Canonites). This lets me set my aperture and ISO to get the depth of field and image quality that I want, and then let the camera choose an appropriate shutter speed for an accurate exposure. However, there are some situations in which the camera's meter can go haywire and give you bad results, or leave you playing with exposure compensation the entire time (and missing shots because of it).
For the image above, we were rehearsing in a room that was almost surrounded by windows. The light in the room remained fairly constant, but depending on how I framed my shot it could have more or less of the window in it. This would move the meter all over the place, and so even if I dialed in an exposure compensation I would have to be constantly adjusting it. By flipping over to manual and setting a constant exposure, I didn't have to worry about it. Even if the exposure on people fluctuated by 1/2 a stop or so, it wasn't a big deal to fix it in post (since I was shooting RAW).
Another good example is when I photograph school concerts. The stage lights are constant (more or less) through the concert, so I just flip it into manual and find an exposure that I like. In the two examples below, the meter would give very different exposure values for the first shot (sea of white) and the second (very dark). Since I was shooting in manual, I didn't have to worry about it, and the exposure on the skin was the same between the two.


I find myself shooting in manual more and more when I'm in a situation where the light is fairly constant. It actually requires less thinking than letting the camera meter for me, since I don't have to worry about compensating for large amounts of white/black in the frame. It also gives me a nice consistency for the shoot, and I can make batch adjustments for things like exposure and curves.
________________________________
Finally got around to editing some photos from last weekend: Flickr set here.I'm planning on editing the rest of the photos and getting them up tomorrow, so check back again :)
Happy Friday, and enjoy your weekend!
~S
© 2009 Simon Hucko
I've been shooting in RAW now for almost a month, and I thought I'd offer my observations on the differences between RAW and JPEG, and how it has affected my photography.
For those who don't know, some higher end point n shoot cameras and all DSLR cameras have the option of storing RAW files along with/instead of JPEG. A RAW file is a collection of unprocessed data from the camera's sensor. It is NOT an image file, and needs to be decoded in order to produce an image on the computer screen. In order to do this, you need some sort of RAW developer. There are a full range of these available - each camera company has their own, there are some free programs available (I recommend RawTherapee), and of course the two industry standards Lightroom (Adobe) and Aperture (Apple). My experience has largely been with Aperture, but any true RAW developer that gives you control over how the final image is generated will be similar.
The biggest change for me is in how I expose my images. When shooting .jpg, I would set my review mode to flash highlights that had clipped. I would often have to make a decision on what was more important - saving highlight detail or capturing enough detail in the shadows. I usually let the highlights go, since I only had so much dynamic range to work with and pulling up exposure on a .jpg immediately leads to noise issues. Now, however, my camera review mode is almost always set to display the histogram, and I try to push every image to just touch the right edge. If the dynamic range of the scene is very large, I can still pull up some shadow detail in post, which makes for a more realistic looking image, and I don't have the same noise issues as I would with .jpg.
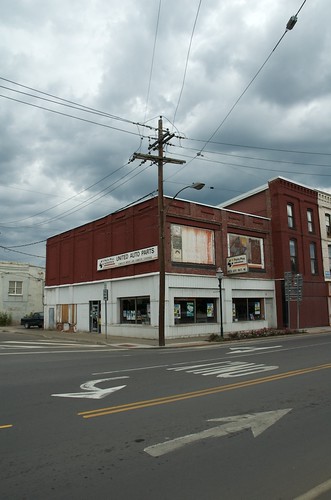
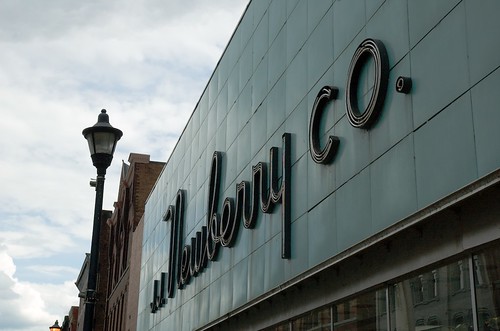
A good example of this was a shot I took while walking around Owego:
© 2009 Simon Hucko
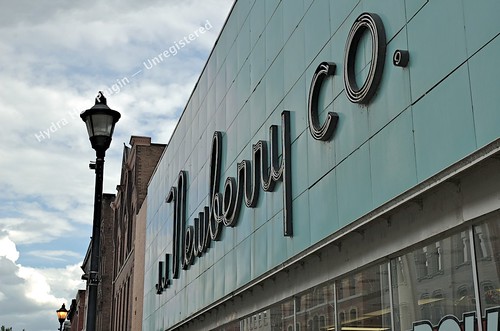
The dynamic range of this scene was pretty high, but I wanted to hold the cloud detail if possible. I was able to push the shadows and get a better exposed store front while still keeping texture in the sky. I also shot a bracketed exposure (3 frames +/- 2 EV) and merged it using a trial copy of the Hydra HDR plugin for Aperture (hence the watermark):
© 2009 Simon Hucko
In comparing the two, there is definitely a better balance in the tone mapped HDR photo, but the single RAW exposure did a pretty good job. I don't have a .jpg capture to compare with, unfortunately, but I can guarantee the shadow detail would have been much noisier.
If you haven't ever shot RAW, give it a try. Try one of the free developers and play around with adjusting exposure, sharpening, noise reduction, color balance, highlight recovery, tone curves, etc. You'll be amazed at how much more you can get out of your images.
~S
© 2009 Simon Hucko
This past weekend I was in Pittsburgh, PA. I got invited to come and sing with my college a cappella group (the Carnegie Mellon Originals) for their performance during the Pittsburgh Symphony Orchestra's pops concert at Heinz Hall. Definitely an awesome, once in a lifetime experience.
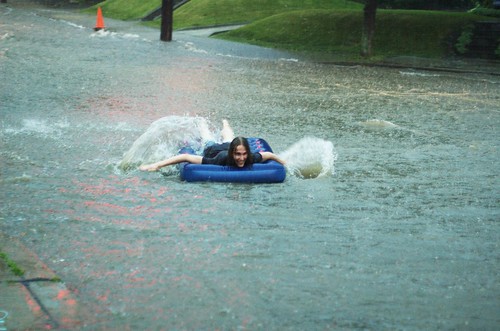
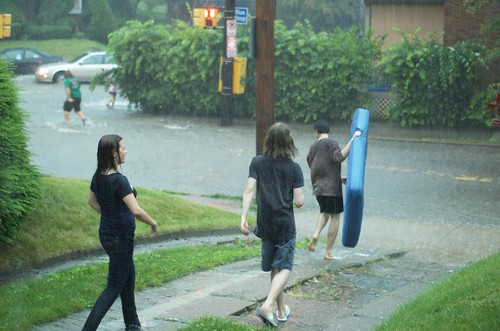
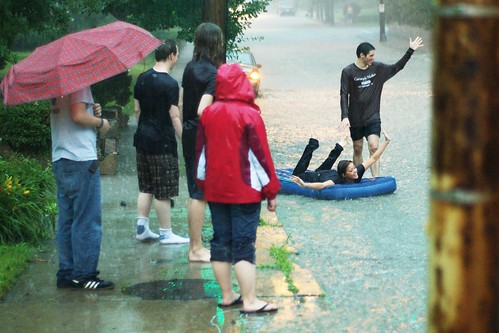
While we were hanging out on Wednesday night, one of the biggest and baddest rain storms I've ever been a part of rolled through Pittsburgh. All of a sudden, someone looked out the window and said "Whoa, the road is flooded! It's like a river out there." Within a few minutes, someone else got the brilliant idea to grab an air mattress and go rafting in the street. The little alarm in my brain went off saying "Go get your camera, you're going to want to document this."
A quick look outside told me that the point n shoot just wasn't going to cut it. I needed the DSLR with my 50mm f1.8 (fastest lens I own) attached. I ran upstairs, pulled the camera out of the bag, swapped lenses, grabbed an umbrella and rain coat, and ran back down just as they were heading out:
© 2009 Simon Hucko
I went down to the sidewalk and spent a good 10-15 minutes shooting (and worrying about soaking my camera, but fortunately everything stayed dry). Most of the cars passing by were amused rather than annoyed, and a few even honked and waved, resulting in my favorite shot from the set:
© 2009 Simon Hucko
Despite all of the environmental craziness and being forced to shoot one handed because of the umbrella, I was able to capture this incredible event. I credit my success to what I've talked about recently - practice with and without my camera. Operating the camera was effortless, even one handed, and I could focus on the action. I recognized moments developing (like the waving above) and timed my shots rather than just spraying away. I was in the zone, and it was a surprisingly organic experience - probably one of the first times that I truly felt like a photographer, and not just a guy with a nice camera.
Check out the full set here. As always, comments, questions and constructive criticism are encouraged.
~S
© 2009 Simon Hucko
Just a quick post to let you know I'll be out of town Wednesday through Sunday, so I won't be updating my blog the rest of the week. I'm feeling somewhat overwhelmed and uninspired today, too, so it's going to be a short and self-serving blog post.
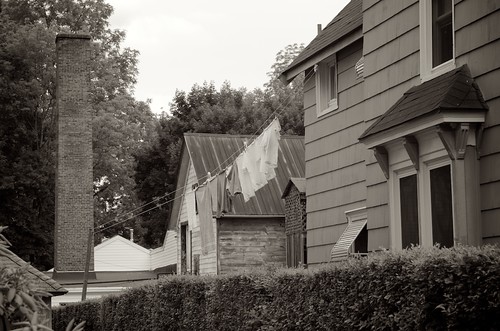
My assignment to everyone was to shoot 100 frames this weekend. I don't think I quite made it to 100 (probably more like 75), but I did get some nice ones. Please visit my photostream and check them out - comments and feedback always welcomed and encouraged :)
Do I have any real winners in there? Maybe one or two. However, I did explore some new techniques (HDR, reversed lens macro), and got more comfortable editing RAW images in Aperture (both of which are new to me). All in all, a successful weekend. Look for pictures from my trip next week :)
~S
© 2009 Simon Hucko
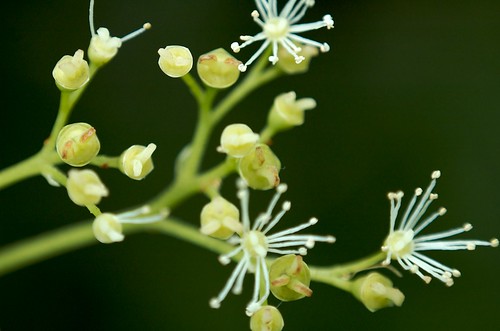
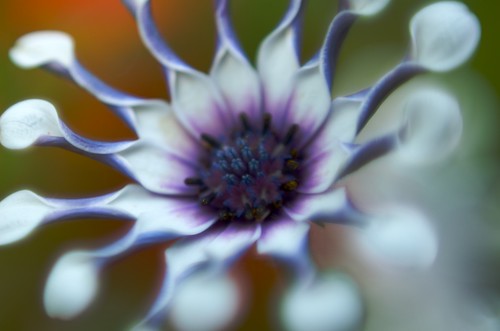
Want to shoot macro but don't want to drop the $$ on a dedicated macro lens? Try reversing your lens. I took the above shot using my 50mm f1.8 prime. Turn the camera off, remove the lens, flip it around, open the aperture all the way, and start shooting in manual. Most cameras won't meter in this configuration, but it's not too hard to dial in exposure using the histogram (more on that some other time). The result is an incredibly shallow depth of field and a close focusing distance, simulating the look of a macro lens.
A few caveats:
- As I already mentioned, your camera will not meter this way. Time to practice your manual exposure skills
- The back of your lens will be exposed. Scratching this can have more of a detrimental effect than scratching the front element, so be careful
- Your camera body will be open, and every mirror flip will suck any particulates (dust, pollen, etc) into the camera and onto your sensor. Do this in a relatively dust free area (your kitchen for example), or be prepared to clean your sensor
You can buy an adapter (called a reversing ring) that will screw into the filter thread on your lens and then mount to the camera. This keeps the camera a little cleaner and eliminates the possibility of dropping the lens, if you're squeamish about those sort of things.
Oh, and you all shot 100 frames over the weekend, right? Just checking ;)
~S
![[title of blog]](https://blogger.googleusercontent.com/img/b/R29vZ2xl/AVvXsEhJ8bvx_9_zOAREbXcrJRML7aVvJMbb90IYYYuyti384jeZHYQ9t8MK6_Kpt_1P4-pZw-QfF9kh4Sqci0vbopzLme862PPhuyPJcc7pRLUW1K1aNzts5YzuXIhgonq66MpjJCqfiWtfwUw/s1600-r/waterfall.png)


 Posts
Posts

