I know I promised a histogram post this week, and I'll get there, I promise. (possibly even later this week) I just didn't have the time to get everything together.
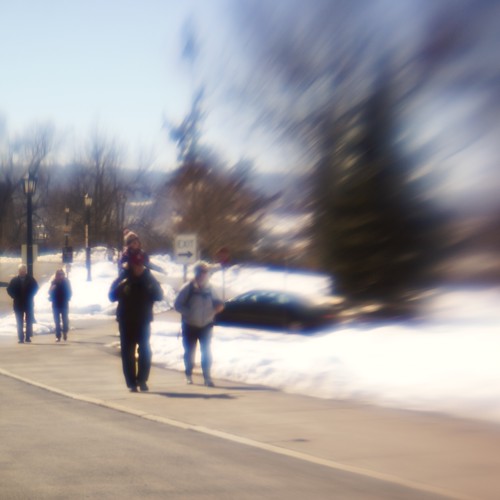
I know I don't usually write posts about gear, either, but I had the opportunity to use a truly fantastic little bit of kit. I went for a photowalk with Adam and Stacey (two other Ithaca photographers) on Saturday. Stacey was kind enough to lend me a lensbaby to play with (I think it was the older lensbaby 2.0). Oh man, are they fun. The lens is designed to give you a "sweet spot" that's in focus, leaving the rest of the image with a crazy blur (almost like a zoom blur). This really makes your subject pop, and gives you a whole new perspective on the world around you.
Given more time with a lens like this, I think I would have been better able to take advantage of the effects it gives. Check out Stacey's huge lensbaby set for an idea of the amazing range of creative possibilities.
If you're ever looking for a creative pick-me-up, I highly recommend borrowing/renting/buying one of these and playing with it for a while. I'm totally addicted, and have added one to my photo gear wishlist.
One caveat - the lens doesn't talk to the camera at all, so you're on your own for exposure unless you use an old film body with stop down metering. No problem, though, just use the histogram as your meter. Yes, I'll write that post. I promise. Seriously.
9 weeks already! Looks like some of you are here for the long haul, and for that I thank you. It's not easy finding time to shoot every week, especially when the weather is uninspiring and you've used up the easy shots. Even if you miss a week here and there, I applaud all of you for continuing to post and comment in the group. There has been some great sharing and feedback going around, which I hope you all are enjoying as much as I am. Hopefully with the spring weather approaching inspiration will come a little bit easier. To any of you who have wandered away from the group, you're always welcome to come back and start posting and commenting again. If you missed the first few weeks but still want to join, you're welcome to start any time. The more, the merrier.
My photo this week is somewhat of a departure from my normal style. I was inspired recently by some out of focus photos that I saw while browsing through Flickr, so I decided I would give it a try - you could say I'm going through my impressionist phase ;) Part of the challenge of taking an out of focus photo is for it to still have some meaning to the viewer. It's hard for me to say what people will see in this photo, since when I look at it I can picture the scene in my memory (and in focus, obviously). For me, it captures the feeling of walking down the commons (a pedestrian mall in Ithaca, NY) at dusk - the buildings, the trees, the people, the neon and the streetlights. I stopped down my 50mm f1.8 a little bit to get the polygonal bokeh, since I actually like that effect. Not everyone agrees, and most modern lenses are made with rounded aperture blades so they will produce circles no matter what f-stop you're shooting at. In this case, the contrast of regular shapes against the blur is a nice added detail and really makes the lights pop in this photo. This style is still pretty new for me, and is something I'll continue exploring.
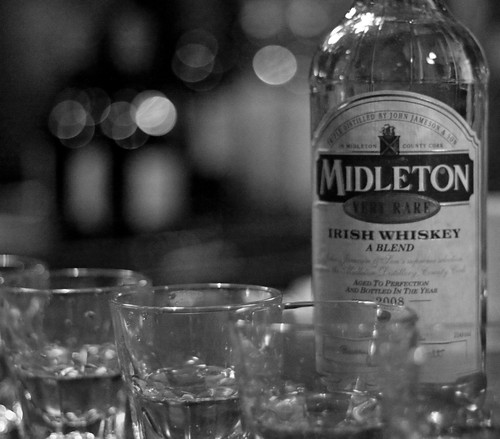
This week's winning photo is "Irish whiskey tasting" by :
Nice shallow depth of field and black and white tones in this shot. I like the composition, it tells a nice story and still leaves some details to the imagination. I also happen to be rather partial to Irish whiskey, so that didn't hurt either ;)
If you're in touch with the photography community on Twitter or Flickr, chances are you've already watched this video. For those of you who haven't, I suggest watching at least part of it before reading on (and really, you don't need to watch all 10 minutes, I suggest starting around 3:30).
In brief, a bride is "suing" a budget wedding photographer for not delivering professional results. There are many things wrong with this case, but I'm going to start by saying I think they're being unfair to the photographer. Unless the photographer presented a portfolio that was far superior to the results that she delivered (which I doubt), there's no case here. The bride presumably saw the photographer's work before hiring her (and if she didn't, she's an idiot), so she should have known what to expect. Unless the photographer promised something that she didn't deliver, legally there's nothing to stand on here (which is probably why it was on JJB in the first place).
The main takeaway from this video is that with wedding photography (as with life), you get what you pay for. The bride wanted professional quality results, but wasn't willing to pay for them. $1300 (or whatever it was, don't remember exactly) might sound like a lot to you, but in the world of wedding photography that's almost the bottom bracket. What do you get for that price? Someone shooting your wedding with an entry level camera and their kit zooms, and prints from WalMart. There's nothing inherently wrong with that, that's just how it goes. And if the bride viewed this photographer's work and agreed to hire her, then obviously whatever she saw was good enough. That or the bride somehow thought things would improve for her wedding. The only thing I can think of to defend the bride here is that the photographer's portfolio probably contains ceremony photos from where she was allowed to use a flash, and so they aren't dark or blurry like the ones the bride got. In this respect, the photographer wasn't really prepared to shoot a ceremony without flash, and that should have been stated somewhere along the way. The fact that the photographer was angry that she wasn't allowed to use a flash clues you in that she isn't very experienced, as that has been the case with a lot of weddings I've been to. Again, this is reflected in her price point and the portfolio presented.
I take issue with JJB's attitude. He misses the point entirely, and uses this "case" to show off his (or his script writers') photographic knowledge. Pro series cameras and f/2.8 zooms would have probably helped with the low light photos, but again - you're hiring a budget photographer so don't expect professional gear. Having prints made at Walmart is not ideal, but again - you're hiring a budget photographer, so don't expect professional prints. Last I checked, 8x10's *are* enlargements. And, unless there was some severe cropping going on, the camera she was using would be perfectly adequate for printing up to 20x30. You wouldn't walk into a car dealer, buy a Toyota, and then sue the dealer because it's not a Porche. Attacking this photographer for not being a gear head at the top end of her market is worthless and irrelevant.
There are a lot of wedding photographers who complain that people like this are undercutting them and ruining the industry. My response to them is that if you're good at what you do, you should never even have to think twice about these people. Sure, you lose brides who are trying to save money or just don't have the budget to hire you, but they won't even be looking at you in the first place. And if you think you're better than a budget photographer but you're still competing on price, it's time to wake up and start charging what you're worth - you're only undercutting yourself and devaluing your own work.
To any future brides out there, remember this when you start shopping for a photographer. If you want professional quality work you have to hire a professional quality photographer, and they don't come cheap. What you're paying for is a photographer who will come prepared with the right equipment (and backup equipment in case something fails or breaks, which happens), the right knowledge and experience to use that equipment, the ability to make you and your wedding party/family comfortable and pose you for flattering and unique formals, the right processing software and knowhow to produce gorgeous images (trust me, that's a big part of it), and the right printing services to deliver outstanding prints and books. I'm not saying you have to blow your entire budget on a photographer or only hire the most expensive in your area, but be aware of what your money will get you and don't have unrealistic expectations. Always meet with your photographer and look through their work before signing a contract (and especially before signing a deposit check). Ask if you can see a whole wedding, not just a polished book or portfolio, so you have an idea of what you're really getting.
That's about it for my little rant here. What are your thoughts? Do you think JJB was right to rip into this photographer? Should the bride have won this case? Are photographers like this devaluing the industry? Please comment and share a bit.
Sorry for the late post this week. I've been pretty busy/uninspired, but today I came across a photo I took a little while back and got an idea for a quick tip.
There are often times that you're forced to take a photo through glass (museums, zoos, out your window, store fronts, aquariums, etc). Even if the glass is perfectly clean (which it never is), it can still introduce reflections and other tell-tale signs that it's there. Here's how to minimize/eliminate those problems and get photos that look like you're up close and personal with your subject:
- The most important thing is to get close. I mean very close, to the point where part of your lens should be touching the glass. A rubber lens hood is ideal for this, since they still stick out a tiny bit when folded back. This allows you to press the lens right up against the glass and gives you a good light seal without worrying about scratches. A regular lens hood will work, too, but that puts you a little farther away which could be problematic. Getting this close will do two things. First, it cuts out all reflections because the lens/hood/camera body/your head block all the light falling on that part of the glass. Second, it brings the glass very close to the front element, helping to take it farther from the plane of focus. More on that in a second.
- Shoot at a large aperture. This reduces your depth of field, helping to insure that the glass will not be in focus. The farther out of focus the glass is, the less any little smudges on it will affect your photo (they turn into huge blurs and eventually cover the whole image, making them effectively invisible). Using a longer focal length (if possible) will help with this as well, since it also cuts down on depth of field.
So there you have it - next time you have to shoot through glass don't let the viewer know it was there. This technique also works on fences, wires, security glass, etc., just make sure you use a long fast-aperture lens to fully blur them out of your photo. Don't believe me? Try it sometime, you'll be amazed.
8 weeks down. Thanks again to everyone for keeping up with posting - I'm really enjoying seeing all of your photos week to week.
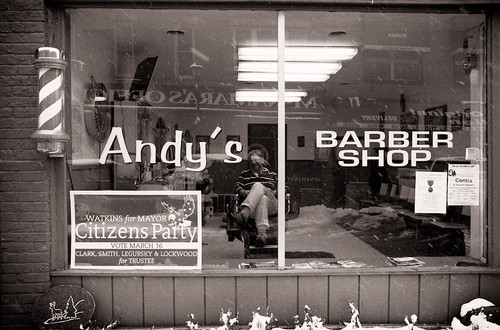
My photo this week is a bit of a personal victory. I saw this shot a while back when I was walking around, but couldn't work myself up to approaching the window to take it. When I was out walking around the other day I forced myself to go over and do it. After taking the shot, I stepped in the door and talked with the guy (I'm assuming it was Andy) for a bit - turns out he has a very similar painting hanging on his wall. I'm glad I did it, it's probably not the best photo I've ever taken, but there's a lot of layers going on in there and it's a step towards getting over my phobia of photographing strangers.
I really like the long exposure here - there are a lot of great lines in this photo, and plenty to keep my interest while looking at it. Very nicely done.
Last time I talked about some of the technical aspects for shooting live performances. One thing I forgot to mention was what white balance setting to use. Most stage lights are bigger badder versions of standard light bulbs, so set your white balance to tungsten to accurately capture the colors that the lighting designer wanted to share. One exception to this is if a show is lit mostly with modern "smart lights" (sort of a projector on steroids), which I think are LED based. In that case, daylight white balance will give you a better starting point. You may have to tweak a little in post (not a problem 'cause you're shooting RAW, right?), but don't go too far or you'll ruin the ambiance.
Today I'll go into more of the process involved and how to get the shots you want:
If you have a fast zoom, set yourself somewhere that you can cover the whole stage at the wide end and get a 3/4 or tighter shot at the long end. If you don't have that kind of range (especially if you're relying on your fast prime), get ready to do some running. Sneaker zoom is invaluable. If the stage is raised, locate a sturdy chair you can stand on so that you can get to eye level or just below for the close up shots. For wider shots, back up. You'll do some shuffling back and forth and you might feel a little foolish, but the results are worth it. If you don't have a fast lens and are using a slower variable aperture zoom (ie your kit lens), you may need a tripod to combat camera shake. You're still going to want to be somewhat mobile so you can change your angle to get the shot you want, otherwise all of your photos will be taken from the same spot, which is boring.
If you're using a slow lens you're also going to have to worry about subject motion blur. Even if you put your camera on a tripod or have some sort of image stabilization (VR, IS, OS, etc), a slow shutter won't freeze the movement on stage. This means you're going to have to get good at catching your subjects when they pose. Even if they're constantly moving (dancing, pacing, gesturing, etc), there is a moment at the peak of every motion where they freeze. After watching the performers for a bit, you'll start to get a feel for their usual gestures and poses and be ready to capture them. Motion blur can be used as a creative tool to capture movement on stage, but it only works in certain instances. You won't be able to explain away an entire show's worth of blurry photos by claiming it was a creative decision ;)
Something that will help you capture the right moment is shooting in short bursts (2-3 frames). People like to blink or make weird transitional faces when they talk and sing, which you don't notice live but will look ridiculous frozen in a photo. Give yourself some insurance by shooting short bursts for each pose, increasing the odds that you'll get a normal looking shot. This is especially important if you're running into slow shutter speeds - typically shooting bursts will result in one image that's sharper than the others. This will increase the number of photos you take total, so make sure you have plenty of memory card space. Once you get the photos back on your computer, you can compare the shots from each burst and delete all but the best one.
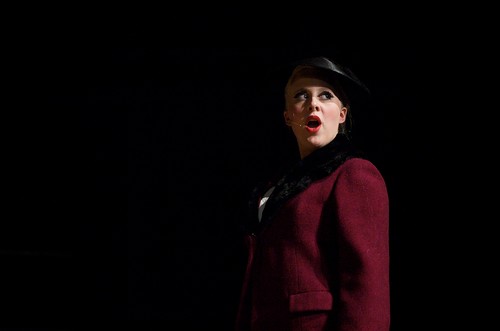
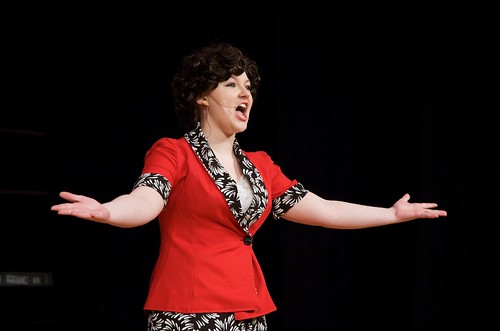
Like I said before, you're going to want to move around some to get different vantage points. This is especially true for the close up shots - part of the appeal of photos from a live event is that they get up close and personal with the performers, a view that the audience typically doesn't see. Be aware of what's in the background. If you're at a rehearsal, chances are good that the set is unfinished. One way to deal with this is to angle your shots so that the teasers (black side curtains) or the unlit sides of the stage become your background. This gives you a nice clean background and puts all of the focus on the performer (today's photo and the one from my last post are a good example of this).
Try not to get tunnel vision through the lens. Keep an eye out for what's happening on the rest of the stage and look for photo worthy moments to develop. Seek out "stage pictures" - good choreographers and directors will set up very nice little vignettes for you to capture. If possible, try to shoot more than one performance. The first time through you're going to miss a lot of shots because you're unfamiliar with how things go. The next time you'll be much better prepared to get into the right position to capture the moments and angles you want.
Finally, after sorting and editing the photos, make sure you share the good ones with the performers and the producer(s). Performers always love seeing pictures of themselves on stage, and if you schmooze with the producer you might be able to line up a paid job shooting some promo pictures and/or headshots the next time around.
Hope this was interesting for at least some of you. I promise I'll get that histogram post going sometime in the next week or two, if you're still confused about that. As always, any comments or questions are appreciated and encouraged.
Shooting a live performance probably isn't something you do very often, but since I've spent the past week in a theater shooting play rehearsals (and have nothing else prepared for this week) I'm going to talk a bit about photographing the stage. Everything I say here will be in the context of theater, but it applies equally well to concerts or other live events with lighting.
First thing: NO FLASH. Turn it off. Just don't do it. Yes, it's dark, and yes, your camera will be unhappy, but not only is flash extremely distracting to the performers and the audience, it will ruin whatever mood the lighting designer was trying to create. This applies double to your built in flash, especially if you're shooting from more than 10 feet away from the stage - at that point all you're doing is draining your battery and annoying a lot of people. This is a personal pet peeve of mine, and I can't stress enough how rude and worthless a flash is in these situations. Along the same lines, turn off any beeps or other sounds that your camera makes, and turn off the auto-focus assist light if possible. Your goal is to not exist as far as the performers and audience are concerned.
The next step is to know the rules. You can't just buy a ticket and show up with pro camera gear to shoot away. Most concerts are OK with you bringing in a camera, but there could be restrictions on lens length (no joke) or "professional looking equipment" (make sure you remove your lens hood, take the battery grip off your camera, and don't look too good at what you do). Most theaters I've been to expressly forbid "flash photography," but don't mention photography in general. I think you could probably get away with shooting some from your seat, but you'll also probably annoy the people around you. The best thing to do in any situation is to contact the people in charge to see what their policy is about photography.
My situation was somewhat unique. My wife is a music teacher, and is choreographing and costuming the high school musical in her district. As such, I was granted an all access pass to rehearsals. I'll talk more about this next time, but having access from the back of the house to right in front of the stage (and possibly even on the stage) without worrying about an audience makes this job much easier. If you don't have a connection like this but are still interested in doing some stage photography, don't be afraid to contact your local high school and see if they'll let you come in and take some shots at a rehearsal or two. This is a great way to get access and experience, and most schools would probably be happy to let you in.
From a technical standpoint, it's time to brush up on your manual exposure. All of the darkness is going to confuse the heck out of your meter, leading to overexposure, hugely blown highlights and longer shutter speeds that could introduce camera shake. As it is, shutter speeds will be an issue. You'll want to boost your ISO as high as practical and get your hands on fast glass (f/2.8 or brighter) if possible. If you don't have a 70-200mm f/2.8 zoom (as I don't), that fast prime is going to be your best friend. In this case, something a little longer like a 50mm (with the crop) or 85mm will be better. You're going to have to constantly adjust exposure every time the lighting changes, so get ready to use your histogram to the max. (I have a histogram post in the works, probably won't get to it this week but hopefully the next week. Keep an eye out.) Once the lighting changes, eyeball how far off you are from the last scene, adjust, snap a test shot, check the histogram, and fix exposure if necessary. This sounds a little intimidating at first, but with some practice you'll get the hang of it and be able to guess pretty accurately how much things have changed. You can also try spot metering off of people, but I prefer the other technique.
Accurate exposure is critical when using a higher ISO. For one thing, the dynamic range captured by your sensor decreases at higher ISO's. This means you have less latitude to play with when processing. For another, noise starts to become a problem with higher ISO's. Noise gets much more noticeable when you start boosting exposure after the fact. Even if you're very careful about exposure, some amount of noise reduction is a good idea when processing your photos.
This turned out to be a pretty long post (apparently I have a lot to say on the subject), so I'm going to split it here. Today's focused on the technical side of things. Part 2 will focus more on the practical, and how I go about getting the shots I want.
![[title of blog]](https://blogger.googleusercontent.com/img/b/R29vZ2xl/AVvXsEhJ8bvx_9_zOAREbXcrJRML7aVvJMbb90IYYYuyti384jeZHYQ9t8MK6_Kpt_1P4-pZw-QfF9kh4Sqci0vbopzLme862PPhuyPJcc7pRLUW1K1aNzts5YzuXIhgonq66MpjJCqfiWtfwUw/s1600-r/waterfall.png)




 Posts
Posts

