skip to main |
skip to sidebar
© 2009 Simon Hucko
I know I've drooled over RAW before, but I found a nice concrete example of why I'm never going back to JPEG while I was editing photos from this weekend.
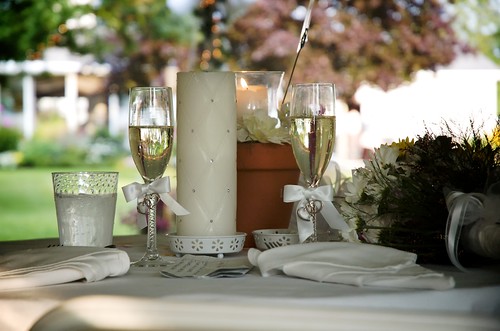
I like today's shot. Nice color, pleasing bokeh, captures the feeling of sitting at the head table at a wedding. Out of the camera, it looked like this (straight RAW conversion):

© 2009 Simon Hucko
Underexposed, muddy, color is off - not such a nice shot. But, because I was shooting in RAW, I had some wiggle room and was able to save it. I set the white balance from one of the napkins, boosted the exposure, tweaked the levels to add some contrast, applied some noise reduction and sharpening, and added a little vignetting. Only a minute's worth of work, but it made a huge difference in the final product.
I try not to rely on this, but it certainly can help save a shot you like that's a little off.
__________________________________________________
Tip of the day: find something neutral in a picture to help set the white balance. Weddings are especially good for this because of all the white. (Just make sure that it's really white and not ivory/cream/champagne/whatever, or you'll have an unhappy bride on your hands)
~S
[title of blog] on flickr
© 2009 Simon Hucko
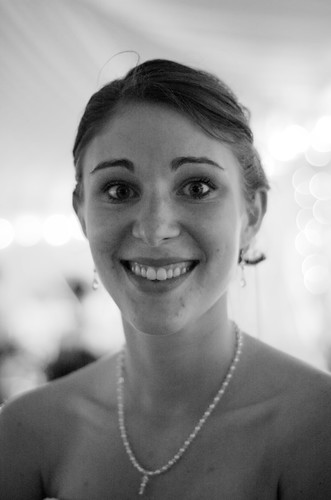
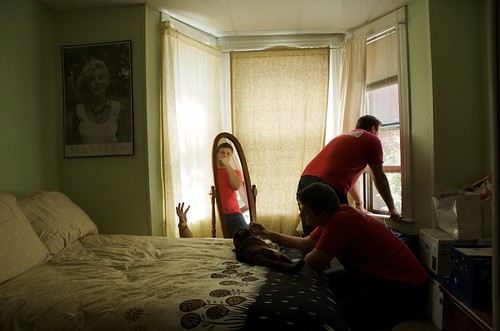
While editing photos from this weekend I came across a portrait I had taken of the bride. I was shooting available light in the reception tent at dusk, and so all I had to work with was a little bit of sunlight and the christmas lights and candles that had been lit. Even at ISO 800 f/1.8 1/40th (the limit for my setup, as it doesn't handle high ISO very well) things were dark and underexposed. I tried pushing the exposure, but couldn't get it very far before it got too noisy for comfort. See the original color image below:

© 2009 Simon Hucko
I decided to try converting to black and white. People tend to be more tolerant of noise when the image is black and white, probably something to do with the notion of grainy black and white film. After conversion I was able to boost the levels a little and with some noise reduction got a usable portrait. It probably wouldn't make a huge print, but it's good enough for screen viewing, and if you really wanted you could squeeze an 8x10 out of it.
Converting to black and white is also a good way to overcome color casts and fringing/chromatic aberration that you can't easily correct in post. So remember, when all else fails, try black and white.
~S
[title of blog] on flickr
© 2009 Simon Hucko
Had a great time at the wedding this weekend - nice ceremony, and a fairy tale reception under a big white tent in the garden. I came back with almost 500 shots, which I pared down to around 100 to edit for friends/family. I'm only about halfway through those, but I took the time to pick a few of my favorites and post them to flickr.
Set here.
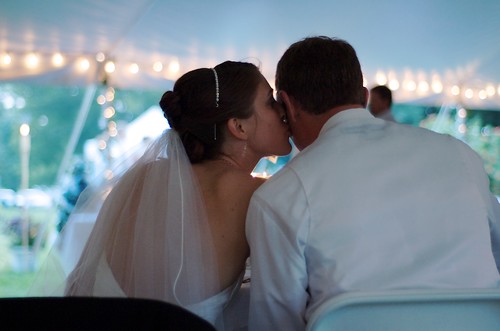
I tried my best to follow my own advice, and while I didn't always succeed (it's easy to get caught up in the moment and take 200 pictures of the bride and groom on the altar...), I think I managed to capture some unique shots. The one above is probably my favorite from the day. We ended up behind the sweetheart table because of the layout under the tent. When they finally sat down to eat after visiting with everyone, I managed to capture their quiet moment together (without intruding).
© 2009 Simon Hucko
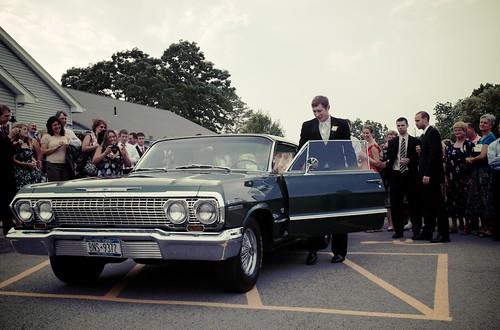
This one is a close second. I saw this sweet ride and immediately envisioned this shot. While everyone else lined up for bubbles, I parked myself by the front corner of the car with my zoom at its widest setting and waited. I got nice and low, and captured the length and lines of the car and the happy groom getting in to drive away with his new wife. After reading a tutorial on a simple cross-processing technique yesterday (more to come on that), I went for the vintage feel to compliment the vintage car.
All in all, a great weekend with some great times, great friends, and (I think) great images.
~S
[title of blog] on flickr

© 2008 Claire Voelkel
My wife and I are going to a friend's wedding tomorrow, and I plan on bringing my camera. I want to take some good pictures, but at the same time I don't want to be "that guy with the DSLR." Here's a few tips for getting the most out of attending a wedding with a camera:
- Let the pro do their job. Couples pay a lot of money for a professional to come and shoot their wedding. Whatever you do, don't distract them or the people they're shooting for any reason. You're there as a guest to have fun, not to ask questions about how much their gear costs or whether Canon or Nikon is better. (The answer is Nikon, obviously.) Be wary of shooting near them - people see multiple cameras and get confused about where to look. You don't want to be the one that screws up the family portrait.
- Take unique pictures. The professional has a list of must-have shots, and at the end of the day you're not going to be able to top anything they take. They have the gear, the access, and the experience. So focus instead on things that the photographer won't have. The photographer will be mainly focused on the bridal party and the immediate families, so you should look for other opportunities. Get a shot of the bride's friend crying during the vows. Catch the groom's aunt laughing at the toasts. Find stories happening while the bridal party is doing formal portraits. This way, you stay out of the photographer's way and produce shots that the couple will appreciate.
- Have fun! You're there to enjoy the wedding and celebrate, not to be a photographer. Take some pictures, but don't forget to experience the wedding. When someone asks "how was it?" you shouldn't have to say "not sure, haven't looked at my photos yet."
- Only pass your best shots on to the couple. Getting pictures from guests is nice. Getting 700 nuked flash snapshots... not so much. Find those unique shots and share those.
___________________
Thanks to Claire Voelkel and Matt Mendick for today's photo. Check out Matt's flickr photo-stream.
~S
[title of blog] on flickr
© 2009 Simon Hucko
Zoom lens 101: You see a scene, but only want to capture part of it. Zoom in, and voila. This is very useful, especially when photographing something where you don't have a lot of room to move around.
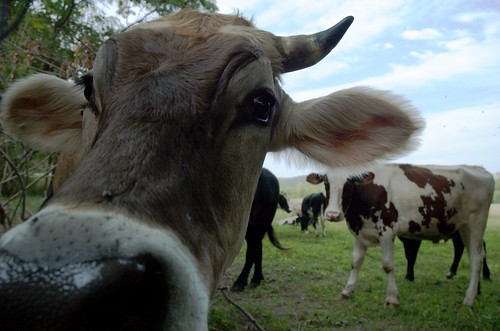
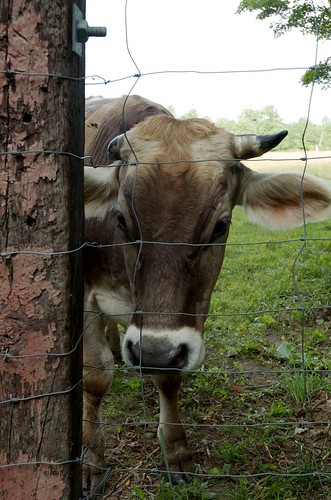
Zoom lens Advanced: Deliberately use your zoom to influence the perspective of the picture. I do this a lot when photographing animals - I set my zoom to a wide setting and hold the camera close and below their eye level. It gives a very unique perspective that you don't usually get in person. For the shot above, I employed this technique to capture the bull. My lens was literally inches from his nose, somewhere my face has never been, and it produced a dramatic, almost comical effect. For the shot below, I shot at a more 'normal' focal length, resulting in an image that looks very natural:
© 2009 Simon Hucko
Same bull in essentially the same place, but two very different feeling photographs. It's not the exact same shot because I wasn't thinking about this as an exercise at the time, but I think it illustrates the point well.
Wider angles will really emphasize depth and distance from the camera. In some cases this is desirable, but in others (portraits, for example) it can result in unpleasant distortions of the subject. Telephoto lenses are said to "compress" distances, and will produce a flatter looking image. This is generally considered more flattering when photographing people. It can also be used to compress a landscape with a lot of depth to emphasize the lines (a series of rolling hills, for example).
If you haven't played around with this before, I suggest you give it a try. Find a subject that won't run away from you. Set your zoom to its widest setting and get in close so that the subject fills the frame. Grab a shot. Zoom in a little, and move back so the subject is the same size in the frame. Grab a shot. Repeat until you're at your longest focal length. (You can even switch lenses if you want to experience the full range of your kit) Notice what effects the focal length had on the subject and the background.
Next time you're out shooting, try to use focal length as an artistic tool, not just a way to frame the scene.
~S
[title of blog] on flickr
© 2009 Simon Hucko
Today's post is about reducing camera shake to get sharper pictures. The easiest and best way to accomplish this is to use a sturdy tripod and head. However, you can't always carry a tripod with you (and it can be a real pain to lug around), and the good ones tend to be very pricey. Here's a few steps you can take to improve your hand-held photography:
- First and foremost, make sure that you are holding your camera correctly. Here's a short video on how to hold your camera from Chris Marquardt (Tips From the Top Floor). The key is to support your camera with both hands, and to keep your elbows in and as close to your body as possible. That will help you keep it stable while you shoot. This is especially hard when shooting vertically (portrait) - make sure you don't let your elbows go flying out everywhere when you turn the camera.
- Another very important step is to make sure your shutter speed is fast enough. Generally, you should avoid shooting slower than 1/(35mm effective focal length) - ie a 50mm lens on a crop sensor dslr is equivalent to a 75mm lens on a full frame camera, so you won't want to shoot slower than 1/80th or so. This can be pushed a little slower with good technique, but your rate of blurry shots will increase dramatically the slower you get. Open your aperture or increase your ISO if possible to get a faster shutter speed.
- If you're lucky enough to have some sort of image stabilization on your camera/lens (VR for you Nikonians, IS for the Canonites, sometimes OS for other brands), you can push the above rule by an extra 2-3 stops.
- Find additional support. Lean your body against a wall, rest your elbows on a table, or find some other way to add support from your environment. With solid holding technique, this added stabilization can buy you a stop or so of shutter speed.
- Make a "string tripod" (tutorial here). Not as good as the real thing, but it's lightweight and very portable - you could easily keep one in your camera bag.
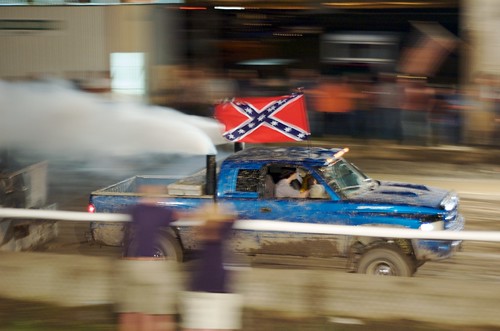
- Pan your camera (only works for a moving subject). Today's photo (above) was taken with a 1/10s shutter speed. Normally that would result in a blurry mess, but since I was panning with the car my constant body motion helped prevent some jerking or shaking.
______________________________________________________________
Don't forget to check out [title of blog] on flickr!
~S
© 2009 Simon Hucko
I decided to create a [title of blog] flickr group as a companion to the blog. I'm hoping that this will encourage readers to share their images for comments and critique and discuss what I've written here. I also hope that people will post some questions or interesting bits of news/discussion there that I can work back into the blog.
The group is open to anyone with a flickr account (which are free), so please come on over and invite your friends!
~S
![[title of blog]](https://blogger.googleusercontent.com/img/b/R29vZ2xl/AVvXsEhJ8bvx_9_zOAREbXcrJRML7aVvJMbb90IYYYuyti384jeZHYQ9t8MK6_Kpt_1P4-pZw-QfF9kh4Sqci0vbopzLme862PPhuyPJcc7pRLUW1K1aNzts5YzuXIhgonq66MpjJCqfiWtfwUw/s1600-r/waterfall.png)


